6/28/12

School Years Themed Shadow Box

I'm sorry that I have been absent from my blog for all this week. I am my sons  "Bear" Cub Scout den leader starting this fall and in the meantime I cooridinated and attended Cub Scout day camp all this week with 9 boys at our local Marine Corps base- Camp Pendelton! Tomorrow is our last day and I'm fairly tired but I have a great tan to start the summer with!

Here is a School Years Themed Shadow box I made over at The Robins Nest blog.
I hope you'll come by to see the whole thing!
Saturday is my day off and then I'll be back to my regular crafty blog postings on Monday! :)

6/20/12

Freedom Resin Art


I'm so excited that you could come and visit me today! I just love anything and everything SteamPunk, don't you? I also love to work with resin and thought this piece would be nice and patriotic for the hop! Thanks to Leslie Rahye  for a great theme!
To make this Steampunk piece, you will need the following: 
  1. Amazing Mold Putty.
  2. Amazing Clear Cast Resin.
  3. Silver Alumilite Metalic powder.
  4. Fabric strips.
  5. Letter beads.
  6. Steampunk themed trinkets.
  7. Something to make your mold, I used the wooden handle of a rubber stamp.
  8. Small dry paint brush.
  9. Scissors.
  10. Toothpick and sandpaper.
  11. Wax paper and old tray.
  12. Mixing stick and small Dixie cups.
  13. Metallic permanent markers, I used copper and gold.

  1. If you are new to Amazing Mold Putty, I have a really great visual on how to mix the white and yellow mold putty here. You basically mix the two together, kneading it quickly until no traces of white appear. Then you form a square larger than your block. Press the block into about 3/4 of the way and pinch the corners of the mold 'snug' around your block. Let set about 15 minutes till hard. Pop out block.
  2. Use your dry brush to apply the Alumilite to the entire inside of the mold. Use sparingly as a little goes a long way.
  3. Set your mold on the wax paper and again onto a old tray.
  4. Measure your Clear Cast Resin in the cups provided and then pour both into your Dixie cup. Mix completely with a mixing stick.
  5. Pour a 'bit' of resin into the mold, using the toothpick to help get it into the corners.
  6. Place your fabric strips into the mold, pressing them into the resin with the toothpick.
  7. 'Color' any trinkets with the gold or copper pens to help make them look vintage if you want. The copper gear piece next to the key is really white plastic that I colored to look 'old'. :)
  8. Pour in a little more resin and add your trinkets, moving them in place with the toothpick. If you happen to get resin on your hands, don't panic, alittle nail polish remover will clean up your hands just fine.
  9. Add more resin until the trinkets are covered.
  10. Place away from draft in a sunny spot if possible. My craft room was really warm the day I made this, so instead of the normal 48 hours cure time, is was done in just 24 hours!
  11. Once set, pop out and sandpaper the sharp corners and anywhere else you see fit.

Then color the edges with your copper and gold pens. I used the copper to sign my name and date on the metallic back. I still have not decided if this will become jewelry or what. For know, I just like to look at it and add it to my shelf of SteamPunk creations!
Thanks for coming by, I hope you like this!
Please visit the rest of the Artists for more Red-White & Blue Steampunk Fun!


6/18/12

Easy Lanyard Key Fobs

Because Dyllan has a summer Birthday, his party favors for the class also doubles as his end of the year gift.
I'm so grateful for our new Hobby Lobby. Otherwise I'd have to buy the kids things that might break in a day or two or never make it home.
Here, because backpack decorations are all the rage...at Hobby Lobby, I found 300 feet of the sparkly tie dye lanyard for $6, more than enough for the key fobs and summer activities! Craft Beads $4 for 65ct, For $4, you get 40 split key rings, 30 lanyard hooks, and 10 figure 8 shaped key rings.
There were 3 different colors of the lanyards, I used 2 per key fob.
Measure and cut  9 1/2" pieces. Grab 2 and loop it through the spilt ring, pull the 4 ends  through the bead. Before pulling tight, loop 3" of craft wire through the split ring and into the bead. Pull the wire and lanyard tight through the bead, then wrap the wire around the base of the bead and secure so it's not sharp.
Dyllan helped add the lanyard hooks to each ring. We put these in a snack bag with a copy of his 2nd  grade photo and a nice note. :)

6/16/12

Yummy Candy Pendants!

Today my creations are Resin candy pendants.
 I think they are just the cutest and a great way to start off summer with sweet style!
You can see the whole tutorial over on The Amazing Mold Putty blog.
See you there!

6/14/12

Looking for last minute Fathers Day or Teacher gifts?

Here are two decorated tins I made. I'm thinking of filling one of them with pencils and school supplies for my sons 2nd grade teacher. Won't that make a nice end of school gift? How about cookies in the other for Fathers Day? Want to know how easy it was to make these? Come visit me on The Robins Nest blog to see how!

6/11/12

My Succulent Terrariums Tutorial

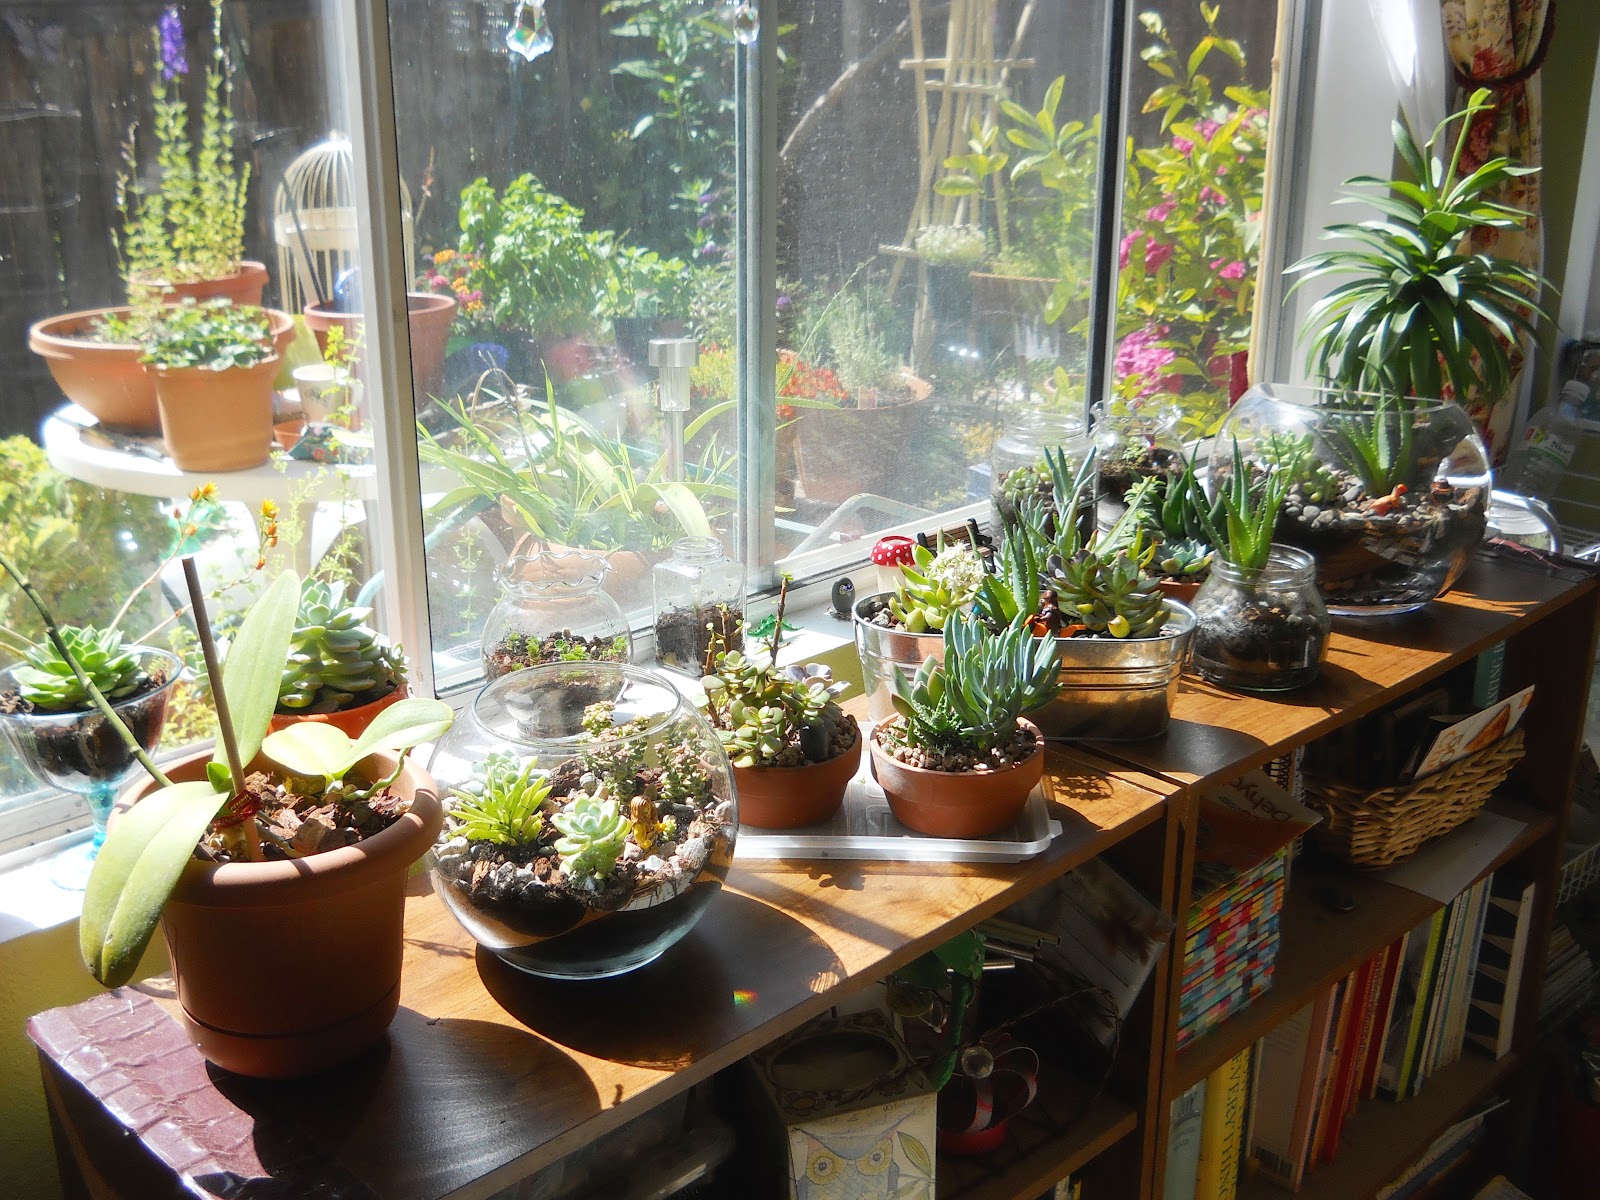
 This is one of the things I was working on last week in case you have wondering where I have been. Between this and working in my little garden space ( you can see it out side in the midst of all my new plantings!) - re potting the old and adding new plants, I have not had much leftover energy for crafting. Sorry! But I'm back to business this week. :)
Here you can see the succulents before I re potted them. The above space is my little window garden near the dining table. I had all the glass bowls, vases and containers already. Some are condiments and pickle jars. If you don't have any of these, the dollar tree and .99 cent store are great places to find them. Also thrift shops and garage sales. Just make sure you can get into them after planting  to prune and water.
Succulents are slow growing, so these are perfect habitats for them. The sketch above it how you should layer your materials.  I purchased the pea gravel, orchid bark and cactus dirt from a Major hardware chain store, in their garden section. Both Home Depot and Lowe's have them. The crushed charcoal can be found at public nurseries. For the top layer, I used some bits of crushed lava rocks that came with my succulents, more pea gravel and bark. You can also use sea shells, crystals and other clean stones. And of course, toys....  :)

Cave woman. She has later been updated with the 'bone in the hair' look.
I washed the pea gravel outside in a empty plastic planter pot with drainage holes. I used  gardening tools to stir and help wash the dust and packing grime off the rocks with the water. I placed them out on pot trays and a tarp in the sun to dry. When dry, they look the same as before you washed them. Don't worry. They will darken in color, like river rocks when you water your plants.

Begin with a clean glass container. Fill with enough rocks so you don't see any glass bottom.

Dyllan's idea for Indiana Jones to be running from the T-Rex. :)
Add a thin layer of charcoal with a plastic spoon. Charcoal will aid in keeping the soil dry and keep the nutrients in the dirt. Next add some cactus dirt. Make sure its free of  lumps. You want the dirt nice and loose. Mist the soil with a water mister to help keep it down while you plant.

Pull your succulents from their little pots and remove any lava rock for later. Loosen some of the dirt to see the roots. Sometimes you will find that one succulent is really two or three! More to plant in the other containers! Place the plant in your desired spot, hold gently with your hand up right while you spoon dirt around it. Use the a long handled soft paint brush to aid you. The handle can help push in the roots into the dirt while the brush can help remove dirt from the plants later. Water your plants as you work with the mister. This will help keep them in place.
 Once you have added your desired plants and more dirt, add some terrain with a spoon. Then give a overall mist with the water. You will now see the pea gravel darken.

I am loving Chewbaca off roading!
 I originally was going to just add the dinosaurs, because the plants give off a prehistoric feel, but then Dyllan suggested some of his legos and now they are my favorite and make us all smile whenever we see them!

As soon as we find them, (in Dyllans; toys) we plan to put some little dinosaur bones deep into the dirt here, pressed up against the glass, like a archaeological site.  :)
Tips on care:
While your terrariums will enjoy natural light, never leave them in direct sun as they will "bake"  and kill your plants.
Water once a week with the water mister, once a month with diluted cactus food.
Use long handled tweezers to remove dead matter- this help promote new growth.

More succulent terrariums to come later.
Thanks for coming by! I hope I've inspired you start you own!

6/04/12

Summer Picnic Designer Crafts Challenge!

 This months theme  is Summer Picnics. Right up my alley as I love to pack a picnic! We bring our own lunch to parks, beaches, day trips and amusement parks. I can always be counted on to have plenty of snacks and food to share. So it's no wonder I have more than one lunch tote. But some of those designs are soooo boring or the sacks are too small. So I set about to make my own.
 To cut cost, I used a old plastic table cloth with a cotton backing. This one is not used anymore because it has some stains and rips. But it's plenty long for extra lunch sacks.
 Then I gathered a few pins, scissors, VELCRO® Brand adhesive squares, a marker and scissors.
 This is then back pattern with length for a fold over flap. I cut 2 pieces of this. When you fold down at the  4 1/2" mark, you'll create the front of the bag. Cut 2 pieces.
*(If you don't want a fold over top, then cut 4 pieces of the back)
 Put the two positive sides together and stitch around, leaving the top of the bag open.
Turn the bag inside out and stitch around the outside then all around the inside to add stability. Hold the pieces tight as you stitch or they will bunch up and distort your bag.
 For the bottom, fold the like so and stitch across.
Cut a bit of the table cloth to make the handle.
 Stitch to the inside of the bag.

I used VELCRO® Brand adhesive squares for the enclosure.
Well I hope you liked this! You are probably getting ready to dig out that old table cloth right now.  :)
The cotton backing adds the perfect insulation. And if you don't have one of these table cloths already, you can get them fairly cheap anywhere picnic items are sold.

LinkWithin

Related Posts Plugin for WordPress, Blogger...