As you know, I love, love, love anything to do with Mexican Folk Art.
There is just something so classic and romantic with the embossed tin look.
Doesn't this look like the real deal? Can you believe its not?
Follow the instructions below to create your own....so easy...You'll love it!
There is just something so classic and romantic with the embossed tin look.
Doesn't this look like the real deal? Can you believe its not?
Follow the instructions below to create your own....so easy...You'll love it!
Supplies used:
- Silver/Gold Glossy Foiled Paper
- Ruby/Gold Glossy Foiled Paper
- Violet/Violet Starstuck Foiled Paper
- Marigold/Gold Glossy Foiled Paper
- Copper/Gold Glossy Foiled Paper
- 12" x 12" Chipboard
- 6" x 6"
- Pencil
- Hot glue gun with narrow tip
- Tacky glue
- Q-tips and a blunt embossing tool
- Embossing folder and machine
- Modeling paste
- Colored permanent markers in Yellow, light green and dark green.
- Scissors and craft knife
Starting with the 6x6 square, draw a design with pencil similar to mine. A border, a heart and rays of light. No need for perfection since we just need a general 'idea' of where the heart should go. Use the hot glue to trace the border, nice and thick and straight (as possible) rays of light.

Slather the square and hard lines of glue with your adhesive. Use your fingers to push the tacky glue into every area. Wash your hands before going onto the next step.
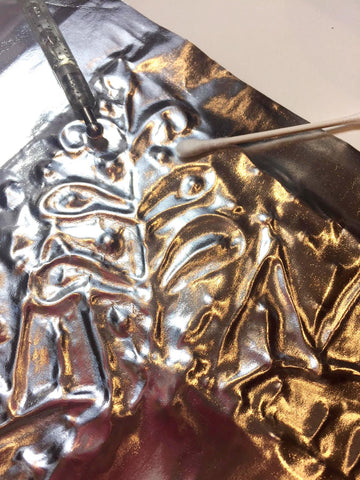
Cut a piece of the Silver foil larger than the square itself. Place foil onto the glue and use the base of your palm to quickly press the foil down over the whole area. Glue the extra foil onto the back of the square. Use a Q-tip to gently press the foil along the lines of hardened hot glue. If you press too hard, the foil will tear.
Color in the rays as shown with yellow pen first, then the light green.

Finish coloring with the darker green pen.
Hand cut or die cut a heart from the Ruby foil and one slightly larger from the Violet starstuck foil. Emboss the heart and fill the back of the heart with modeling paste. This will dry hard and preserve the embossed design of the heart. Glue the two hearts together. Cut flame like strips from the Marigold and Copper foil, flipping some flames to reveal the gold backside of the foiled paper. Adhere these flames to the heart duo before attaching all to the center of the rays.
Trace the square onto the larger chipboard. Then draw your design. As you did earlier, trace the design with the hot glue gun.
When the glue is cool to touch, use the craft knife to cut away any mistakes. Don't worry too much about all those glue trails, you won't see them under the foil.

Repeat the same process you did earlier for the smaller square. Make sure to cover the entire square/design with glue.
Alternate between the Q-tip and embossing tool to bring out the design. Use soft pressure as not to tear the foil.

Use the tacky glue to adhere the middle square in place and press down gently. Leave this flat to set over night before displaying on a mantle or hanging on a wall.


