Click here to read all about it!
12/01/20
Announcing the Blank Page Muse 2021 Design and Creative Team!
10/05/20
How to Make a Plush Owl with Fairfield
I love to sew and I love anything to do with owls, so when I received a very special fun filled box from Fairfield, celebrating their 80th Birthday, I knew just what I wanted to make! -
- Poly-fil® from Fairfield World
- Pewter Luxe-Cuddle fabric
- Pink fabric of choice
- Yellow and Fushia Felt
- Sulky Poly Star Thread
- Sulky Metallic Gold Thread
- Assorted buttons
- Pinking shears Sewing machine
- Sewing needle
- Download and print the following patterns-
Plush Owl Body - Top half & Bottom half
- I made the patterns to fit a standard 8 ½" x 11" piece of paper,
so make sure you select 'fit to printable area' when printing the pattern. - You'll need to print 1 pattern that has the eyes, beak and feathers.
Then 2 of the other pattern with the crown. - Lay down the 1st pattern onto the 2nd pattern as shown below and secure with tape.
- For the owl body, you'll need to trace and cut 1 piece from the Luxe fabric and 1 piece from the other fabric.
- Since the Luxe fabric is furry, place it face down and stitch all the way around, ¼" in.
This will help keep the stray 'fluff' to minimum as you sew.
- Place the 2 fabric together and stitch a ¼" allowance all the way around.
Leave a 2" opening at the bottom.
- The Poly-fil® will come with a stuffing tool, use this to push out the corners when you turn the body inside out.
- 2 eyes from the yellow felt
- 1 beak from the yellow felt
- 4 feathers from the fushia felt
- 4 (slightly smaller) feathers from the Luxe fabric.
- Use a zig zag and straight stitch to attach the Luxe fabric onto the felt.
Alternate between the Poly Star and metallic threads.
(Take time to clean any 'fluff' out of the machine as you sew)
- Use the Poly Star thread to create a starburst design on the felt eyes.
- Hand stitch the buttons onto the felt circles.
- Use your sewing machine to attach the owl beak felt piece to the top of the owl body.
- Flip over and stitch a line across. (see pattern for reference.)
- Start pushing in some Poly-fil® in the opening of the owl body, pushing up to the stitched line and towards the corners. Use the stuffing tool as needed.
- Hand stitch the opening closed.
- Fold over the owls head at the stitched line and hand stitch the beak to the body.
- Attach the eyes in the same manner.
- Next, hand stitch 2 wings to each side of the owl body.
please let me know, I'd love to see it!
9/16/20
2nd Annual Mexican Folk Art - Shrine Swap
You are invited to
Join our 2nd Annual Mexican Folk Art - Shrine Swap!
Depending on the participation of this swap the return shipping fee
may range from $7.50 to $15 max.
Last day to sign up is September 21st and head count will be emailed by September 25th.
All shrines due in my hands no later than October 20th.
I hope you can join in on the fun!
~Michelle
8/10/20
Halloween Shadow Box Swap
You Are Invited-
To a Halloween Shadowbox Swap!

To sign up for this swap, you can send me a email or let me know via the link below.
Art Charms and Faerie Garden Miniature Swaps
I recommend joining our group so you never miss out on new swaps or the sharing of creative idea's!
Signups start now and end on 8/22/2020
Head count and shipping details will be emailed 8/25/2020
All shadow boxes are due no later than 9/25/2020
7/31/20
7/20/20
Beach Themed Crafts and Decor


5/11/20
Handmade Face Masks for Sale
4/22/20
How to make a Reading Pillow
You will need:
- Joy® Embroidered Dye-able Letters
- T-shirts (Large to XXL) in prints with coordinating solids
- A Toss Pillow
- Scissors
- Measuring tape
- Steam Iron
- Pressing cloth
- Colored markers
- Sewing machine
4/16/20
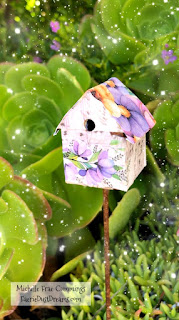
Spring Time in the Garden with Little Birdie Crafts
- Cut the paper to fit the outside of the jar. Cut a fringe on the top and bottom of the paper (as shown).
- Apply the Deco Magic to the paper before adhering to the jar.
- Overlap the fringed cuts of paper onto the bottom of the jar as you apply the Deco magic.
- When all is covered including inside jar lip, paint with the varnish and set to cure before tying with a pretty ribbon and filling with flowers!
- To get the most precise cuts for your faerie garden miniatures, simply place the paper onto the chair, and press along the edges (as shown). This way there is no second guessing and you can see exactly where to cut and glue your papers!
- Using a some blunt tool is helpful in pressing the paper into tight spaces.
- After the chair is covered, be sure to seal it with Decor varnish!


