Showing posts with label Back 2 School. Show all posts

8/25/25

Button Apple Card

 Schools back in session so why not let your Childs teacher know early on just how much you appreciate them with this easy to make button apple card?


7/29/24

No Sew Beaded Lanyard

 School is right around the corner, so how about sprucing up your tired lanyards
 so you are ready for the new year?


8/09/22

Back 2 School Ribbon Crafts!

 Lanyards and wristlets are the perfect hands free accessory for students, teachers and school staff. Customizing them with Gwen Studios ribbons helps to make them extra special and extra fun!


* As a design team member for Gwen Studios,
I am provided with product to work with each month.


To make the ribbon lanyard, you will need the following:

1. Cut 2 ribbons at 38" each.
2. Cut your heat n bond at 37" and if its not the same size as your ribbon, trim to fit.
The heat n bond comes with (shiny) adhesive side and a paper backing.
3. Place the heat n bond adhesive side down onto the back side of one of the ribbons, leaving 1" uncovered at the end.
4. Carefully run the iron over the ribbon. This will be HOT, so make sure you are using a heat proof surface. 
5. After you have ironed the whole length of the ribbon, carefully peel off the heat n bond paper backing. 
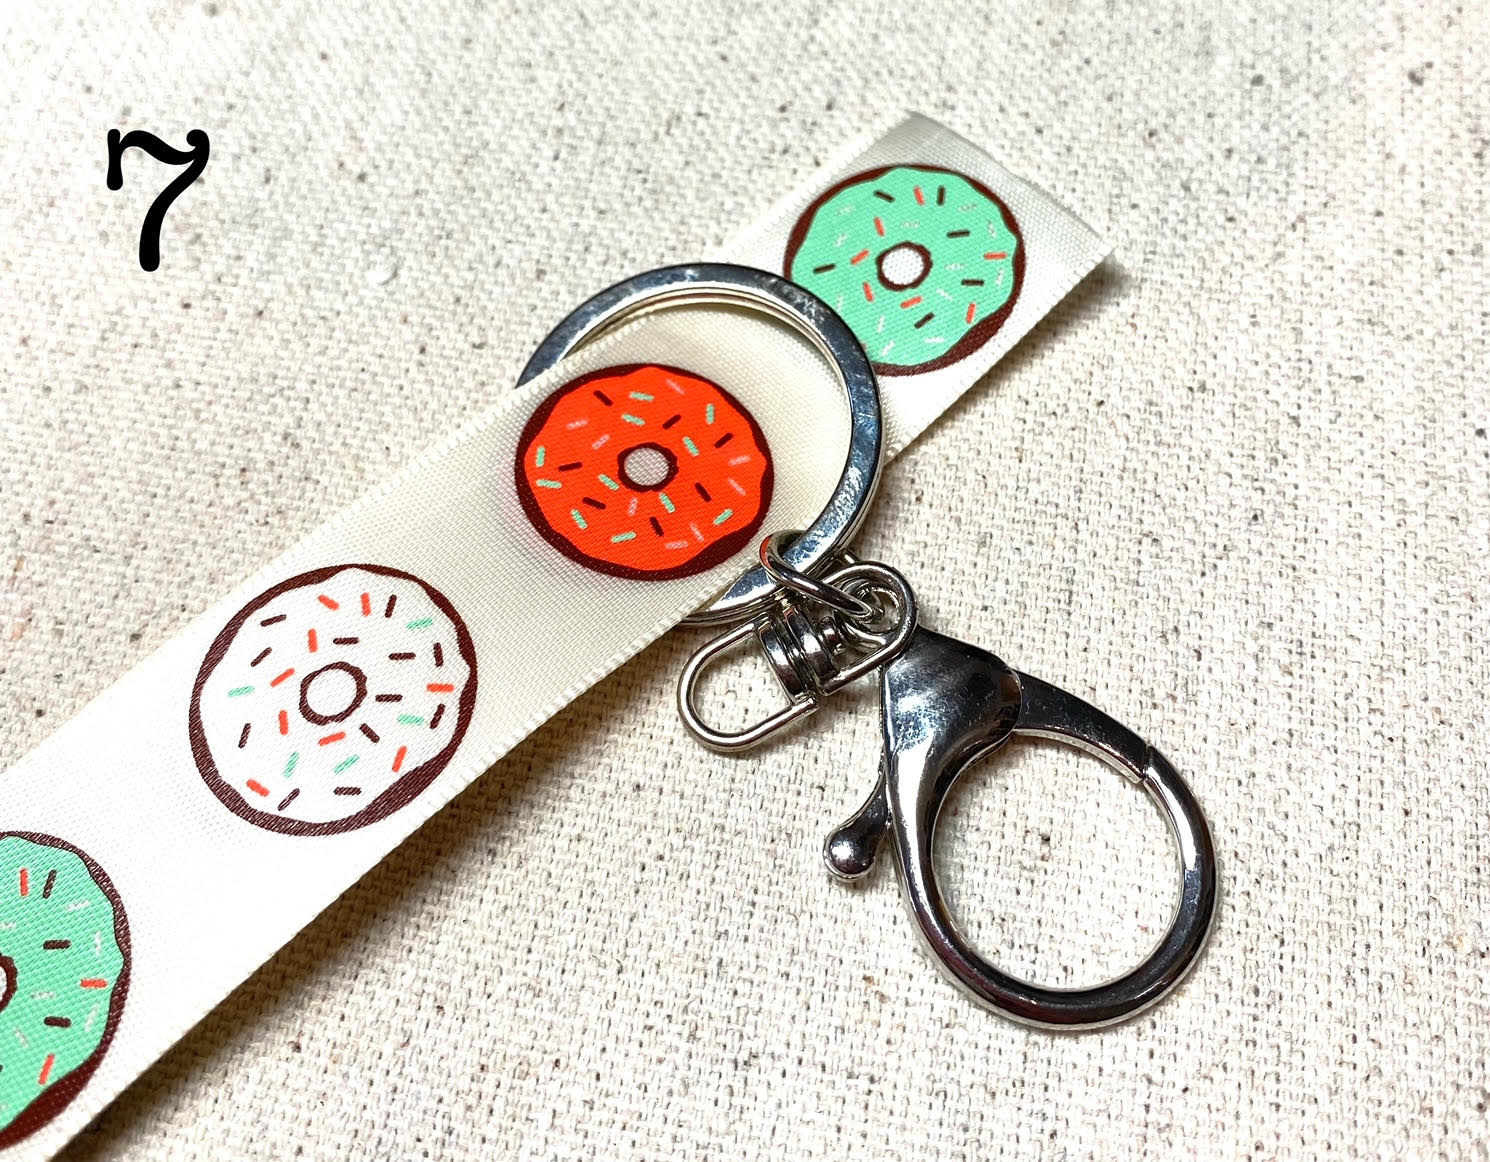
6. Lay the 2nd ribbon as shown and iron again to fuse the two together. 
7. Once cool, thread the ribbon through the key ring.
8. You should have a 1" space at the end of your ribbons. 
Fold this back and iron a piece of the heat n bond - face down as shown in #9. 

10. Peel off the backing and trim off any stray threads.  Then sandwich the other end of the lanyard between the open end and iron to fuse shut, making sure to iron the other side as well. 
Leave to cool before adding charms and other accessories. 

*   *   *

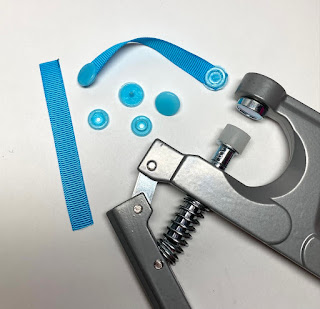
To make the matching ribbon wristlet, consider using a coordinating piece of grosgrain ribbon as I did here with some orange. 

1. Cut 2 ribbons and 1 length of heat n bond at 12" each and fuse together.
 Fold slightly in half, leaving a 1" space at one end. Mark this space with a pen.
2. Cut a length of heat n bond and place as shown. Secure with the hot iron and remove the backing.
3. Bring up the end of the ribbon to just below the line. 
4. Carefully iron on just the 'left' side, fusing that small area in place. 
5. Slide the key fob ring in place. 
6. Fold the remaining end down and iron both sides to be sure it will not come undone.
Add some heat in bond to a small bit of ribbon and use to cover the exposed area.

That's it! So fun, right? 
Mix and match with your favorite Gwen Studios Ribbons and Trims!

Find your favorite Gwen Studios Ribbons at your local Walmart and online at Walmart.com!


Follow this link for more creative ribbon idea's! 


12/07/21

Rainbows and Sparkles with Gwen Studios

 Hi Everyone! 
I'm so excited to show you these new ribbons and appliques from Gwen Studios! 
The colors are so bright and cheery, I just had too much fun creating!


  As you can see, the assortment of ribbons and appliques are just so much fun!
 Look at those yummy colors! 


To make the backpack zipper pull, you will need the following:


Select the colors you want to adorn your Mermaid.
Fold the ends over and secure with hot glue.
This will deter any unraveling of the ribbon. Do this at both ends of the ribbons and adhere with the hot glue to the back of your Mermaid.


Following the simple instructions that come with the Snap Setting Tool, attach your snaps to about 3" of ribbon.
 With the hot glue, adhere to the back of your Mermaid at the top. 
Then attach your Mermaid zipper pull to your backpack or purse!  

The same technique as posted above using ribbon and the Snap Setting Tool can be used to attach Gwen Studio Appliques to your favorite shoes! 


It doesn't matter how young you are or how old you feel, Rainbows will always make us happy and full of hope. Just like this Rainbow- hairclip holder! 
Make one today!

All you need is:

Select and cut 7 colors of ribbon, ranging in length of  12" - 24".  Glue in place on the back of the Rainbow. Don't forget to glue the ends as you did with the zipper pull. Attach a loop of ribbon at the top for hanging.


Hang in a sunny spot and attach your favorite hair clips. Don't you just love those shooting stars? You can see how I made the Rhinestone hairclips here. 
All of the Gwen Studios product in this post can be purchased online and in-store at Walmart. 


Thanks for coming by! I hope I've inspired you in some way or another. 
(Let me know which ones are your favorite!)

Please visit the Designers Craft Connection for more Gwen Studios Ribbon and Applique idea's! 


8/29/19

Back 2 School

Today I am featured on the Joy blog!


You will need:


  • Joy® Iron-on embroidered letters - (2) white initial scripts
  • Joy® Embroidered, iron-on appliqué 
  • Clear zippered bag
  • Notebook
  • Pocket mirror
  • Permanent marker
  • Permanent adhesive
  • Scissors
See the full tutorial here! 

LinkWithin

Related Posts Plugin for WordPress, Blogger...