Jazz up a store bought gift bag with Dew Drops fun! 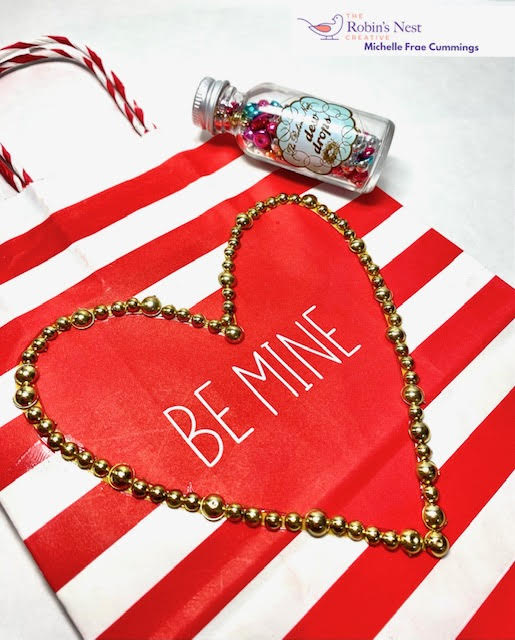
Showing posts with label Holidays. Show all posts
Showing posts with label Holidays. Show all posts
1/12/23
1/06/23
Valentine Garland
With Valentines Day just around the corner, you can easily jazz up a store bought (or handmade) garland with Gwen Studios Ribbons!

11/29/22
Mini Ribbon Wreath Ornament
Kick off the Holiday Season with this quick and easy festive ribbon craft!

2/18/19
Get Lucky
Get 'Lucky' this St. Patrick's Day using Joy® iron-on letters!

You will need:
- Joy® Iron-On letters- 2" script
- Rinea™ double-sided foil paper - emerald/gold glossy
- Chipboard
- Scrap paper and pen
- Small rhinestones with adhesive backing.
- Glue stick
- Yellow ribbon
- Yellow permanent marker
- Tools:
- Scissors

See the full tutorial here!

11/16/17
Mexican Folk Art Holiday Decor

The theme of this hop is holidays. So I chose Our lady of Guadalupe since a huge part of my holiday decorating is Mexico folk art! I decided to make a shrine.
Enjoy!

The Colorique paints I used were Ruby Slippers, Honey Bee and Pacific Ocean. You can see all the colors here.

I primed the piece with a bit of gesso.


The Colorique paints flow very nicely and can be thinned with water if desired. I chose primary colors for easy blending and mixed some with the gesso as needed.
I started off coloring in the flesh tones and yellow first. Then I set the metal piece aside to dry in between colors while I worked on the shrine.


Next I randomly decorated the inside of the shrine with paint, clip art and washi tape.

I continued painting the metal piece, color by color, letting each hue dry before going onto the next detail.
When I was done, I painted the piece with a thin layer of clear sealant.


6/07/17
Patriotic Rockets with Rinea Foils
Hi everyone, when I think of summer, I think of picnics, barbecues, anything patriotic, and fireworks! Here I have used Rinea Foiled Papers to create the perfect summer centerpiece.

From Rinea-
Other supplies:
 Begin by folding the newspaper pages in half until you have a strip 2" wide.
Then wrap some double sided tape at the end of a straw and roll the paper around the tape.
When you get to the end of the paper, tape it down and add more double sided tape, then begin with some freshly folded paper. Keep this up until your roll can fit snugly inside the tube.
Coat the outside of the roll with your glue then push into the tube.
 With your paper trimmer, cut to size the Sapphire Star Struck to measure 4" x 6 ½" and emboss with your folder.
Next cut to size the Ruby/Gold Glossy to 3" x 7".
Score your foil at 2". Then with your scissors, cut a fringe up to that mark.
Adhere the fringe to the bottom part of your rocket with the tacky glue, but use a bit of double sided tape to secure the end flap. - Foil on foil.
 If you are using a standard sized embossing folder, you'll find that cut foil will be to large. This is OK. Simple adhear the embossed foil to the tube with your tacky glue and secure the last bit with tape. This will cover the non embossed foil nicely.
 With your trimmer, cut a piece of Silver Star Struck to measure 1" x 6". Adhere this with double sided tape to cover the previous seams. Add any embellishments to your rocket at this time.
 Trace a 4" circle onto Silver Star Struck. Cut this out, fold the circle in halves until you have four sections. Cut up to the center on one of the fold lines. Just like making a paper funnel, do the same with the circle until you achieve the rocket top you like. Secure shape with tape.
 Place a thick line of tacky glue onto the edges of the tube. Place the rocket cap on top.
 Place your rocket upside down into a sturdy container. While the glue sets, curl the fringe with a straw.
 The possibilities are endless with Rinea Foiled Paper!
See more idea's on their blog!
Thanks for stopping by!

From Rinea-
Other supplies:
- Paper towel tubes cut down to 4"
- Fancy paper straws
- Embellishment- sequins.
- Newspaper
- Double sided tape
- Tacky glue
- Pencil
- Scissors
- Paper trimmer
- Embossing folder and machine.
- Empty containers or glasses.

Then wrap some double sided tape at the end of a straw and roll the paper around the tape.
When you get to the end of the paper, tape it down and add more double sided tape, then begin with some freshly folded paper. Keep this up until your roll can fit snugly inside the tube.
Coat the outside of the roll with your glue then push into the tube.


Next cut to size the Ruby/Gold Glossy to 3" x 7".
Score your foil at 2". Then with your scissors, cut a fringe up to that mark.
Adhere the fringe to the bottom part of your rocket with the tacky glue, but use a bit of double sided tape to secure the end flap. - Foil on foil.


See more idea's on their blog!
Thanks for stopping by!
11/04/16

12/25/15
Christmas Charm and ATC Swap Reveal!

Everyone did a wonderful job creating magical and festive jewelry!
I made the (above) vintage inspired bulb wreath necklace! I colored faux pearl beads with inka-golds and glued them onto a sturdy back ground to create the wreath!


See past Charm and ATC swaps here.
If you are interested in joining future swaps, we also do Faerie garden swaps too!
Message me the following:
Your name
Mailing address
Your Birthdate/year
Any links....Blog, twitter, pintrest, instagram, FB, website, shop....
A little about yourself and the style of crafting you like to do.
You will be sent a confirmation and added to a "master" email list for future Charm or Faerie Garden swaps.
People on the email list get first signs up for a swap before the announced to other social media sites.
Swaps can be 10-20 participants.
They must include a coordinating ATC.
They must be nicely packaged and shipped no later than the post marked date.
12/18/15

12/15/15
7 Creative Holiday Crafts

12/10/15
83 Front Door Holiday Decoration Idea's
Last year the neighbors really decorated their front doors...so much inspiration!
Which one is your favorite?


Which one is your favorite?


Subscribe to:
Posts (Atom)
LinkWithin
