Get a jump start on some patriotic summer vibes with this festive star shaped red, white and blue wreath!
Showing posts with label Wreath. Show all posts
5/26/23
9/27/22
Curly Ribbon Autumn Wreath
Add some fun to a new wreath or update a old favorite with a blend of Autumn curly colored grosgrain ribbons from Gwen Studios!
2/15/22
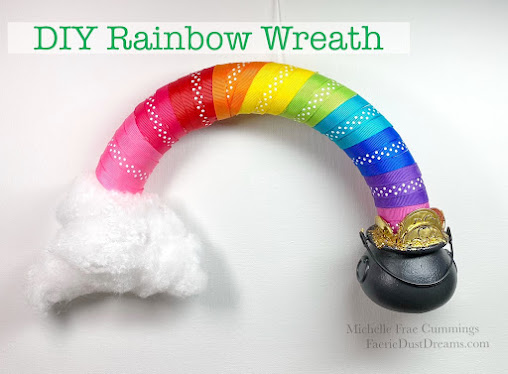
DIY Rainbow Wreath with Gwen Studios
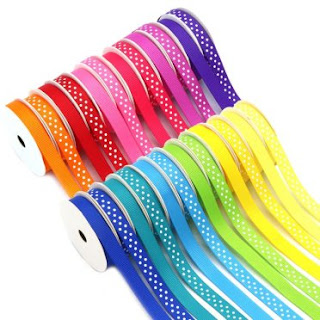
I had so much fun creating this colorful wreath using all my favorite colors from Gwen Studios!
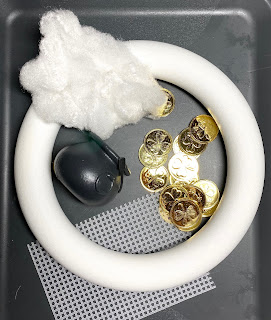
To make this Rainbow Wreath, you will need the following:
Use the scissors to cut the foam wreath in half.
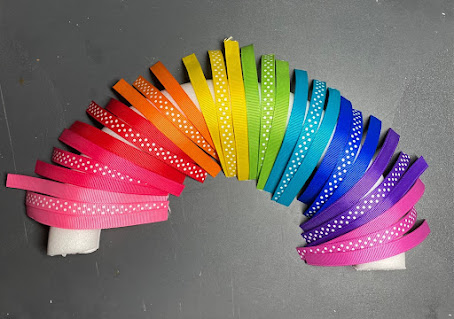
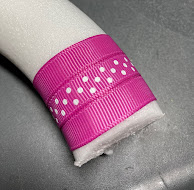
Wrap a piece of ribbon around one end of the wreath to determine the length you will need for the rest of the colors. For my wreath, each ribbon measured 4 ¾". After you have cut all your ribbon, lay it on the wreath to determine your design. Make sure you have some extra pieces available to fill in any gaps if needed.
Working with one ribbon at a time, add a thin line of hot glue to the foam wreath and attach the ribbon. Secure the ribbon ends to the back of the wreath.
When you get to the end of the foam wreath, use the scissors to cut the end as shown, creating a 'slit '. Push the plastic canvas into the slit and with the marker, draw a cloud shape. Pull the plastic canvas out of the slit, cut the cloud shape with scissors and and re-insert into the slit, securing with hot glue.
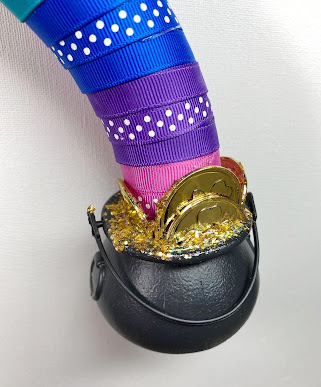
Using some hot glue, fill the cauldron with leftover bits of the plastic canvas and batting. Then adhere the end of the wreath into the the top pf the cauldron. Add a few gold coins, cutting some in half to fit. The gold glitter paint is helpful in concealing hot glue drips and trails, plus it adds the perfect bit of glittery Leprechaun magic, don't you agree?
Thanks for coming by, I hope you've enjoyed my craft!
Please visit the Designers Craft Connection for more Gwen Studios Ribbon idea's!
3/17/19
Butterfly Wreath with Embroidered Flowers
Get ready for spring with Joy® Iron on Floral Appliques!
You will need:
- Joy® iron-on embroidered floral appliqués
- Grapevine wreath
- Assorted butterflies
- Scissors
- Glue gun
See the full tutorial here.
11/02/18
Sugar Skull Wreath
Welcome to day 3 of our Day of The Dead Art - Celebration!
This a wreath I made a couple of years ago. I love it so much that it stays up as all year long.
Check out the full tutorial here!
11/04/16
5/26/16
Stars and Stripes Patriotic Wreath
I don't know about you, but anything patriotic gets me in the mood for a great summer!
To make this fun wreath, you will need the following:
8" Ruled Smoothfoam Wreath*
Red and blue craft paint
Paint brush
Patriotic fabric cut into 1" x 12" strips.
Use the handy ruled indents on the wreath to decide where you want your stars and stripes to be. Then paint those sections. When the paint is dry, start tying your strips of fabric. I alternated between tying the knots on the top and on the side of the wreath. This way you easily add volume to the wreath while covering up any bare paint spots.
For the stars, I used 15 strips of cloth.
For the stripes I used 40 strips of cloth.
When done, tie a extra long strip at the top and hang for all to enjoy!
Visit here for more Smoothfoam wreath inspiration!
This post was sponsored by Smoothfoam.
12/25/15
Christmas Charm and ATC Swap Reveal!
Here is the reveal for the Christmas Charm and ATC swap!
Everyone did a wonderful job creating magical and festive jewelry!
I made the (above) vintage inspired bulb wreath necklace! I colored faux pearl beads with inka-golds and glued them onto a sturdy back ground to create the wreath!
Shelia created this colorful Christmas tree dangle bracelet.
Christina made this sweet angel necklace.
Sarah made us this whimsical vintage inspired pink Christmas tree!
PJ put together these fun Snowman earrings
Maria made this simple but classy jingle bell bangle
Ashani always amazes us with her wire work skills. This is just beautiful and unique!
Glenda created this sophisticated snowman pendant
Shawn made this sweet vintage pendant!
See past Charm and ATC swaps here.
If you are interested in joining future swaps, we also do Faerie garden swaps too!
Message me the following:
Your name
Mailing address
Your Birthdate/year
Any links....Blog, twitter, pintrest, instagram, FB, website, shop....
A little about yourself and the style of crafting you like to do.
You will be sent a confirmation and added to a "master" email list for future Charm or Faerie Garden swaps.
People on the email list get first signs up for a swap before the announced to other social media sites.
Swaps can be 10-20 participants.
They must include a coordinating ATC.
They must be nicely packaged and shipped no later than the post marked date.
12/10/15
83 Front Door Holiday Decoration Idea's
Last year the neighbors really decorated their front doors...so much inspiration!
Which one is your favorite?
10/05/15
Dollar Store Eyeball Wreath
As soon as I saw these eyeballs in the Dollar Tree store, I knew I just had to make a wreath!
I've been wanting to for awhile, so why not?
Total cost? $7
Materials:
Visit the Designer Crafts blog!
I've been wanting to for awhile, so why not?
Total cost? $7
Materials:
- 3 Packages of eyeballs - 12ct each.
- 1 Creepy cloth- 30"x 72" - it's more than enough.
- 12" Floral wire wreath- $3 from a general craft store.
- Hot Glue
- Wire to hang.
- Wrap the creepy cloth around the wreath.
- Use the wire to secure the ends of the cloth to the wreath, weaving in and out of the cloth. Leave a loop of wire to hang.
- Hot glue the eyeballs to the wreath. Add as much or as little as you want.
- Hang for all to enjoy.
- *Bonus- The eyeballs 'jiggle' with the opening and closing of any door!
Visit the Designer Crafts blog!
9/24/15
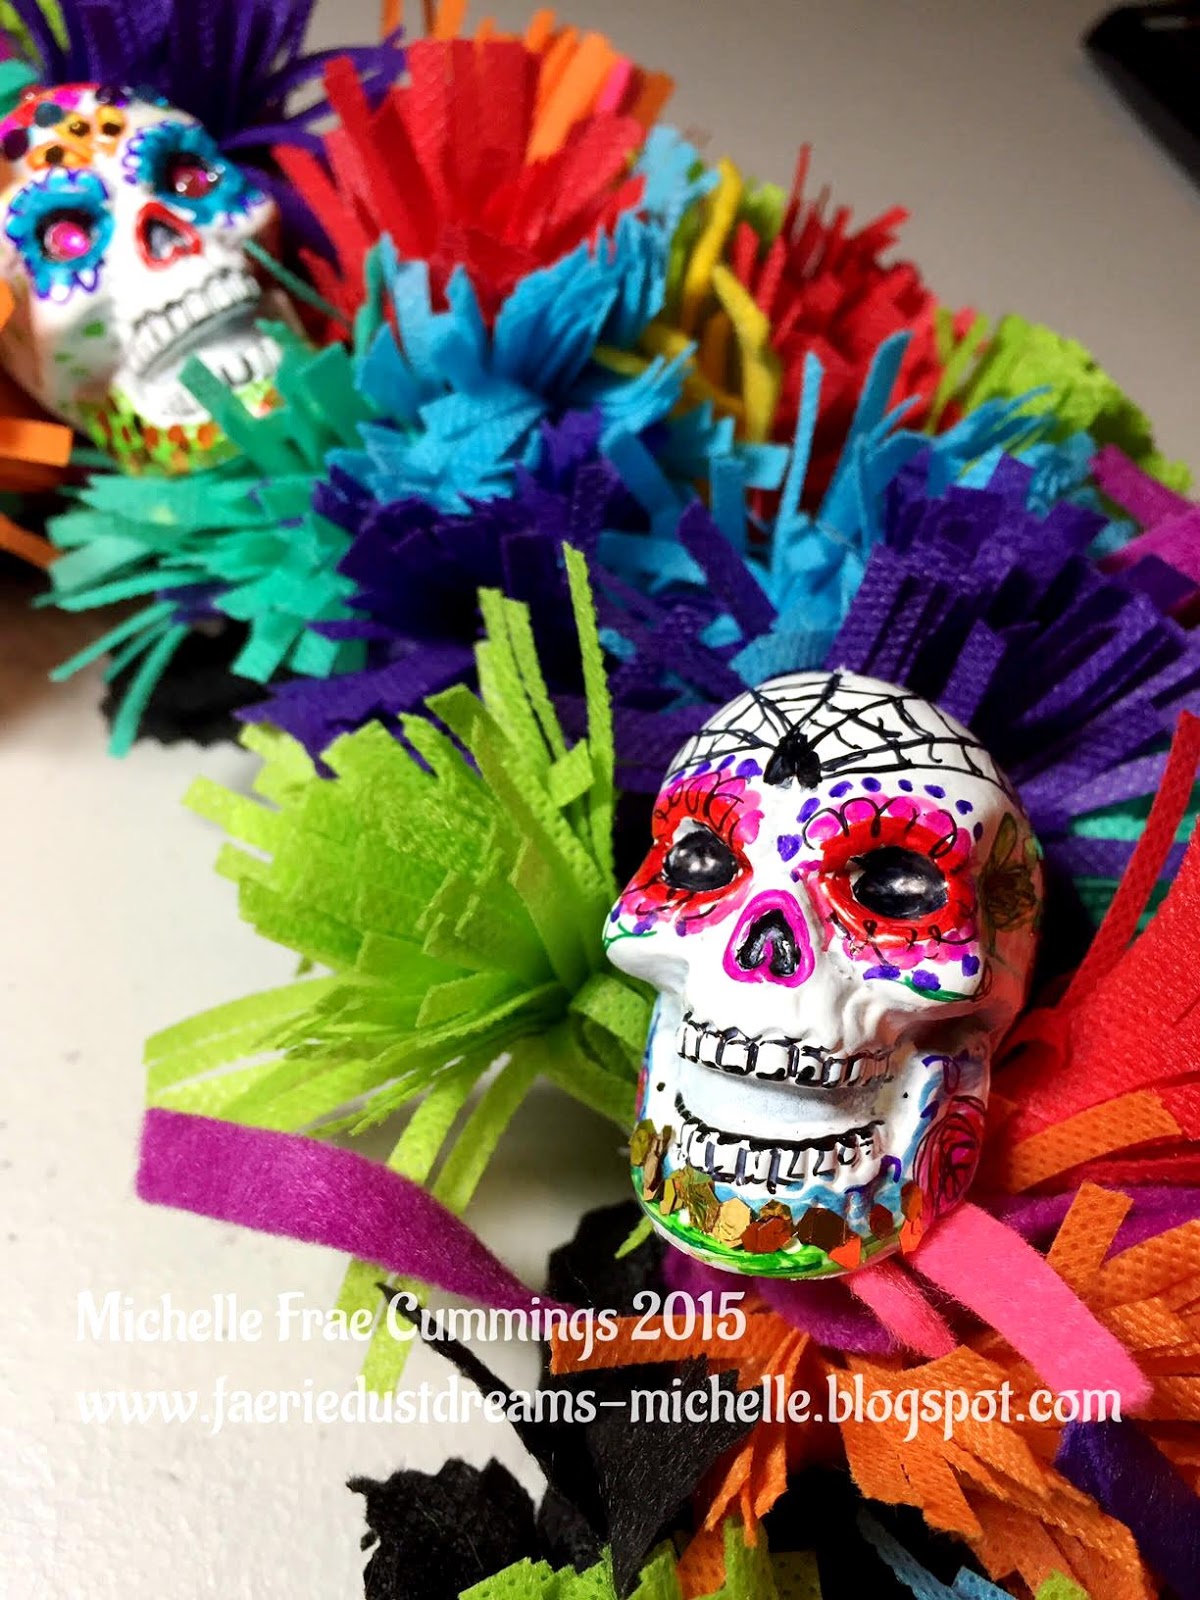
How to make a Sugar Skull - Day of the Dead Wreath!
Its no surprise to anyone that I love all things to do with Mexican folklore,
especially Day of the Dead!
I love the vibrant colors, rich history and stories!
I grew up eating the foods and visiting the museums.
In honor of Día de Muertos I am showing you how to make a easy, new sew wreath with a little help from Fairfield World , the makers of Olyfun!
To make this wreath, you will need the following:
Please visit the rest of the designers for more Olyfun inspiration here!
especially Day of the Dead!
I love the vibrant colors, rich history and stories!
I grew up eating the foods and visiting the museums.
In honor of Día de Muertos I am showing you how to make a easy, new sew wreath with a little help from Fairfield World , the makers of Olyfun!
To make this wreath, you will need the following:
- Assorted Olyfun colors.
- Felt strips.
- 12" Wire wreath.
- Gloves
- 22 Gauge wire
- Jewelry pliers
- Fringe, pinking and regular scissors.
- 1 " Halloween skulls
- White spray paint
- Fine and standard tip-colored permanent markers.
- Embellishments and adhesive.
- Trim your Olyfun to 3"x12". Plan on making 10 flowers each of at least 6 colors.
- Cut a fringe half way into each strip.
- Roll up the fringed strip, then leave a 4" tail of the wire and wrap tightly around as shown. Let out about 4" of wire and keep wrapping. Repeating as you go.
- Trim the wire so each flower has the 4" tail. Twist the ends.
- Keep going until you have wrapped all the colors.
- Starting with the darkest color, push the flower into the wreath and wrap the wire in and out of the frame until secure. Use the gloves to keep the wire ends from scratching you.
- Stagger the colors at first, then group them as a collection. Fill in empty spaces with extra flowers.
- Don't worry if your wire is exposed.
- When you are done adding all the flowers, make up some filler with 5" strips of colorful felt.
- Fold in half and twist with about 4" of wire.
- Work these into the wreath.
- Use your pinking shears to trim plenty of ½" x 5" black strips of Olyfun. Tie these anywhere there is a open space or wire is exposed.
- Spray paint the skulls white.
- When dry and the paint is not tacky, color the skulls with your markers.
- Then add glitter and tiny rhinestones.
- Find inspiration to color your sugar skulls online or here.
- Attach sugar skulls to your wreath with wire or a hot glue gun.
- Add a loop of wire onto the back of your wreath and hang for all to enjoy!
Please visit the rest of the designers for more Olyfun inspiration here!
Subscribe to:
Posts (Atom)