Showing posts with label butterflys. Show all posts

8/30/23

La Catrina Ribbon and Floral Headband

My floral headband colors were inspired by the beautiful holiday known as Day of the Dead. This holiday is celebrated every year on November 1st and 2nd. Its a time to honor loved ones who have passed on to the spirit world by having a huge celebration filled with family, festivities, and brightly colored flowers. 


* As a design team member for Gwen Studios,
I am provided with product to work with each month.

I love wearing headbands but not the hard plastic ones.
Here I have created a simple tutorial that I hope you enjoy making as much as I did! 

3/17/19

Butterfly Wreath with Embroidered Flowers

Get ready for spring with Joy® Iron on Floral Appliques! 


You will need:
  • Joy® iron-on embroidered floral appliqués  
  • Grapevine wreath
  • Assorted butterflies 
  • Scissors
  • Glue gun 


See the full tutorial here. 

9/23/17

Rinea Foil Butterfly Card


For this project, I used the following:
Ruby/Gold Foiled paper
Ghost Ink

4"x 5" watercolor paper
4 1/4" x 5 1/4" red card blank
Dandelion burst background stamp by Sin City Stamps
Butterfly punch
70% rubbing alcohol and paper towel.
Heat gun, scissors, pliers, gold wire, gold acrylic paint, water colors, adhesive, rhinestones, foam tape and washi tape.


See how I made this card here!

7/07/17

Rinea Paper Foil Butterfly Cube

I really love how Rinea Paper Foil adds elegance to just about everything including this butterfly cube!

Supplies:

Trim your Blush foil to fit four sides of the cube. Crumple the foil, then open up and smooth out. Adhere this with your adhesive to the sides of the cube.
Repeat this step with the Emerald foil for top and bottom of the cube.

Cut 1½" of wire and fold in half. Then curl the end of the wire with jewelry pliers to create antennas.

Fold the Violet foil in half 4 times and punch out with 2 sizes of butterfly punches.
Add adhesive to the center of the larger butterfly, add the wire antenna, then secure the smaller butterfly on top.Adhere these butterflies to the sides of the cube and add the word stickers at the bottom.

Cut some wire to be 3" long and crimp with your fingers. Attach the dimensional butterflies at the top. Use the paper piecer to make holes in the foil, them push your butterfly topped wires in place. Add decorative trim is desired.


See more idea's on the Rinea Blog!

4/23/15

Boho Bridal Wear with Decorative Trimmings


 A handful of DCC designers and I received product from Decorative Trimmings to inspire you in making Wedding themed projects.
 
Decorative Trimmings is a manufacturer of high quality braids, cords, ribbons, fringe and other trim.
Decorative Trimmings are used in bridal wear, Renaissance costumes,Mardi-Gras, masks, hair adornments, hand bags, jewelry and more!


I love anything Boho/Gypsy, so naturally I fell in love with these sequined trims!
I've created 2 headpieces and a garter.

To make the headpieces, I used the following:
 Sedona Rose Hologram Sequin Trim

New Orleans Fushia Trim

  1. Measure- starting at your forehead, and continue all the way around. Add a extra ½".
  2. Secure ends with a small piece of clear tape to keep the sequins in place.
  3. Overlap ends, tape on tape and hand stitch with a thread and needle until secure.
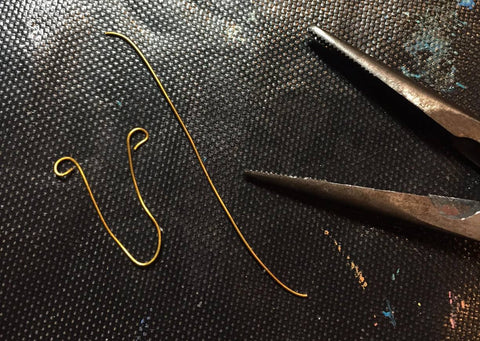
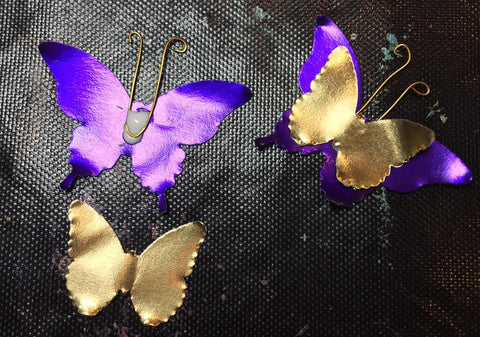
  4. Cover stitched  area with a decorative butterfly, either with hot glue or a thread and needle.
  5. Wear headpiece across the forehead or as a headband.

So beautiful the way the sequins sparkle in sunlight.
 Perfect for a Bridesmaids, girls night out, a princess party or everyday wear!


 To make this garter, I used the following:
 
 Purple Spot Sequined Trim


2" Purple Chainette Fringe

  1. Measure above the knee and cut both trims to be 1" shorter the actual leg circumference.
  2. With a thread and needle, hand stitch the purple trim to the fringe as shown. 
  3. Open up the fringe by trimming off the bottom. It is stitched for you so the fringe can hold its shape before creating with.
  4. Stitch  a 1" piece of like or dark colored elastic to both ends. This is your elastic give.
  5. Place on leg, above the knee and give a little "shake"! 

Thanks for coming by, I hope you have enjoyed my Boho Bridal wear!
Please visit the rest of the designers here for more Wedding themed projects using Decorative Trimmings.


LinkWithin

Related Posts Plugin for WordPress, Blogger...