Showing posts with label Halloween. Show all posts

9/15/25

Batwing Hairclips

 Who's ready for Halloween?  

I am! 

With these spooky cute batwing hairclips, 

you're sure to be the ghoul of the ball! 


9/30/24

Spooky Ribbon Spiders

 Halloween is just around the corner, 
 so I thought it would be fun to add some spooky spiders to my indoor plants!


9/30/23

Spooky Halloween Bows

 Add a little bit of fun to your hair this Halloween with Gwen Studios ribbons!


* As a design team member for Gwen Studios,
I am provided with product to work with each month.

This craft can also be used to decorate gifts or jazz up party decor!

8/30/23

La Catrina Ribbon and Floral Headband

My floral headband colors were inspired by the beautiful holiday known as Day of the Dead. This holiday is celebrated every year on November 1st and 2nd. Its a time to honor loved ones who have passed on to the spirit world by having a huge celebration filled with family, festivities, and brightly colored flowers. 


* As a design team member for Gwen Studios,
I am provided with product to work with each month.

I love wearing headbands but not the hard plastic ones.
Here I have created a simple tutorial that I hope you enjoy making as much as I did! 

8/31/22

Ribbon Decorated Halloween Pumpkins

 As most of you know, Halloween is my absolute favorite time of the year! I love the thrills, the chills, the dressing up and of course the decorating! Here I have created the easiest way to embellish pumpkins. In this tutorial, I used foam pumpkins but you can also use real ones if you want a more realistic affect.


8/10/20

Halloween Shadow Box Swap

You Are Invited-

To a Halloween Shadowbox Swap!


The Premise:
Create shadowboxes using Halloween miniatures.
 Make a stack-able Haunted house!!

The easiest way to go about making the base for your shadow boxes is to use a carton of 250 matches like the ones above which I found at Walmart. - Sometimes they can be found in the camping section and sometimes in the paper plates isle. 

 Pull out the box and empty the loose matches. 
Then carefully unfold the box, lay flat and trace as shown above. 
You now have your shadow box pattern. 
I recommend tracing your pattern onto thin cracker like boxes. 
This is so your shadow boxes will be sturdy enough to hold your spooky scenes. 
You can paint the insides black before or after reassembling. 


As shown above, each shadow box base must not exceed  2 ½" x 5" and a 1" depth. 
(that's pretty close to the original matchbox size.)


Determine if your scenes will be vertical or horizontal.
Make sure all your elements are firmly glued in place before shipping. 

I have created a Inspiration board with Halloween Shadow Box idea's here.
Looking for other idea's as to what you can make or use for your scene miniatures?
 Click here !

How many people that sign up for this swap 
will determine how many boxes you need to make.

Please make all your scenes using the same focal point or main character. 
(example: if one of your scenes scene includes a witch, then put her somewhere in each scene- Stirring a pot, casting a spell, flying on a broom,...It doesn't have to be the exact same witch, just the same character/focal point.) 
 Like a running story board. You can also use a skeleton, a zombie, a vampire, a ghost dog, a bubbling cauldron,  a graveyard, a scary movie poster, a murder scene, bloody mask, bloody knives and so on ... 
The other elements can be whatever you have on hand but all your scenes 
need to have one universal theme. 


Each shadow box must include your name and info on the back along with 2 sturdy magnets.
This is so, when all the boxes have been received, they can be collectively displayed-
 (on any metal surface- fridge, file cabinet, a old cookie sheet, metal door...) 
to look like a Haunted house! 
Cool right? 

To sign up for this swap, you can send me a email or let me know via the  link below.

 Art Charms and Faerie Garden Miniature Swaps

I recommend joining our group so you never miss out  on new swaps or the sharing of creative idea's!

Signups start now and end on 8/22/2020

Head count and shipping details will be emailed 8/25/2020 

All shadow boxes are due no later than 9/25/2020


Please share!

10/23/19

Winged Skeleton Halloween Card

Hi Everyone, Michelle here with a card to portray my favorite Holiday...Halloween!
I know it's late, but I could not resist. I hope you'll enjoy and be inspired to create your own!


 Supplies:
  • Winged Skeleton and "Dead men Tell No Tales" from Halloween Bingo Stamp Set
  • Dew and Diamond drops
  • Vintage news print
  • Scrapbook Paper
  • Assorted washi tapes
  • Pumpkin Smooch
  • precision scissors
  • Black stamping ink
  • Adhesive, foam tape, and a pen.

Start by trimming your scrapbook paper to be a card size of 4"x6".
Next attached several torn pieces of the vintage news print. 
Place some decorative washi tape in the center of the card and some pleat a bit near the bottom.
A few more strips of washi tape were placed on the card before I added decorative detail with the liquid smooch.
Stamp the winged skeleton and the saying onto the back side of the vintage newsprint paper. 
Cut out and color lightly with the smooch.
 I added a criss-cross of washi tape to the center of the card before adding the skeleton with foam tape.


Decoratively add the dew drops and saying.

Happy Halloween! 
-Michelle
Don't forget to check us out at all of our social media sites
The Blank Page Muse- https://blankpagemuse.com/

10/01/19

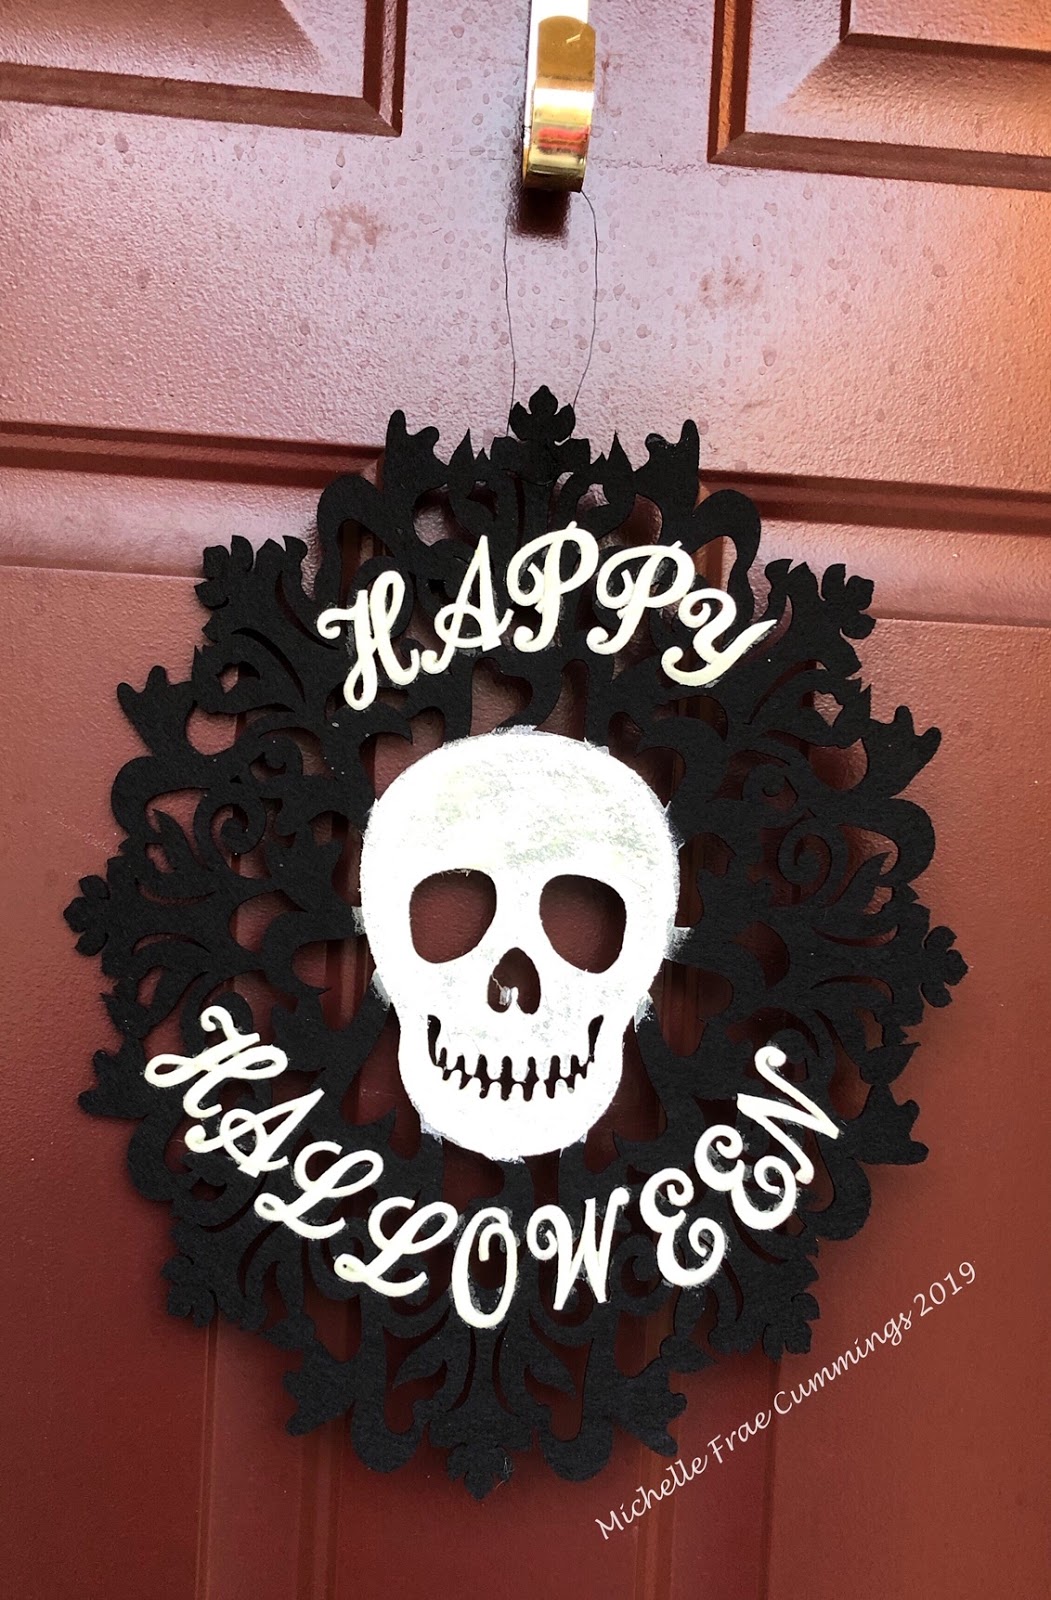
Glow in the Dark Halloween Decor

Get a head start on Halloween with easy to make Halloween decor!


You will need:

Joy® embroidered letters -  (1 1/2" Script) **


A black Halloween felt place mat. **
White acrylic paint **
Glow in the dark paint **
Paint brushes **
Iron

Items with a ** next to them were found at Michael's Craft Stores.


Instructions:

1. Begin by painting the center design of the felt place mat with white paint. Apply the paint  at least 3 times, letting it dry in between each coat.


2. Use an iron to heat set the letters per the instructions on the package.

3. Paint the letters carefully with the glow in the dark paint. 
2-3 coats of paint should do the trick.
4. Next paint your center design with multiple coats of glow in the dark paint, letting it dry in between coats. 
5. Attach a wire to the top and place under a bright lamp to activate the "glow". 
 Then turn out the lights for a 'spooky' good time! 
Happy Halloween!

See more Joy® embroidered creations here


Joy® embroidered script, monogram letters are available in different sizes in white or black. White letters can be colored to coordinate with any décor. 

9/25/19

Halloween Party Favors

With Halloween being my all time favorite holiday, I couldn't pass up the chance to make these oh so  spooky party favors! They are easy to make up and fun to fill.
I'll be making these to give to the kids in my neighborhood all through October, as a early Halloween treat!

To make party favors like these, you will need the following:


3. Halloween party fillers
4. Washi tape
5. Strong double stick tape
6. Stapler
7. Scissors
8. Crepe paper
9. Colored paper
10. Black ink for stamping
11. Assorted markers and glitter gel pens


For the party favors with pencils in them, I cut my paper to be 6 ½" x 11".
The smaller treat tubes measured to be 5" x 6 ½"
Use the black ink to randomly stamp all over the papers.


Have a little fun coloring in your stamped images!


To make the tube, tightly roll your paper first, to get its shape. Add a strip of double stick tape along one side and press the rolled end into the tape.


Gently press down one end of your tube and insert some crepe paper. Staple this shut. 
Add some washi tape to this end, covering the staples. Use your scissors to cut slits in the crepe paper to make a 'fringe'. 

Fill your tube with Halloween toys or candy. 
Turn the tube and close the opposite end as you did before. 


You can also fill these with money, gift cards, and other fun things! 
Happy Halloween!
~Michelle

For more creative idea's, visit us here:
The Blank Page Muse- https://blankpagemuse.com/

11/06/18

Day of The Dead - Fan Art by Adam

Welcome to day 7 of our Day of the Dead Art - Celebration!

This card was created by one of our guest designers, Adam.


Its called Sugar, Sugar and you can see the full tutorial here.


Flaming Skull stamp


Please follow us for more Inspiration!

11/02/18

Sugar Skull Wreath

Welcome to day 3 of our Day of The Dead Art - Celebration!


This a wreath I made a couple of years ago. I love it so much that it stays up as all year long.

Check out the full tutorial here!

10/13/18

Hocus Pocus Felt Board Sign

Make your own custom felt board letters this Halloween with with Joy!


You will need:


  • Joy® iron-on embroidered monogrammed letters
  • A felt board
  • 2" x 5" of yellow felt
  • A bamboo skewer cut down to 5 1/2" 
  • Washi tape
  • Bakers twine
  • 18 gauge galvanized wire cut into 1" pieces
  • Hot glue
  • Scissors 
  • Pliers


  • See the full tutorial here! 

    8/24/18

    6 DIY Halloween Decor Idea's!


    Hi Everyone!
         Crafts By Ria is featuring my mummified body tutorial along with 5 other fantastic easy and cheap idea's to get you in the mood for Halloween!

    Check them out here!

    10/20/17

    Decorated Halloween Treat Bags


    All this week, the designers on the Rinea Foiled paper team are working with with Pink & Main stamps and dies for a fun filled week with with amazing inspiration!
    Both are having giveaways !
    You can enter for a chance to win by leaving comments on the Facebook pages


    For my decorated Halloween treat bags, you will need the following:

    1.  Pink & Main Witch brew - Stamps
    2. Pink & Main coordinating Witch Brew- Dies.
    3. Rinea Foiled Paper 
    4. Black and white cardstock
    5. Decorative crepe paper
    6. Clear treat bags
    7. Double stick tape
    8. Black ink and stamping blocks
    9. Paper trimmer and scissors
    10. Colored pens
    11. Halloween embellishments and glitters.
    12. Die cutting machine 
    13. Candy
     Begin by measuring the width of your treat bag. This treat bag is 5".
     So now I want to cut a 5" x 5" square of black cardstock.


     Fold square in half and cut as shown. Open up and place pieces of double stick tape on just one half.

     Pleat your crepe paper all around, pressing into the tape to form a circle.
    Stamp the witch and spider web onto white cardstock. Cut designs out using the coordinating dies. 

     Cut a circle of foiled paper to be larger than the witch. Snip the edges with the scissors to create a fringe. Adhere to the center of the pleated crepe paper. Colored your witch in with your pens. Adhere to the center of the foiled paper and tuck the die cut spider webs around.


     Cut your treat bag down to size and fill with candy. Tape the bag shut.
    Open your circle and adhere double stick tape to top and bottom.place the treat bag onto the bottm and then close, pressing firmly.

     Accent with glitter and any Halloween embellishments. 


    Don't forget! .....To enter for a chance to win
     by leaving comments on the Facebook pages
    Good Luck!


    LinkWithin

    Related Posts Plugin for WordPress, Blogger...