Jazz up a store bought gift bag with Dew Drops fun! 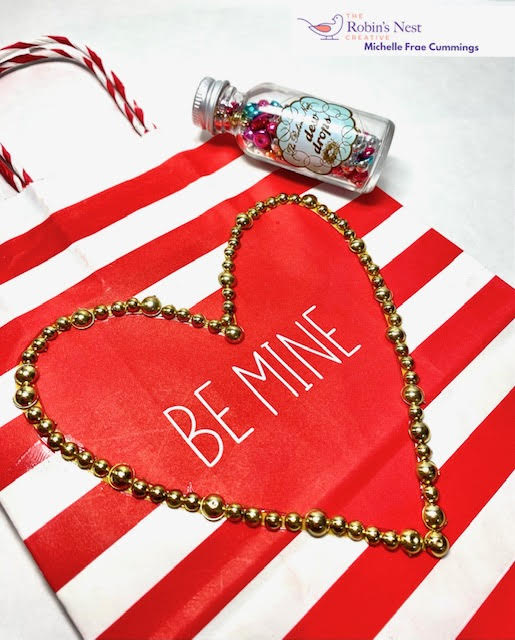
Showing posts with label Party Favors. Show all posts
Showing posts with label Party Favors. Show all posts
1/12/23
9/25/19
Halloween Party Favors
With Halloween being my all time favorite holiday, I couldn't pass up the chance to make these oh so spooky party favors! They are easy to make up and fun to fill.
I'll be making these to give to the kids in my neighborhood all through October, as a early Halloween treat!


I'll be making these to give to the kids in my neighborhood all through October, as a early Halloween treat!

To make party favors like these, you will need the following:

3. Halloween party fillers
4. Washi tape
5. Strong double stick tape
6. Stapler
7. Scissors
8. Crepe paper
9. Colored paper
10. Black ink for stamping
11. Assorted markers and glitter gel pens

For the party favors with pencils in them, I cut my paper to be 6 ½" x 11".
The smaller treat tubes measured to be 5" x 6 ½"
Use the black ink to randomly stamp all over the papers.

Have a little fun coloring in your stamped images!

To make the tube, tightly roll your paper first, to get its shape. Add a strip of double stick tape along one side and press the rolled end into the tape.

Gently press down one end of your tube and insert some crepe paper. Staple this shut.
Add some washi tape to this end, covering the staples. Use your scissors to cut slits in the crepe paper to make a 'fringe'.

Fill your tube with Halloween toys or candy.
Turn the tube and close the opposite end as you did before.
You can also fill these with money, gift cards, and other fun things!
Happy Halloween!
~Michelle
For more creative idea's, visit us here:
The Blank Page Muse- https://blankpagemuse.com/
FB Fan Page- https://www.facebook.com/
Instagram Shop- https://www.instagram.com/
Instagram Blog- https://www.instagram.com/
Twitter- https://twitter.com/
6/18/16
Embossed Gift Bag with Couture Creations!
Hello Couture Fans!

I am Michelle Frae Cummings and I'm super excited to be a Guest Designer for Couture Creations this month.
Today I am sharing a embossed gift bag to fill with goodies then give to my son's 4th grade teacher on the last day of School this year.

To start, emboss a plain brown lunch sack using Vine Frame from The Harmony Collection.

Here you can see that the embossed design, raised or not, is now all around the bag.
So elegant.


Using a white pigment ink, lightly dab at the raised design on the front of your bag. As you work, you can add more ink till you have the desired shade. Don't worry if a little bit of ink gets on the bag itself, this will only add to its charm.


For the tag, dab teal ink directly onto a Decorative Plaque from The Secret Treasures Collection.
Then quickly (before the inks dries) flip over onto some clean white cardstock and run through your die cutting machine. The result will be a a embossed and stamped Decorative Plaque!
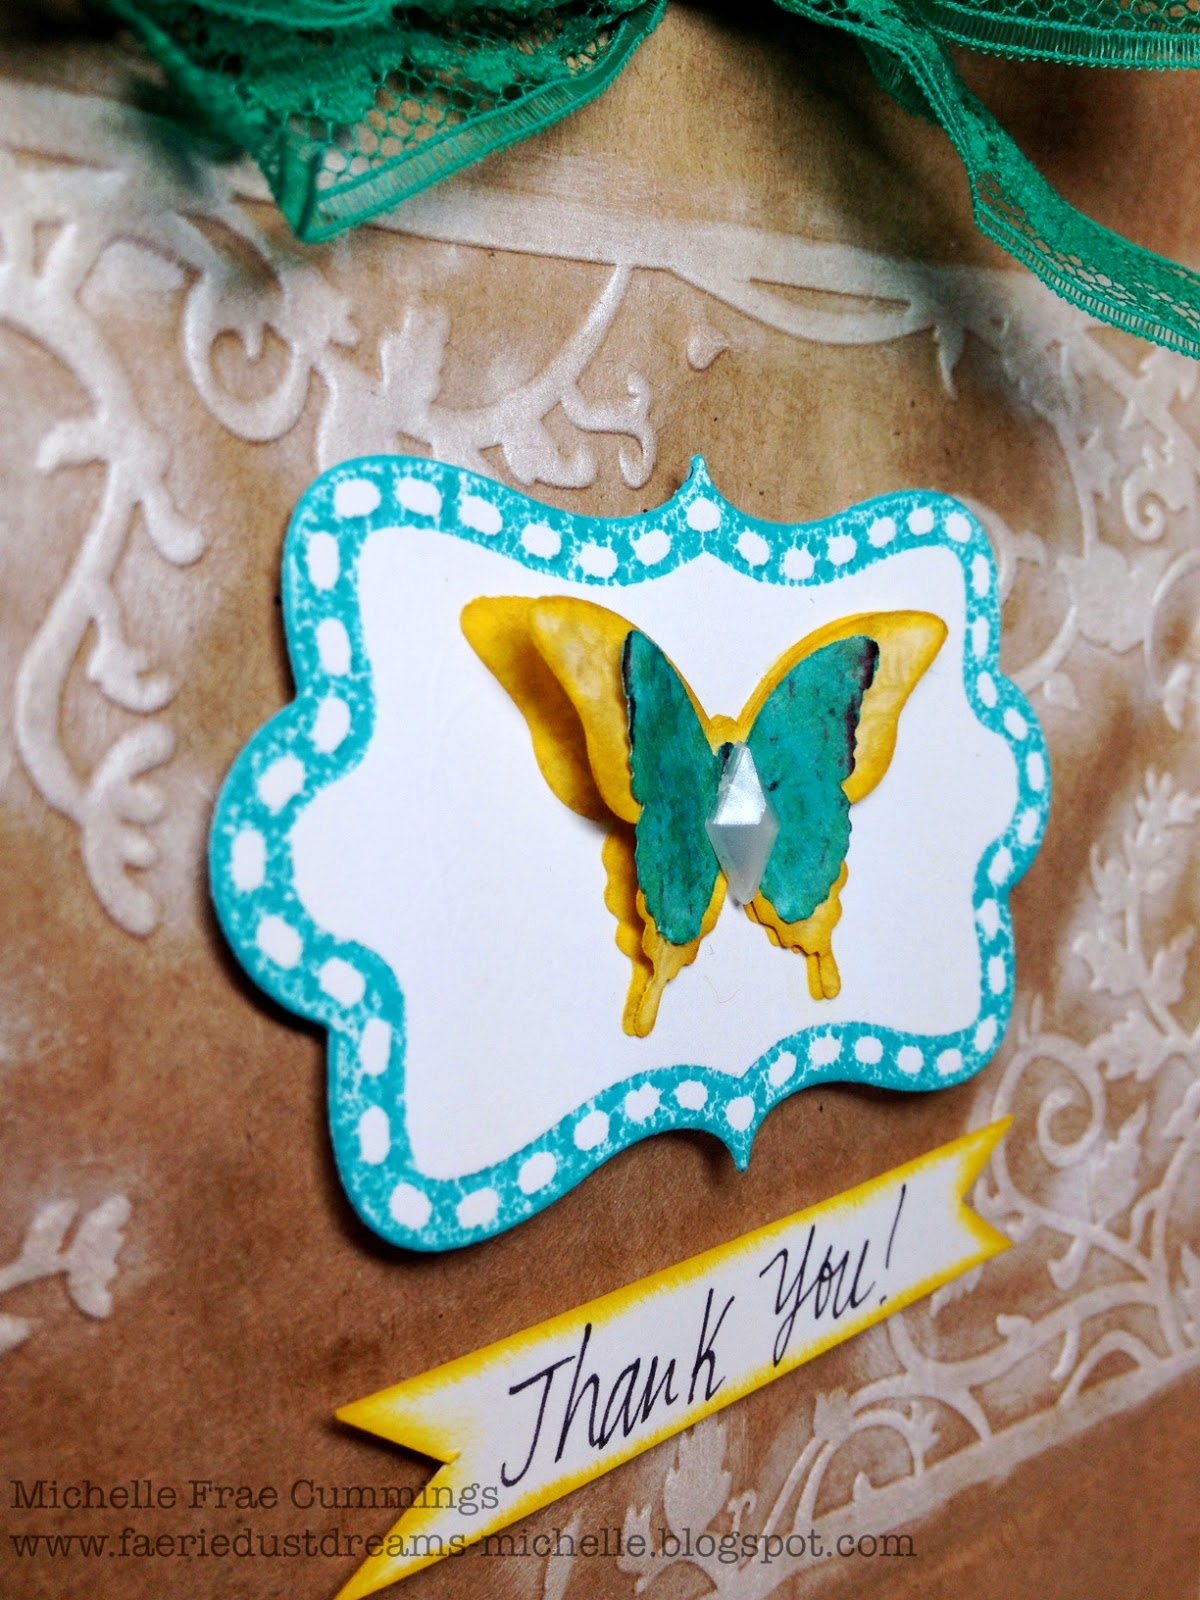
Place the Decorative Plaque onto your sack with foam tape. Add some colorful butterfly's to the center of the Decorative Plaque and finish with a hand written sentiment.


Fill with some happy surprises and secure the top with some vintage trim.
Thank you for visiting.
I hope I've inspired you to create a few Embossed Gifts Bags for your friends or family!
Subscribe to:
Posts (Atom)
LinkWithin
