Showing posts with label Miniatures. Show all posts

8/10/20

Halloween Shadow Box Swap

You Are Invited-

To a Halloween Shadowbox Swap!


The Premise:
Create shadowboxes using Halloween miniatures.
 Make a stack-able Haunted house!!

The easiest way to go about making the base for your shadow boxes is to use a carton of 250 matches like the ones above which I found at Walmart. - Sometimes they can be found in the camping section and sometimes in the paper plates isle. 

 Pull out the box and empty the loose matches. 
Then carefully unfold the box, lay flat and trace as shown above. 
You now have your shadow box pattern. 
I recommend tracing your pattern onto thin cracker like boxes. 
This is so your shadow boxes will be sturdy enough to hold your spooky scenes. 
You can paint the insides black before or after reassembling. 


As shown above, each shadow box base must not exceed  2 ½" x 5" and a 1" depth. 
(that's pretty close to the original matchbox size.)


Determine if your scenes will be vertical or horizontal.
Make sure all your elements are firmly glued in place before shipping. 

I have created a Inspiration board with Halloween Shadow Box idea's here.
Looking for other idea's as to what you can make or use for your scene miniatures?
 Click here !

How many people that sign up for this swap 
will determine how many boxes you need to make.

Please make all your scenes using the same focal point or main character. 
(example: if one of your scenes scene includes a witch, then put her somewhere in each scene- Stirring a pot, casting a spell, flying on a broom,...It doesn't have to be the exact same witch, just the same character/focal point.) 
 Like a running story board. You can also use a skeleton, a zombie, a vampire, a ghost dog, a bubbling cauldron,  a graveyard, a scary movie poster, a murder scene, bloody mask, bloody knives and so on ... 
The other elements can be whatever you have on hand but all your scenes 
need to have one universal theme. 


Each shadow box must include your name and info on the back along with 2 sturdy magnets.
This is so, when all the boxes have been received, they can be collectively displayed-
 (on any metal surface- fridge, file cabinet, a old cookie sheet, metal door...) 
to look like a Haunted house! 
Cool right? 

To sign up for this swap, you can send me a email or let me know via the  link below.

 Art Charms and Faerie Garden Miniature Swaps

I recommend joining our group so you never miss out  on new swaps or the sharing of creative idea's!

Signups start now and end on 8/22/2020

Head count and shipping details will be emailed 8/25/2020 

All shadow boxes are due no later than 9/25/2020


Please share!

4/16/20

Spring Time in the Garden with Little Birdie Crafts

Hi Everyone, Welcome to my blog! 
This month,the  Designer Crafts Connection has partnered 
with Little Birdie Crafts to inspire you with all sorts of beautiful creations! 
Below you will find my tutorials on a spring time vase and decorated faerie garden accessories. 
Enjoy!


Little Birdie sent me this beautifully presented package!
Isn't t it lovely?


 " Springtime Vase"


This vase is so simple to make! All you need is a clean glass jar, Deco Magic Matte, decoupage paper, a foam brush and scissors! 


  1. Cut the paper to fit the outside of the jar. Cut a fringe on the top and bottom of the paper (as shown).
  2. Apply the Deco Magic to the paper before adhering to the jar. 
  3. Overlap the fringed cuts of paper onto the bottom of the jar as you apply the Deco magic. 
  4. When all is covered including inside jar lip, paint with the varnish and set to cure before tying with a pretty ribbon and filling with flowers! 


I love anything and everything to with faerie gardens, 
so I was excited for a chance to play with some Little Birdie papers! 


" Faerie Garden Chair"


  1. To get the most precise cuts for your faerie garden miniatures, simply place the paper onto the chair, and press along the edges (as shown). This way there is no second guessing and you can see exactly where to cut and glue your papers! 
  2. Using a some blunt tool is helpful in pressing the paper into tight spaces. 
  3. After the chair is covered, be sure to seal it with Decor varnish!


"Faerie Garden Umbrella"


This umbrella was pretty easy to do. I simply cut triangles from the papers and adhered them to the umbrella in sections with the Deco Magic Matte. I trimmed off the excess papers and sealed the top of the umbrella with the Decor varnish. I painted the inside of the umbrella with Deco Magic Gloss and sprinkled it with an assortments of pretty glitter! 


Here is the before and after of the bird house.
 I love how the Little Birdie papers give it a new life! So cheery!


Everything is so perfect for Spring Time in the Garden! 
Thanks for joining me! 
Don't forget to visit the rest of the designers 
and see what everyone is making with Little Birdie Crafts! 


12/25/19

1st Annual Christmas Putz House Swap - Reveal!

 The premise of this swap was to create vintage inspired Putz Houses.
They could not exceed 3"x 4" and had to have glitter somewhere...


There were 5 of us in this swap, so we made 5 (nearly identical)  little houses and swapped them out! 

If you would like to learn more about swap, please join our group here. 


9/26/19

Mexican Folk Art - Miniature Shrine Swap

 You are invited to a Mexican Folk Art- 
Miniature Shrine Swap!


The premise:
Use small 32 ct. matchboxes as the start of your shrine. 
(you can find these in packs of 10 at Walmart for less than $6)

The theme of this swap is "Mexican Folk Art"
This can be Day of the Dead, Frida, Our Lady of Guadalupe, floral, Milagros or other Mexican art!
Use any medium as long as it is durable and artfully made. 

As shown below, each shrine must not exceed 2 ½" x 3" and a depth of a  ½".

Each shrine must also include a wire or string loop somewhere at the top.
This is so it can be displayed on a wall, tree or worn - if desired. 

I have created a board on Pintrest for you to draw inspiration from.

No ATC's are required with this swap, but I ask that you personalize the back of each shrine with your name, date and any other info. 

This is a time sensitive swap. 
Sign ups begin now and close on October 1st, midnight.
All packages are due in my hands no later than Saturday October 26th, 2019. 

To join this swap, please message me by e-mail or  join our Facebook group,

Final head count for this swap will be emailed no later than October 4th. 
Return shipping is determined by participation. 

Feel free to see some of our past swaps here. 

Hope you can join in on the fun!


11/27/17

Felt Candy Cane Holders

These miniature stocking candy cane holders are just the right size to adorn a package or hang on a tree!
Plus its a craft you can easily do with the whole family!
See the full tutorial here! 

12/07/15

Table Top Holiday Decoration!

 Have you ever wanted to give a live plant or mini tree as a gift for the holidays but felt like the selection at the stores were less than great? As long as you keep your basic craft supplies on hand at home or with you when you travel, you'll never run into that problem again!


 I was visiting Family for the weekend and had to run to the store for a few things. I saw this tree with it's plain ornament and thought, hmmmm.....I bet I can pretty that up a bit. 
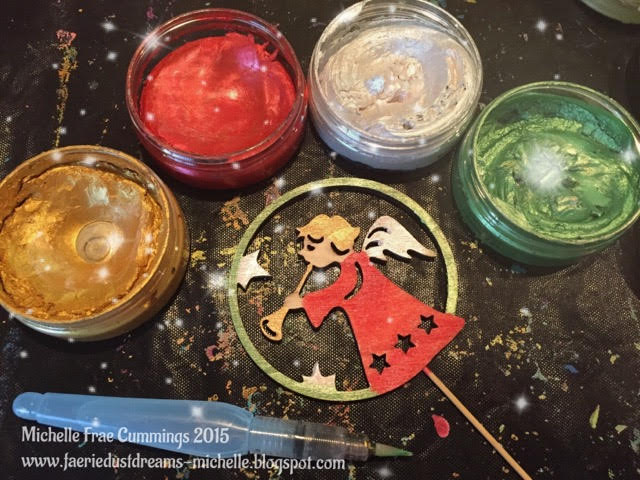
Back at the house, I painted both sides with shimmery paints.

 When they were dry, I added some glittery accents with Tulip Beads in a Bottle.
I have used them once before, you can see those projects here.
I set the decorated ornament outside to cure while I worked on the garland. 
 I used 26 gauge wire, assorted beads and scissors. 
 Wrap the wire around the tree like a garland, then double the wire length.  String a bead onto the wire and secure the end leaving a 1" tail..  Then keep on adding more beads, alternating the colors if possible. 

 Loosely space the beads about 1" apart and twist them and the wire as shown. Continue until you have enough beaded garland for the tree.

Secure the end tail onto a the bottom part of the tree, then loosely wrap the garland around, going up as you wrap. You may have too much garland, if so, snip it off leaving a bit of wire. Attach that bit to the top of the tree. Add the the decorated planter ornament and place for all to see!
Thank you for coming by, comments welcome!
See more Holiday themed crafts here!

LinkWithin

Related Posts Plugin for WordPress, Blogger...