11/05/11

"Thanks Giving" Paper Bag Mini Album

Here is a paper bag mini book I made using product from The Robins Nest.
To see how I made this, please go here.
Have a great weekend!
~ Michelle Frae Cummings

11/02/11

Sizzix Fresh Vintage - Petal Power Flower Die


Welcome! I'm so happy you can be here!
Sizzix recently sent me a new Vintage Fresh Die, Petal Flower Power- designed by Eileen Hull.
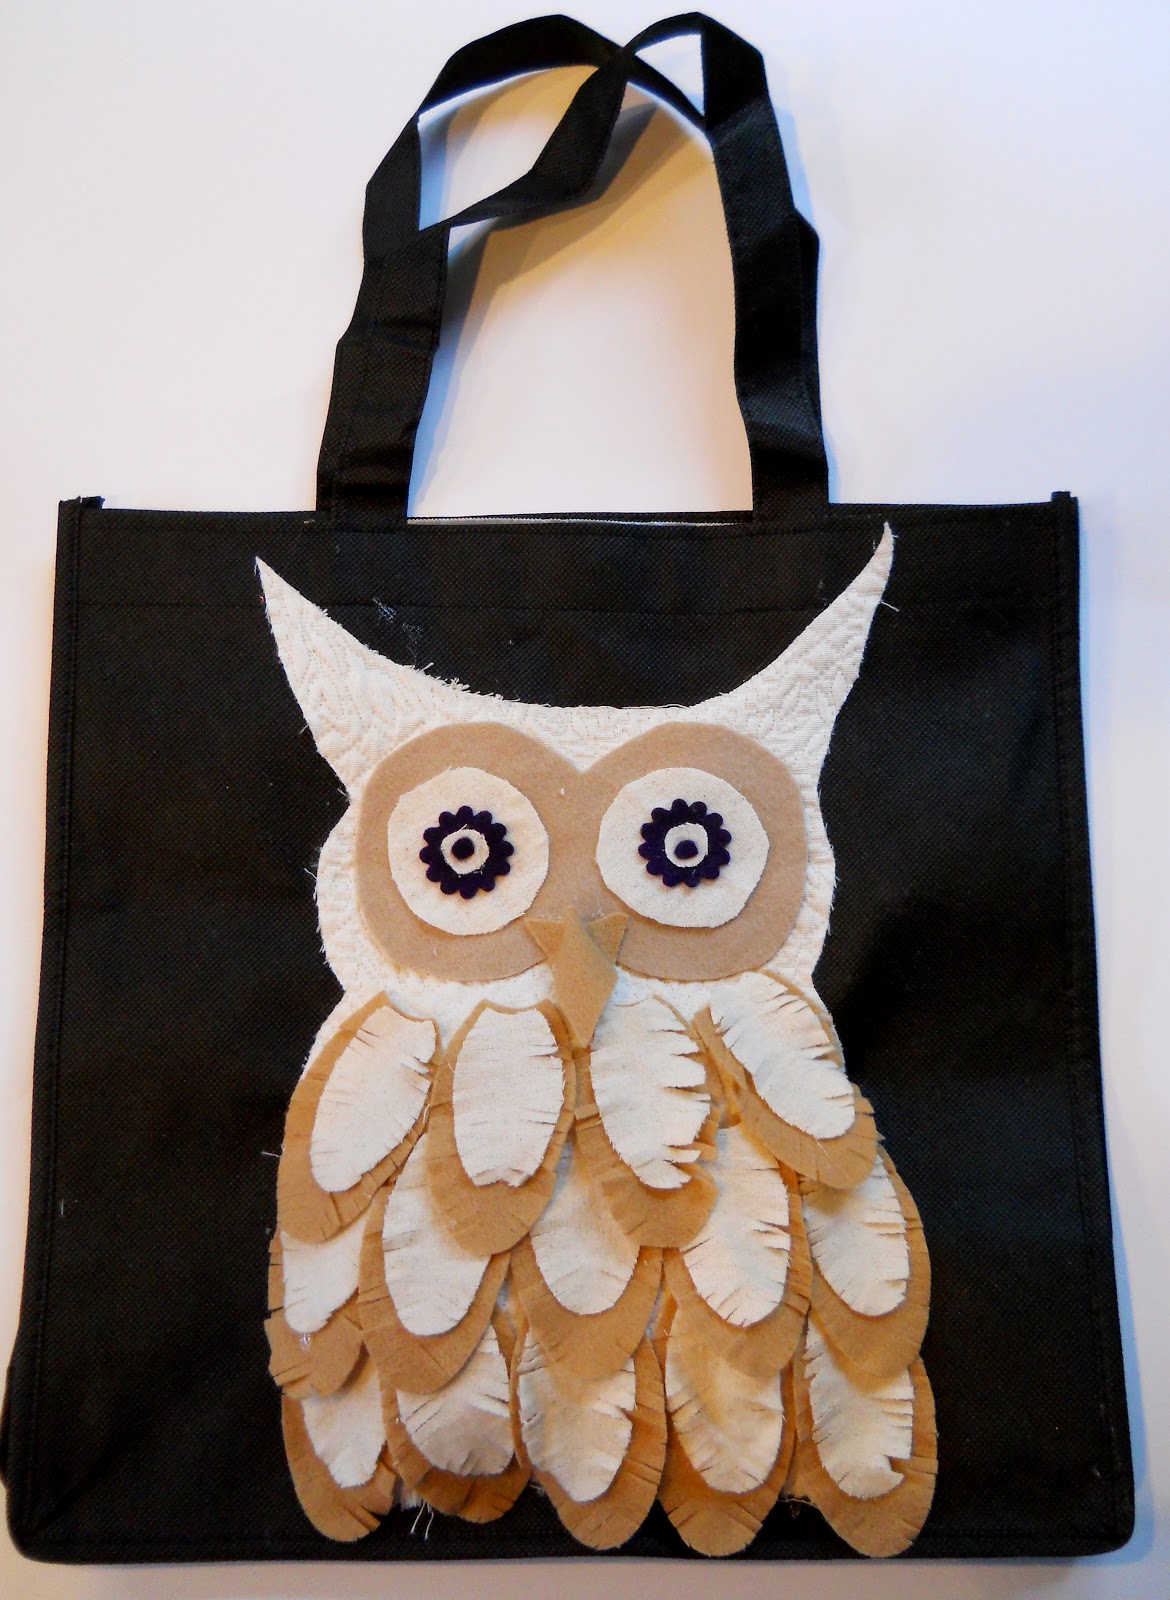
It's the ultimate flower die. Not just because you can make any shape or sized flower you want, but you can also make other things like,Owl. :)
Please besure to click the hop forward button above or at the bottom of this post to see all the projects on this hop!
To make Mr. Owl, I used the following supplies:
Assorted shades of felt and quilted fabric
One blank tote
Fabric glue
Sewing Scissors
Fringe scissors
Wax paper
Cotton stuffing
First cut a basic shape of a owl from your quilted or patterned fabric. Then with your fabric glue, adhere all of the outline of the Owl and face, with the exception of the bottom to the tote. Make sure you have a sheet of wax paper inside the tote in case the glue seeps through. Press the glued sides firm until you are sure the glue has set. Add a bit of the cotton fluff into the bottom, enough to fill out the Owl, but not too much so you can still glue the bottom shut.
Next cut a basic figure eight shape from felt. Trim as needed to fit inside the owls face. Cut larger circles, then use the die to make the scalloped circles and proceed on making the insides of the eye. Glue everything together and add to Owl.

For the feathers, I was able to layer at least 3 rectangles of felt at a time on each petal size. I made 14 small petals and 14 large petals. I used the fringe scissors to create a feathery look. I glued each smaller feather to each larger feather and then adhered to the Owl row by row, starting from the bottom, going up.
The Owls beak was created with a simple triangle of leftover felt. I placed a line of glue on the owl and pinched the beak in place until I was sure the glue had set.
I like how the body of Owl is plump and his feathers look ruffled as if he's ready to take flight!
Be sure to visit the Oh My Crafts blog for a chance to win a Flowers, Layers #9 die!

* * *
Besides being able to work with this fabulous die, I was also fortunate to play with
some Templates from The Crafters Workshop!
To make the collaged journal below, I used the following templates:
Love Beads, & Screen.
The templates -Ava, Summer, Edith & Maude, Herringbone, Chevron, Circles in Square, Triangle,
and Triangle plaid were  designed by Julie Fei-Fan Balzer!
I collaged the book inside and out with  torn bits of scrap paper. I used colored permanent markers with the templates right onto the pages. I accented with doodles, more petals and glitter glue.

I left spaces to add some creative thoughts and dreams.


And for the cover I used the Petal Power Flower die!

So what do you think? Do you like my projects? What would you use this die for? I'm thinking, bunny ears, ruffle for a apron, fall leaves, shingles for a kids playhouse, scales for a dragon or fish costume,...the list is endless! Thanks for coming by, now please take the time to hop along and visit the rest of the creations. :)


11/01/11

The Robins Nest - Design Team Call!

The Robin’s Nest is looking for a few awesome Papercraft Artist that can showcase The Robin’s Nest products!! If you LOVE Paper crafts and lots of bling and use it on layouts, cards & projects then show us what you love to do!! 
We are looking for talented artists who inspire others to create.
What’s expected of a Robin’s Nest Design Team Member?

... * The ability to showcase our products!

* Take good photos or scans of projects

* Interact with our members on facebook and our blog

The Details –

10/30/11

Haunted Halloween House

Happy Halloween!
I'm so happy you could come by to my blog today, as it's a very special day...it's Halloween (my favorite Holiday) and today is the much anticipated blog hop with AMAZING blog candy from The Robins Nest!
If you are already involved in this hop, chances are that you have just hopped from Kristen Keller's blog, so the next one after me is Irit Shalom's blog.

If you are just starting out on my blog,
I recommend you go next to the starting point
They are the generous givers of the blog candy
 you'll see at the end of this post.
I traced my house right onto my selected paper with a pen including the windows and doors and cut out freehand.

I used a precut chip board house for this project.
I covered it with the following Robins Nest product:
Misc. Halloween decorations.
I adheared the inside ghost with two layers of foam tape before putting together the house.

The Robins Nest has granted each designer, (there are 11 of us) to give away one $15 voucher to be spent on their online shop! How cool is that?!
On top of that, one lucky reader will recieve a Grand prize of $50! 

Lastly I added the foam stickers and other fun decorations!
To be entered in both drawings, you must leave a comment
on each of the participating blogs and be a Follower of all of them.  
YOUR comment must also include a valid way of reaching you in case you win.
.
All winners of the $15 voucher and the one Grand prize-a  $50 voucher,
will be posted November 6th on The Robins Nest blog.

Thanks for coming by, I hope you like my Haunted House.
 Good Luck!
~ Michelle Frae Cummings

10/28/11

SteamPunk Pirates and Mermaids!


I'm really happy to a part of this Steam Punk blog hop! I had attended a Steam Punk/Pirate expo a few months back, hosted by Pyrate Daze. Below you will see some photos I took of that day, including a special mermaid appearance!

LinkWithin

Related Posts Plugin for WordPress, Blogger...