10/21/15

Little B LLC Blog Hop!


Several Designer Craft Connection members and I teamed up with a darling company called Little B LLC.
They have everything you can imagine for all your crafting needs! Just look at the stash below! Dies, punches, paper flower kits, dimensional stickers and foil washi tapes!
 
 We were each sent a variety of items to create with. The above stash is for you to win! Over $150. worth of sophisticated and fun products to create with! Details at the bottom of this post.

Butterfly Hair Comb
Peel off the backing of one of the flower strips, wrap a loop of wire at the end. Roll the petal strip, adding more until desired flower size is achieved. Make 2 flowers. Attach them to the end of the comb securing them in place with the wire. Place the leaves on the remaining top of the comb with the glue. Glue the butterfly in place and any other flower stickers.


 Gift Card Holder.
This can be used to hold small notes, gift cards or even ATC's.
The Perfect Positioner is really amazing. The top is sticky to hold your thin dies, emboss dies and paper in place while you run it through your machine. I love the embossed words that come with the die! The colors really pop when I add a bit of inka gold. I used some washi tape to make a 'tab' to pull the card out.


Cupcake Bracelet
I used Cupcakes Mini Dimensional Stickers on a blank charm bracelet!

 Flower Tea Light
Remove the backing from one of the petal strips. Sticky side up- wrap around your finger once. This creates the sizing for the flowers center, space for the flame.
Double back and wrap the petal strip the correct way, adding more until you are happy with the center flower. Next switch up to the larger petals. Finish off with some foil tape around the flowers base and around the tea light.
Light and enjoy.


 Moroccan Tea Light
 Line your paper up to the inside line of the punch to begin. As you press down on the lever, slide the paper to the left and alight with the pattern. This ensures you will get a consistent punched border.
Add double stick tape to the lid and attach your punched design. Add the washi tape, then tea light.


So there are few items you can make with Little B LLC products! You can see more ideas made with Little B LLC on the Designers Crafts Connection blog.

Want to win the stash at the top of this post?

Enter to win using the Rafflecopter feature below. All you have to do is "like" Little B on Facebook and comment on our blogs. The more you comment the more chances you will have to win.  Open to residents of the US and Canada only.


a Rafflecopter giveaway

10/09/15

Halloween Miniature Garden Swap reveal

 So here is the reveal of this years 1st Halloween Miniature Garden swap! 
Everyone did a wonderfully wicked job!
 At the bottom of this post I have a tutorial on how I made my ATC and Zombies.
 Enjoy!
 Zombies by: Michelle Frae Cummings
* * *

 Pumpkin Scarecrow by: Lee Truit
* * *

 Spooky Ghost and Bike by: Wanda Stivison
* * *

 Black Coffin by: Joann Alexander
Joanne also used my ATC stamp! 
You can find that stamp here.
* * *

 Potion Bottle by: Kathleen Ellis
* * *

 Tombstones by Erin Sulivan
* * *

 Creepy Guy and Scorpion by: Shawn Price
* * *

 Coffin by: Robin Rutherford
* * *

 Headhunter by: Mahala Elliot
* * *

 To make the Mummy ATC, you will need the following:
  • Black cardstock cut to 2.5" x 3.5"
  • Assorted sizes of googly eyes
  • Cheese cloth
  • Adhesive
  • Double sided tape
  • Scissors
  • Pencil
Instructions:
  1.  Draw a curved eye shape with a pencil onto each ATC. Fill shape with adhesive and arrange google eyes.
  2. Cover  top and bottom of ATC with double sided tape.
  3. Make sure to add extra tape around the eyes.
  4. Cut strips of cheesecloth to fit width of ATC. Press into place. If you feel the stickiness of the tape through the cloth, add more. Trim off excess cloth when done.
 For my Zombies-
I simply cut a moss sheet into 2"x2" squares.
You can find moss sheets anywhere that sells floral craft supplies.
I honestly don't know where I found the zombies. I've had them for so long!
They are actually finger puppets.
I stuffed them with some cotton balls and super tacky glue. Then adhered them with more super tacky glue. I was afraid a hot glue gun might mess with the moss.
Aren't they frighteningly adorable? 

Want to join our group and be notified of future swaps?
Send me message from here  or visit our FB page!

10/05/15

Dollar Store Eyeball Wreath

 As soon as I saw these eyeballs in the Dollar Tree store, I knew I just had to make a wreath!
I've been wanting to for awhile, so why not?
Total cost? $7

Materials:
  • 3 Packages of eyeballs - 12ct each.
  • 1 Creepy cloth- 30"x 72" - it's more than enough.
  • 12" Floral wire wreath- $3 from a general craft store.
  • Hot Glue
  • Wire to hang.
Instructions:
  • Wrap the creepy cloth around the wreath.
  • Use the wire to secure the ends of the cloth to the wreath, weaving in and out of the cloth. Leave a loop of wire to hang.
  • Hot glue the eyeballs to the wreath. Add as much or as little as you want.
  • Hang for all to enjoy.
  • *Bonus-  The eyeballs 'jiggle' with the opening and closing of any door!
Do you love this and want to see more Halloween craft inspiration?
Visit the Designer Crafts blog!

9/24/15

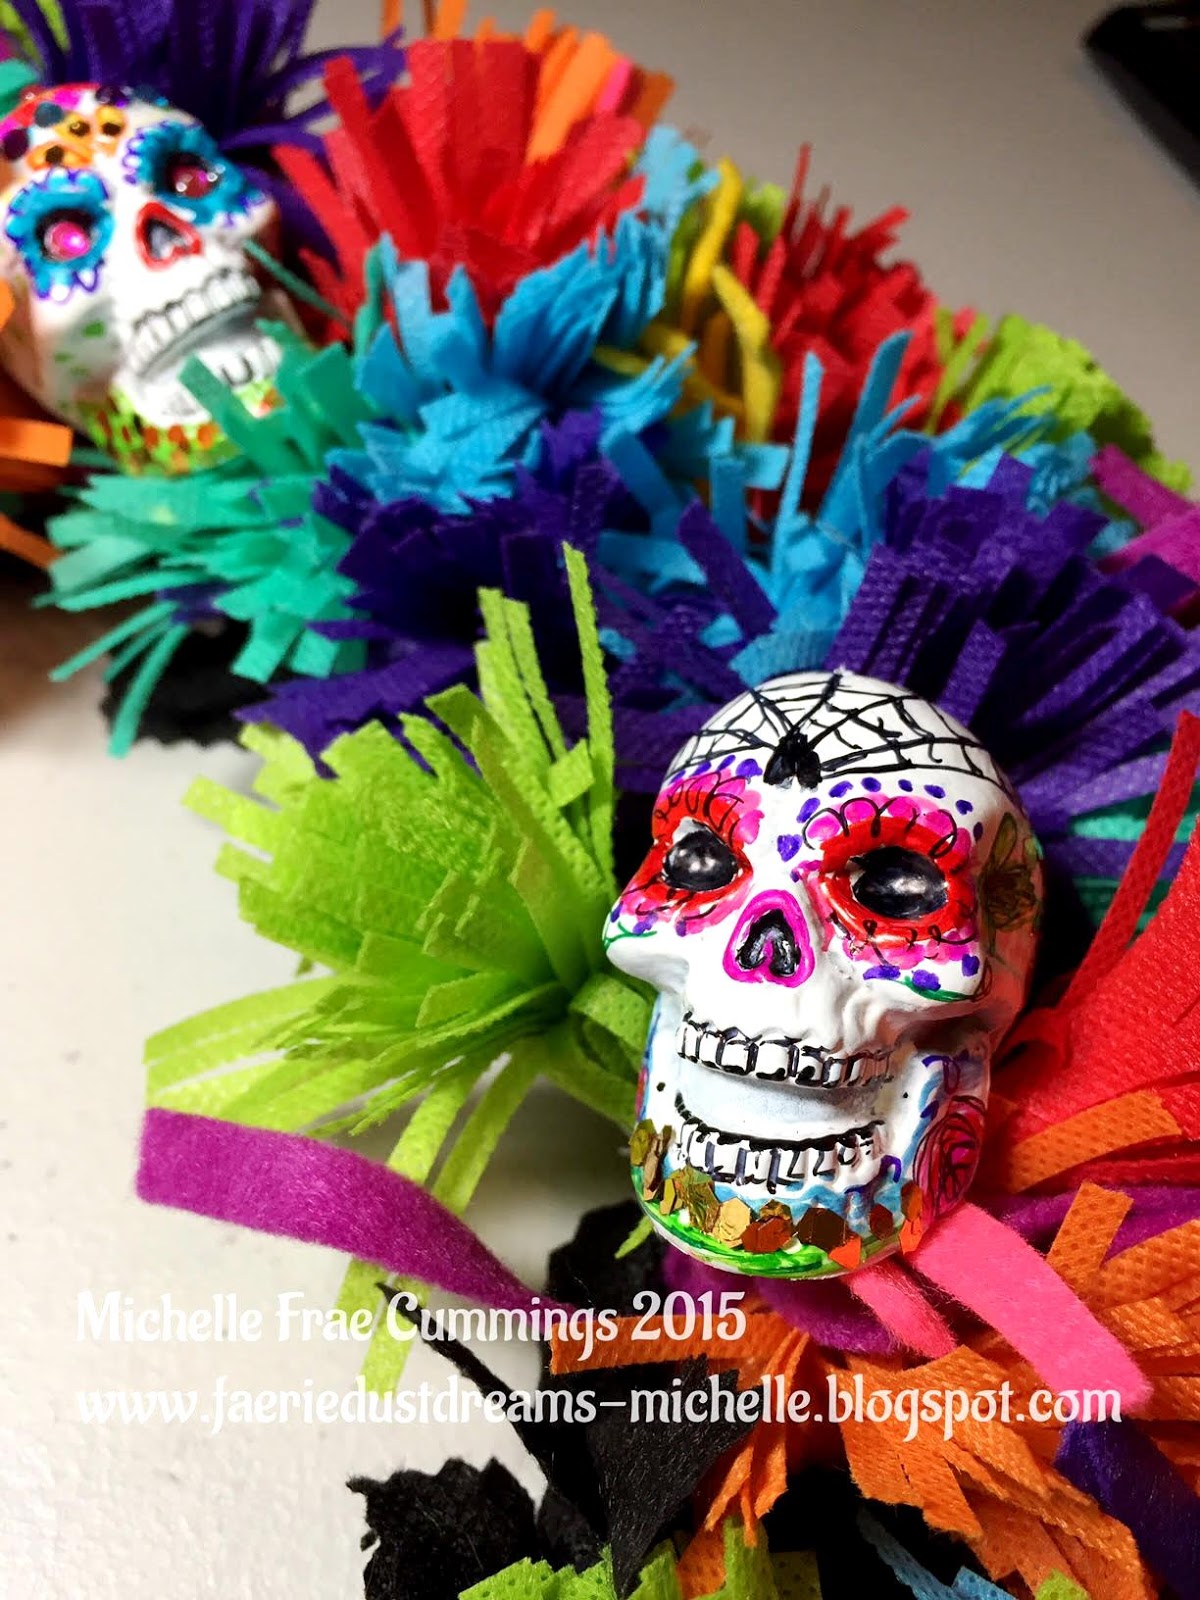
How to make a Sugar Skull - Day of the Dead Wreath!

 Its no surprise to anyone that I love all things to do with Mexican folklore,
especially Day of the Dead! 
I love the vibrant colors, rich history and stories!
I grew up eating the foods and visiting the museums.
In honor of Día de Muertos  I am showing you how to make a easy, new sew wreath with a little help from Fairfield World , the makers of  Olyfun!


To make this wreath, you will need the following:
  1. Assorted Olyfun colors.
  2. Felt strips.
  3. 12" Wire wreath.
  4. Gloves
  5. 22 Gauge wire
  6. Jewelry pliers
  7. Fringe, pinking and regular scissors.
  8. 1 " Halloween skulls
  9. White spray paint
  10. Fine and standard tip-colored permanent markers.
  11. Embellishments and adhesive.


  •  Trim your Olyfun to 3"x12". Plan on making 10 flowers each of at least 6 colors. 
  • Cut a fringe half way into each strip.
  • Roll up the fringed strip, then leave a 4" tail of the wire and wrap tightly around as shown. Let out about 4" of wire and keep wrapping. Repeating as you go.

  •  Trim the wire so each flower has the 4" tail. Twist the ends.

  • Keep going until you have wrapped all the colors.

 
  •  Starting with the darkest color, push the flower into the wreath and wrap the wire in and out of the frame until secure. Use the gloves to keep the wire ends from scratching you.
  •  Stagger the colors at first, then group them as a collection. Fill in empty spaces with extra flowers.
  • Don't worry if your wire is exposed.

  • When you are done adding all the flowers, make up some filler with 5" strips of colorful felt.
  • Fold in half and twist with about 4" of wire.
  • Work these into the wreath.
  • Use your pinking shears to trim plenty of ½" x 5" black strips of Olyfun. Tie these anywhere there is a open space or wire is exposed.
  •  Spray paint the skulls white.
  • When dry and the paint is not tacky, color the skulls with your markers. 
  • Then add glitter and tiny rhinestones.
  •  Find inspiration to color your sugar skulls online or here.


  •  Attach sugar skulls to your wreath with wire or a hot glue gun.

  •  Add a loop of wire onto the back of your wreath and hang for all to enjoy!

Please visit the rest of the designers for more Olyfun inspiration here!

8/27/15

Deflecto Blog Hop and Giveaway

Deflecto was kind enough to provide myself and other designers with a cube organizer and acrylic frame so we can show you that these supplies but can be used for so much more than office use.

I have been wanting to try a broken CD craft for a while. The black border of the frame was the perfect inspiration!

Materials used:
  1. One 5"x7" acrylic frame by Deflecto 
  2. Assorted CD's
  3. Sharp heavy duty scissors.
  4. A soft washcloth.
  5. Protected surface and bowl. 
  6. Aleena's fast grab tacky glue.
  7. Paper plate and q-tip.
1. Use the washcloth to firmly grasp the CD while cutting. This also eliminates  fingerprints and  any sharp edges. Cut the CD into mosaic shaped pieces.

2. The CD with start to separate while cutting. This is fine. Sort the pieces, careful not to touch the metallic shapes with your fingers, you don't want fingerprints.

CD pieces intact.                                            ... Top transparent layer                              ...Bottom metallic layer.
 3.  Place some glue onto the paper plate and use the q-tip to apply glue to the backside of the mosaic shapes. Arrange in place on the black border of the frame, one-by-one.  If you accidentally get glue where you were not intending to- use a wet napkin immediately to remove the adhesive before it dries.

4.  Fill in as much space with the larger pieces then carefully trim the shapes to fit the smaller spaces. Be precise when trimming at the individual metallic layer of the CD is extremely brittle and breaks off easily.

 5.   The end result is fantastic! 
 6.  The way the light hits the CD fragments...never the same gleam of color! So magical!


 Here I have decorated a 8 1/2"x2" Deflecto nameplate. I made my name graphic with a Free sign creator here.

I decorated the front drawers of the cube to reveal what is stored inside. Now I have my extra embellishments for ready to go decorating!
 I hope you were inspired by what I made. If you'd like to make your own decorative frame and cube, Deflecto is offering an incredible giveaway!
All you have to do to win your own cube organizer and frame is comment on as many designer blogs as you can, "like" the Deflecto Facebook page then enter using the Rafflecopter widget that is on the DCC blog @ www.designercraftsconnection.blogspot.com

Good Luck, I hope you find lots of inspiration!

LinkWithin

Related Posts Plugin for WordPress, Blogger...