10/01/19

Glow in the Dark Halloween Decor

Get a head start on Halloween with easy to make Halloween decor!


You will need:

Joy® embroidered letters -  (1 1/2" Script) **


A black Halloween felt place mat. **
White acrylic paint **
Glow in the dark paint **
Paint brushes **
Iron

Items with a ** next to them were found at Michael's Craft Stores.


Instructions:

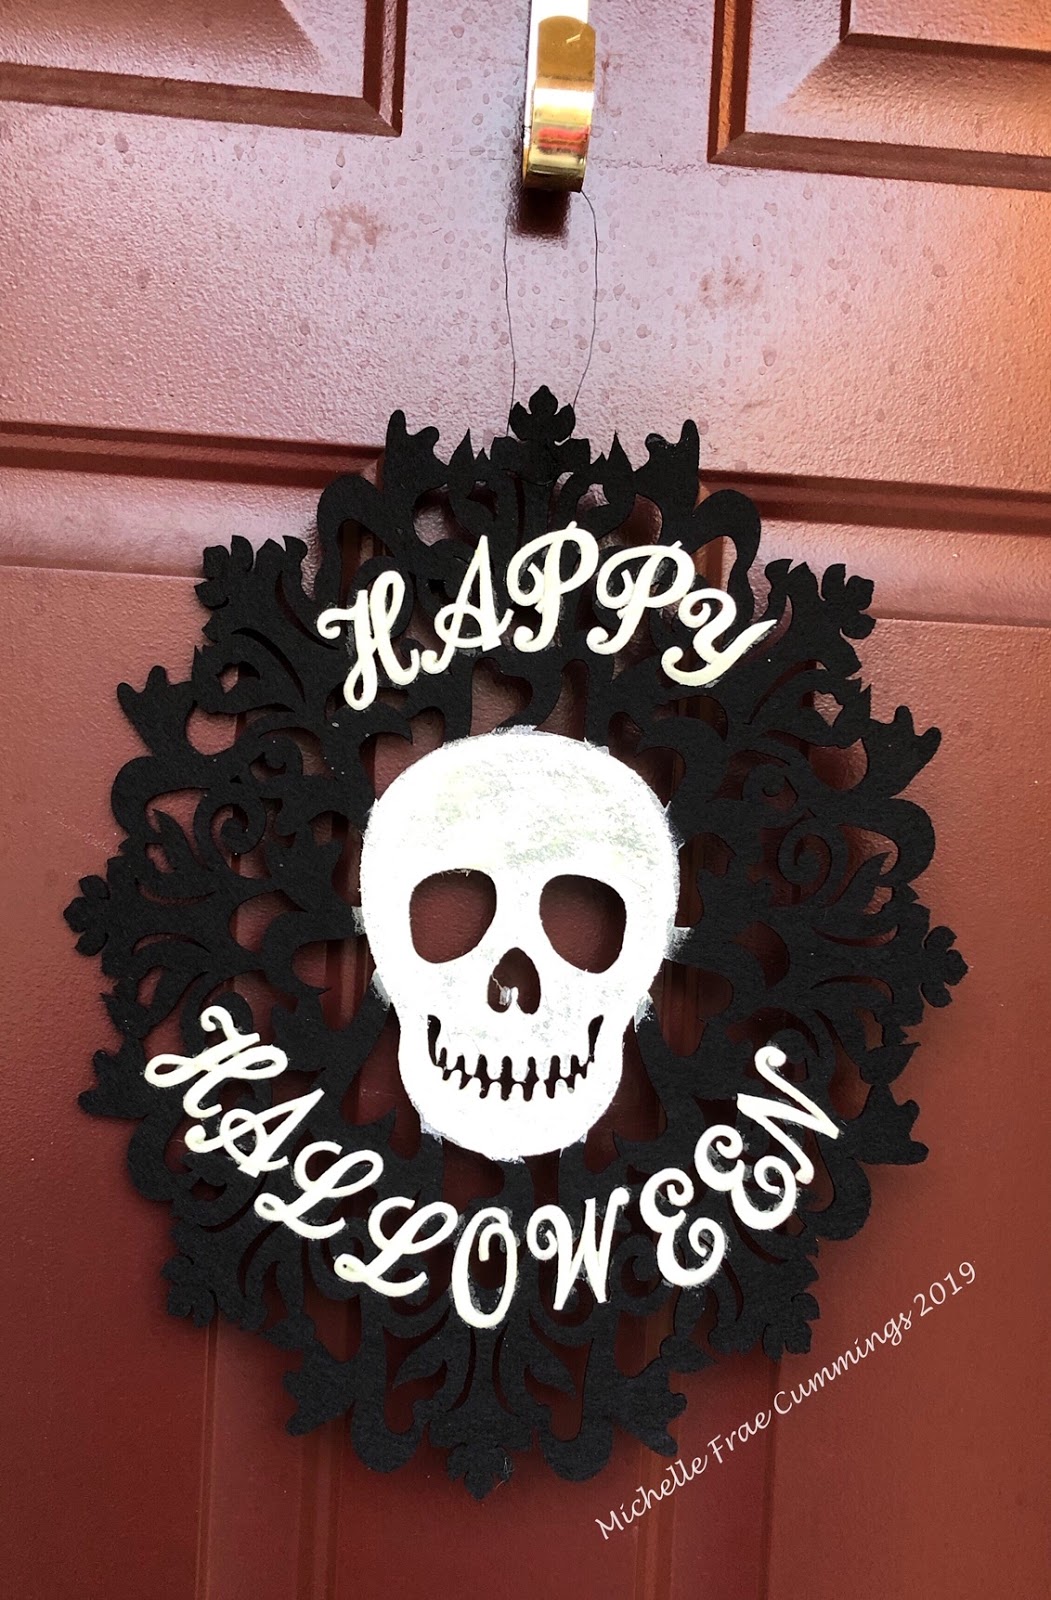
1. Begin by painting the center design of the felt place mat with white paint. Apply the paint  at least 3 times, letting it dry in between each coat.


2. Use an iron to heat set the letters per the instructions on the package.

3. Paint the letters carefully with the glow in the dark paint. 
2-3 coats of paint should do the trick.
4. Next paint your center design with multiple coats of glow in the dark paint, letting it dry in between coats. 
5. Attach a wire to the top and place under a bright lamp to activate the "glow". 
 Then turn out the lights for a 'spooky' good time! 
Happy Halloween!

See more Joy® embroidered creations here


Joy® embroidered script, monogram letters are available in different sizes in white or black. White letters can be colored to coordinate with any décor. 

9/26/19

Mexican Folk Art - Miniature Shrine Swap

 You are invited to a Mexican Folk Art- 
Miniature Shrine Swap!


The premise:
Use small 32 ct. matchboxes as the start of your shrine. 
(you can find these in packs of 10 at Walmart for less than $6)

The theme of this swap is "Mexican Folk Art"
This can be Day of the Dead, Frida, Our Lady of Guadalupe, floral, Milagros or other Mexican art!
Use any medium as long as it is durable and artfully made. 

As shown below, each shrine must not exceed 2 ½" x 3" and a depth of a  ½".

Each shrine must also include a wire or string loop somewhere at the top.
This is so it can be displayed on a wall, tree or worn - if desired. 

I have created a board on Pintrest for you to draw inspiration from.

No ATC's are required with this swap, but I ask that you personalize the back of each shrine with your name, date and any other info. 

This is a time sensitive swap. 
Sign ups begin now and close on October 1st, midnight.
All packages are due in my hands no later than Saturday October 26th, 2019. 

To join this swap, please message me by e-mail or  join our Facebook group,

Final head count for this swap will be emailed no later than October 4th. 
Return shipping is determined by participation. 

Feel free to see some of our past swaps here. 

Hope you can join in on the fun!


9/25/19

Halloween Party Favors

With Halloween being my all time favorite holiday, I couldn't pass up the chance to make these oh so  spooky party favors! They are easy to make up and fun to fill.
I'll be making these to give to the kids in my neighborhood all through October, as a early Halloween treat!

To make party favors like these, you will need the following:


3. Halloween party fillers
4. Washi tape
5. Strong double stick tape
6. Stapler
7. Scissors
8. Crepe paper
9. Colored paper
10. Black ink for stamping
11. Assorted markers and glitter gel pens


For the party favors with pencils in them, I cut my paper to be 6 ½" x 11".
The smaller treat tubes measured to be 5" x 6 ½"
Use the black ink to randomly stamp all over the papers.


Have a little fun coloring in your stamped images!


To make the tube, tightly roll your paper first, to get its shape. Add a strip of double stick tape along one side and press the rolled end into the tape.


Gently press down one end of your tube and insert some crepe paper. Staple this shut. 
Add some washi tape to this end, covering the staples. Use your scissors to cut slits in the crepe paper to make a 'fringe'. 

Fill your tube with Halloween toys or candy. 
Turn the tube and close the opposite end as you did before. 


You can also fill these with money, gift cards, and other fun things! 
Happy Halloween!
~Michelle

For more creative idea's, visit us here:
The Blank Page Muse- https://blankpagemuse.com/

9/14/19

Day of the Dead Artist Trading Cards

When I was invited to participate in a Halloween  swap, 
I couldn't resist in making up some sugar skull charms and matching ATC's! 
I really love how these came out and hope you will too!


 Supplies:
Day of the Dead Sugar Skulls
Black cardstock cut down to 2½ x 3½
White pigment ink for stamping
Shimmer gel pens

See the full tutorial here!

8/31/19

Rubber Stamp Storage Idea

For those of you wondering on how I store my rubber stamps, - I use photo starage boxes!
So cool right?


 You can get them in clear or rainbow as I have here. 
You can find these at most craft supply stores. 

Dandelion Burst
One box contains the rubber stamps and the same color box holds the stamped design, ready to color, embellish and cut out!

Nothing but Owls
Its so nice to just grab a box, some markers and color what I need.

See the rest of this post here.


LinkWithin

Related Posts Plugin for WordPress, Blogger...