Showing posts with label Petaloo. Show all posts

8/22/17

Flaming Day of the Dead Shrine Card

I really love all things to do with Mexican folk art and Rinea Paper Foil!
The combination is just so perfect!
For this ATC, I used the following:
Ruby/Gold Glossy Foiled Paper
Petaloo Flowers
Day of the Dead Sugar Skulls stamp by Sin City Stamps
Tacky glue, foam tape, white cardstock,  scissors, colored markers, rhinestones.
  1. Stamp your skull onto a piece of white cardstock and color in with the markers and cut out.
  2. Trim 2 pieces of foil and one piece of cardstock to be 2 ½" x 3 ½" .
  3. Adhere one foil piece onto the cardstock, gold side up.
  4. Cut and attach flower pieces as shown to the gold foil.
  5. Adhere the skull to the red foil. Cut flame shapes around the skull, removing in between pieces with your fingers or tweezers.
  6. Adhere the flaming skull to the ATC with 2 layers of foam tape.
Please visit the Rinea blog for more inspiration!

8/07/17

How to make a Faux Blooming Cactus with Foil!


When I saw how beautiful and rich the Emerald/Gold Glossy Foiled Paper was, I just 'knew' I needed to make a cactus of some sort.

Supplies:


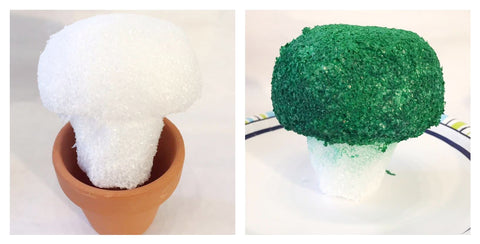
1. Carefully carve your cube into a mushroom like shape with a knife over a trash can. It will get messy!
2. Roll the top part of the carved piece onto a hard surface. This will 'round' out the edges and make them smoother.
3. Place you carved piece on a paper plate and spritz until it is evenly coated. Place this outside in a sunny spot to dry.

4. While your piece is drying, you can start to texturize the foil. To do this, place your foil green side down onto a foam mat or the underside of a mouse pad. For the 'tool', I cut a small rectangle from clear plastic. Can you see it in the top left photo? I made quick indentations going one way, then rotated the foil and made more indentations, criss-crossing until I had 'spine-like' designs.

5. Next I cut about (15)  1" x 4" strips of the foil with a few to spare.
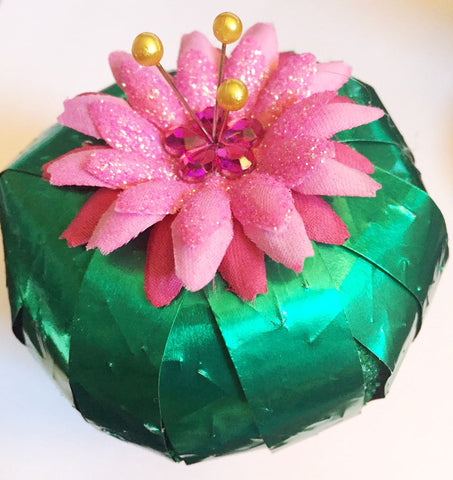
6. As shown in the photo above, I pinned them in place, leaving the center open. Then I flipped it over and pinned the rest of the strips at the base of the cactus. I added more strips as needed to fill any gaps.

7.  I assembled the flowers, securing them at the top of the cactus with the decorative pins.

I love the color contrast, just like a real blooming cactus but with out any prickly fuss!

Please visit  Rinea Inspires for more foil idea's!

LinkWithin

Related Posts Plugin for WordPress, Blogger...