12/25/15

Christmas Charm and ATC Swap Reveal!

 Here is the reveal for the Christmas Charm and ATC swap!
Everyone did a wonderful job creating magical and festive jewelry!
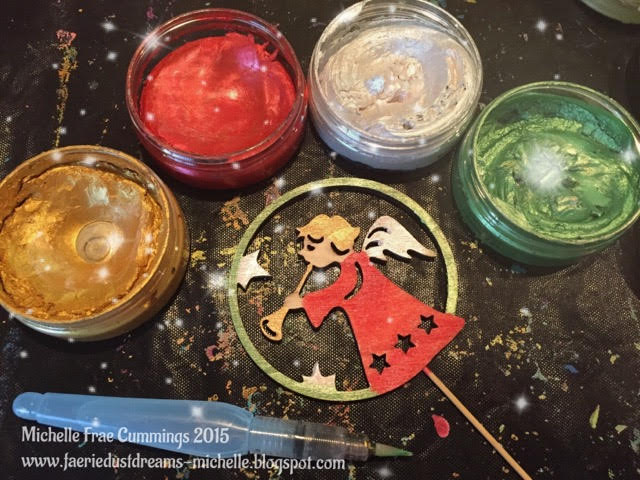
I made the (above) vintage inspired bulb wreath necklace! I colored faux pearl beads with inka-golds and glued them onto a sturdy back ground to create the wreath!
 Shelia created this colorful Christmas tree dangle bracelet.

 Christina made this sweet angel necklace.
Sarah made us this whimsical vintage inspired pink Christmas tree!
PJ put together these fun Snowman earrings
Maria made this simple but classy jingle bell bangle
 Ashani always amazes us with her wire work skills. This is just beautiful and unique!
Glenda created this sophisticated snowman pendant
Shawn made this sweet vintage pendant!

See past Charm and ATC swaps here.
If you are interested in joining future swaps, we also do Faerie garden swaps too!

Message me the following:
Your name
Mailing address
Your Birthdate/year
Any links....Blog, twitter, pintrest, instagram, FB, website, shop....
A little about yourself and the style of crafting you like to do.

You will be sent a confirmation and added to a "master" email list for future Charm or Faerie Garden swaps. 

People on the email list get first signs up for a swap before the announced to other social media sites.
Swaps can be 10-20 participants.
They must include a coordinating ATC.
They must be nicely packaged and shipped no later than the post marked date. 

12/10/15

83 Front Door Holiday Decoration Idea's

Last year the neighbors really decorated their front doors...so much inspiration!
Which one is your favorite?


12/07/15

Table Top Holiday Decoration!

 Have you ever wanted to give a live plant or mini tree as a gift for the holidays but felt like the selection at the stores were less than great? As long as you keep your basic craft supplies on hand at home or with you when you travel, you'll never run into that problem again!


 I was visiting Family for the weekend and had to run to the store for a few things. I saw this tree with it's plain ornament and thought, hmmmm.....I bet I can pretty that up a bit. 
Back at the house, I painted both sides with shimmery paints.

 When they were dry, I added some glittery accents with Tulip Beads in a Bottle.
I have used them once before, you can see those projects here.
I set the decorated ornament outside to cure while I worked on the garland. 
 I used 26 gauge wire, assorted beads and scissors. 
 Wrap the wire around the tree like a garland, then double the wire length.  String a bead onto the wire and secure the end leaving a 1" tail..  Then keep on adding more beads, alternating the colors if possible. 

 Loosely space the beads about 1" apart and twist them and the wire as shown. Continue until you have enough beaded garland for the tree.

Secure the end tail onto a the bottom part of the tree, then loosely wrap the garland around, going up as you wrap. You may have too much garland, if so, snip it off leaving a bit of wire. Attach that bit to the top of the tree. Add the the decorated planter ornament and place for all to see!
Thank you for coming by, comments welcome!
See more Holiday themed crafts here!

12/03/15

Tissue Paper Ornaments

Looking for a great way to make professional looking ornaments with just a few craft items?
Visit my post here to see how I made these! :)

11/30/15

11/02/15

Handmade Owl Gift Cards


The theme this month is "Handmade Gifts".
What better gift than a Owl gift card set?
Materials used:
  1. These Owl Rubber Stamps.
  2. Colorful paper. I used Gelli-printed paper scraps.
  3. Black ink.
  4. Zig glue pen.
  5. Colorful foil transfer sheets
  6. Scissors
  7. Foam tape
  8. Glitter gel pens
  9. Blank cards.

 Stamp your owls onto your colored paper.

 Decide where you want your foil to be, then apply your glue pen.
It goes on blue and dries to a tacky finish when clear.
You want your glue to be clear and tacky for the foil.
 Your foil will be shiny on one side and matte on the other.
 Place the foil matte side down onto your tacky glue.
Press down gently with your finger onto all the glue areas. Then peel the foil away rather quickly.
If the foil did not stick to a certain spot, add more glue.
 Alternate with different foils.

Re-use the foil sheets until they are void of color and all sticky areas on the owls are covered.


 Use foam to adhere your owls to the cards. Embellish with the gel pens.
The two flowers you see above are from this stamp set.

 I prefer to leave the cards sentiment free so people can write their own.


 The owl above is accompanied by this Medallion stamp.

Bundle all the cards together with a pretty ribbon or yarn.
 Great gifts for teachers, family and friends.
Thanks for coming by!
See more gift giving idea's here.

10/28/15

Halloween Steampunk Blog Hop


Welcome to another year of Halloween and Steampunk fun! 
All hosted by Leslie Rahye! 
This is my 4th year participating in this hop.
Here is a little re-cap- 

 October 2012, I created these Steampunk Spiders.

 October 2013, I created this Steampunk Skull Pendant.

October 2014, I put together this Steampunk Book of Spells.
 
 
This year, I have created this Spectacular Steampunk Pocket Watch pendant! 

Materials:
  • Open pocket watch. Real or fake. Can be found at antique flea markets or craft stores.
  • Chain.
  • Assorted sized watch gears. The small gears are the real deal, collected from broken watches and such, the other gears are from the craft store.
  • Halloween and Steampunk findings. Always have more than you plan to use.
  • Mini Dew Drops.
  • Mod Podge Dimensional Magic-  Dries hard and clear.
  • Inka Gold in green, orange, purple and red.
  • Wink of Stella Glitter brush.
  • Fine and chunky glitter.
 Fill your pocket watch half way with the Mod Podge. 
Then start laying down your embellishments. 
Create layers of your items. 
 Secure larger pieces onto the rim of the watch with the Mod Podge.


Fill in spaces, adding more Mod Podge as needed, add embellishments, findings and glitter.
Let set completely overnight.
In the morning, add more Mod Podge and small gears. One of the watch hands didn't work for me, so I used pliers to cut it off. After this has had a chance to set, you may now color it using the Inka Gold and a small paintbrush/water. Finish with the Glitter Brush. 

Thanks for coming by, I hope you liked my tutorial. 
My giveaway for this hop is a jumble of Halloween and Steampunk embellishments for you to play with.
 International welcome
. Leave a comment here (no later than Nov. 6,2015) for a chance to win!
For more idea's , feel free to follow me on Pintrest , FB/BlogFB/Charms and Garden Miniature swaps.
Now on to more Halloween Steampunk Inspiration!
Happy Halloween!

LinkWithin

Related Posts Plugin for WordPress, Blogger...