Showing posts with label Home Decor. Show all posts

3/18/25

Hanging Kitchen Towel

 With a little bit of sewing, a few patches and some cheery buttons, 
you can make a pot holder with hanging kitchen towel.
This is one of those projects that is so clever yet probably the most useful item in your kitchen!


1/06/23

Valentine Garland

With Valentines Day just around the corner, you can easily jazz up a store bought (or handmade) garland with Gwen Studios Ribbons! 


4/22/20

How to make a Reading Pillow


Snuggle up with a good book and Joy® Iron-on Embroidered letters.


You will need:

  • Joy® Embroidered Dye-able Letters 
  • T-shirts (Large to XXL) in prints with coordinating solids
  • A Toss Pillow
  • Scissors
  • Measuring tape
  • Steam Iron
  • Pressing cloth
  • Colored markers
  • Sewing machine 


To determine the size of fabric you need, first measure the size of your pillow with a fabric tape.  My pillow is 16″ x 16″. 
Double that and add 5" (length) , plus 1" (width)
My total patterned fabric measured 17" x  37"

Sew a ½" seam at both ends of the fabric.
Measure and cut fabric to make your pillow pocket.
Mine measured 9" x 12".
Sew a ½" seam along the sides and bottom. 

Arrange your letter assortment onto the pocket.  


Before ironing, color in your letters first with the markers. 


 Use a pressing cloth to heat set the colors and permanently affix them to the fabric. 


Place fabric, pattern side up and fold to the measurements of your pillow, turn over and sew the pocket onto the front, then turn the fabric, pattern/pocket side in
 and sew a ½" seam on the sides.
 Turn your pillow cover right side out, pushing corners out.
Stuff with your pillow and place a book or two in the pillow pocket! 


Happy reading!


You can find Joy® Iron-on Letters at your local craft store and online.

See more idea's here! 


7/12/19

Altered Thrift Store Photo Cube

Personalize a photo cube with Joy® Embroidered Monograms!


In preparation of my Father-in-law's 80th Birthday, I wanted to give him something a little more personable. So I went to my local thrift store and looked around for something to 'alter'. 
When I saw the plain wooden photo cube, I new I had found just the right thing!
The letters below are his initials and they fit perfectly inside the cube! 
Read on for the tutorial.


You will need:

  • Joy® iron-on Left, Right & Center Embroidered Monograms
  • A photo cube
  • Scrapbook paper
  • Glitters and other embellishments
  • Scissors
  • Quick drying adhesive and diamond glaze.


Instructions:

  1. Cut a circle from the scrapbook paper that will fit inside your cube. 
  2. Adhere the monogram letters in place.
  3. Coat the inside of the cube with the diamond glaze and add your glitters and such. 
  4. While the glaze is still tacky, drop in your circle with letters.
  5. Paint over the letters with the glaze.
  6. Measure and cut the same scrapbook paper and adhere to the edges and outside of the cube. 
  7. Seal the paper with glaze.  


You can find Joy® embroidered, iron-on letters, letter sheets and appliqués at your local craft stores.


Visit the Creating with Joy blog for more inspiration!

7/01/19

Painted Beach Sign


 Here's a easy project to get you in the mood for a day at the beach! 


You will need:


  • Joy® Iron-on embroidered white, dyeable letters
  • A wooden sign
  • Rope
  • A large starfish
  • Acrylic pain in white, brown, blues and blue-greens.
  • Assorted dry brushes
  • Hot glue gun


  • See the full tutorial here!

    7/26/18

    This Way to The Beach Sign

    I don't know about you, but I love the beach! I'm fortunate to live close enough to visit often. The shells and sea glass used in this project are from my many walks along the shore. 
    Enjoy!


    Supplies:
    1. Joy® iron-on letters.
    2. Thin canvas panel or thick cardboard.
    3. White gesso.
    4. Acrylic paint in blues and light browns.
    5. Foam brush and dry bristle brush.
    6. Pencil, scissors, hot glue gun and heavy duty hole punch.
    7. White twine and wire for wrapping.
    8. Assorted sea shells and sea glass.
    9. Large bleached starfish.


    See the full tutorial here!

    3/08/18

    Foiled Paper Desert Scene

    Hi Michelle here to show you how you can make a tranquil desert scene with foiled papers!
    Supplies used:
    1. Blush/Glossy Gold Foiled Paper
    2. Emerald/Emerald Starstruck Foiled Paper
    3. Gold/Gold Glossy Foiled Paper
    4. Fushia/Fushia Starstruck Foiled Paper
    5. Marigold/ Gold Glossy Foiled Paper
    6. Jade/Jade StarStruck Foiled Paper
    7. Copper/Gold Glossy Foiled Paper
    8. 12x12 Chipboard
    9. Tracing paper
    10. Pencil and scissors
    11. Watercolors
    12. Coarse sand paper
    13. Quick drying adhesive
    Start by drawing a desert scene onto your chipboard. Make sure to a have a focal point- your cactus and a background such as the hills and mountains.
    Trace the cactus onto the tracing paper and cut out.
    Paint your background with the watercolors.
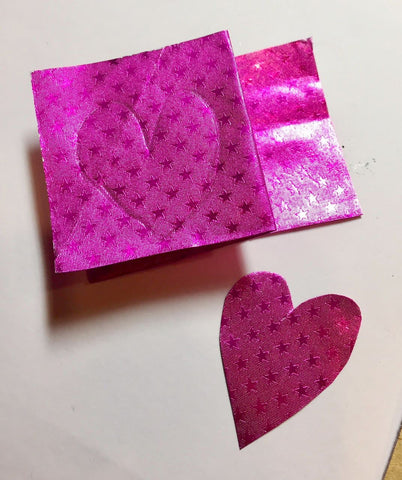
    Fold a strip of the Fushia Starstruck into 3 squares. Use the pencil to freehand draw a simple heart. Cut through all 3 layers. Do this again, but slightly smaller for other blooms.Glue your hearts in place as shown.
    Use your tracing as a template for the main cactus. Trace the entire cactus onto the Emerald Starstruck as a whole, then just the torso 2-3 times and cut out. Fold torso pieces in half length wise.
    Distress the foiled paper with the sandpaper, starting in the center and out at a angle.
    Glue the folded pieces to each other, then to the main shape of the cactus.
    Crumple your Marigold, Blush, Gold and Copper foiled papers.
    Cut them into strips, then small triangles and squares. These are your desert rocks. Glue in place around the cactus and down the hills.
    For the spines, Cut a strip of gold foiled paper and fold it in half. Then cut up little strips.
    Dot the cactus with glue and leave to set up a bit, then attach the spines.
    Add more desert stones, scatter some and feel free to mix up the colors.
    Add more Fushia hearts if you want your flowers fuller. 
    Sit back and enjoy your beautiful desert scene!


    See more Rinea Foiled Paper inspiration here!

    1/22/18

    Foiled Paper Embossed Frame

    Here's another idea of what you can do with your scraps of Rinea Foiled Paper!
    This idea is similar to the address book I up-cycled.
    Supplies used:
    1. Rinea Foiled Paper of your choice. I used a variety Glossy Foiled Paper. Basically  embossed scraps from leftover projects.
    See the entire project here!

    10/12/17

    Halloween Spell Book Covers


     Since Halloween is my favorite time of the year, I'm always looking for ways to re-purpose what I have in order to create some spooky new decor!

    This is a simple enough tutorial you can make with a few supplies found around the house and at your local craft store!


    What I used....
    • Joy embroidered iron-on letters in various fonts. (found at Michael's and Hobby Lobby)
    • Kunin Black wool felt (found at Walmart, JoAnns, Hobby Lobby...see more here.
    • Scissors
    • Sewing needle and black thread
    • Orange permanent marker 
    • Googly eyes or other Halloween embellishments.
    • Fabric adhesive (I used fabric Fuse e6000)
    • Books of varies sizes. Can be paper or hardbacks.
    • White and brown acrylic paint 
    • A dry brush- no water.
    You can view the full tutorial here.


    8/25/17

    Personalized Family Sign


     The nice thing about this sign is that it can be made for any occasion from Wedding, Anniversary, Birth to even the start of something new! Its quick and easy, takes a total of 15 minutes!
    Enjoy!


     Supplies needed:
    • Joy embroidered iron-on numbers and letters
    • Chalkboard sign
    • White chalkboard marker or paint pen.
    • Clear drying adhesive
    • Pencil


    Center your large monogram letter and glue into place.
    Lightly sketch vines around the letter.
    Fill in the design with the pen.
    Arrange the rest of the letters and numbers at the bottom, secure with the adhesive.
    Use the pen to accent the sign as desired.

    I added 3 heart to signify the 3 of us in our  family :)

    LinkWithin

    Related Posts Plugin for WordPress, Blogger...