Showing posts with label Mexican Folk Art. Show all posts

2/02/25

From my Heart to yours

 I'm proud to announce that I have my own ART available in a gallery this month! 


Its a tin piece called, "From my Heart to yours".  
Measures 12 x 12
You can see it in the  LagunaART.com gallery.
555 Shops at Mission Viejo, CA 92691
(in between Nordstrom's and The Apple Store)


Follow me on Instagram for more ART show updates! 

10/31/24

Day of the Dead Crafts/ Dia De Los Muertos

 The Day of the Dead — El Día de Muertos in Spanish — is celebrated on Nov. 1 and Nov 2. The Mexican holiday celebrates loved ones who have passed on by welcoming back the souls of deceased friends and relatives with their favorite drinks, food, music and more. 

Below you will find some of my favorite creations I have made using my rubber stamp designs!

Stamps used: 

Day of the Dead Sugar Skulls

Assorted Flowers, Flourishes, Mustache and line art

See my entire stamp collection here!


Day of the Dead Shrines


Sugar Skull ATC

Sugar Skull Sun Catcher


Flaming Sugar Skull ATC


Sugar Skull Art Cards!


Visit the Blank Page Muse blog hop for more Day of the Dead creations! 


11/02/21

Sugar Skull Shrines

 I had a fabulous time this last weekend, teaching this make and take with Blank Page Muse at the Scrapbook Expo in Ontario, California!


My stamps were a huge hit and people were saying that they loved making the shrines!


- if you would like to check out my stamp line or see what other stamps are available, visit-
And use code : BPMMichelle
to save %15 off your total order!
💗


6/25/21

Mermaid Paper Doll - Art Swap

 I recently participated in a art swap through Facebook called “Art Across the Miles”.


The theme was Mermaid Paper Doll
My swap partner was Kimberly Dunaway Scott


The first doll is the one I sent to my swap partner. I combined my love of Mexican folk art and mermaids.


9/16/20

2nd Annual Mexican Folk Art - Shrine Swap

You are invited to 
Join our 
2nd Annual Mexican Folk Art - Shrine Swap!


Details  and how to join can be found here.

Depending on the participation of this swap the return shipping fee 

may range from $7.50 to $15 max.


Last day to sign up is September 21st and head count will be emailed by September 25th.

All shrines due in my hands no later than October 20th.


I hope you can join in on the fun!

~Michelle 

11/30/19

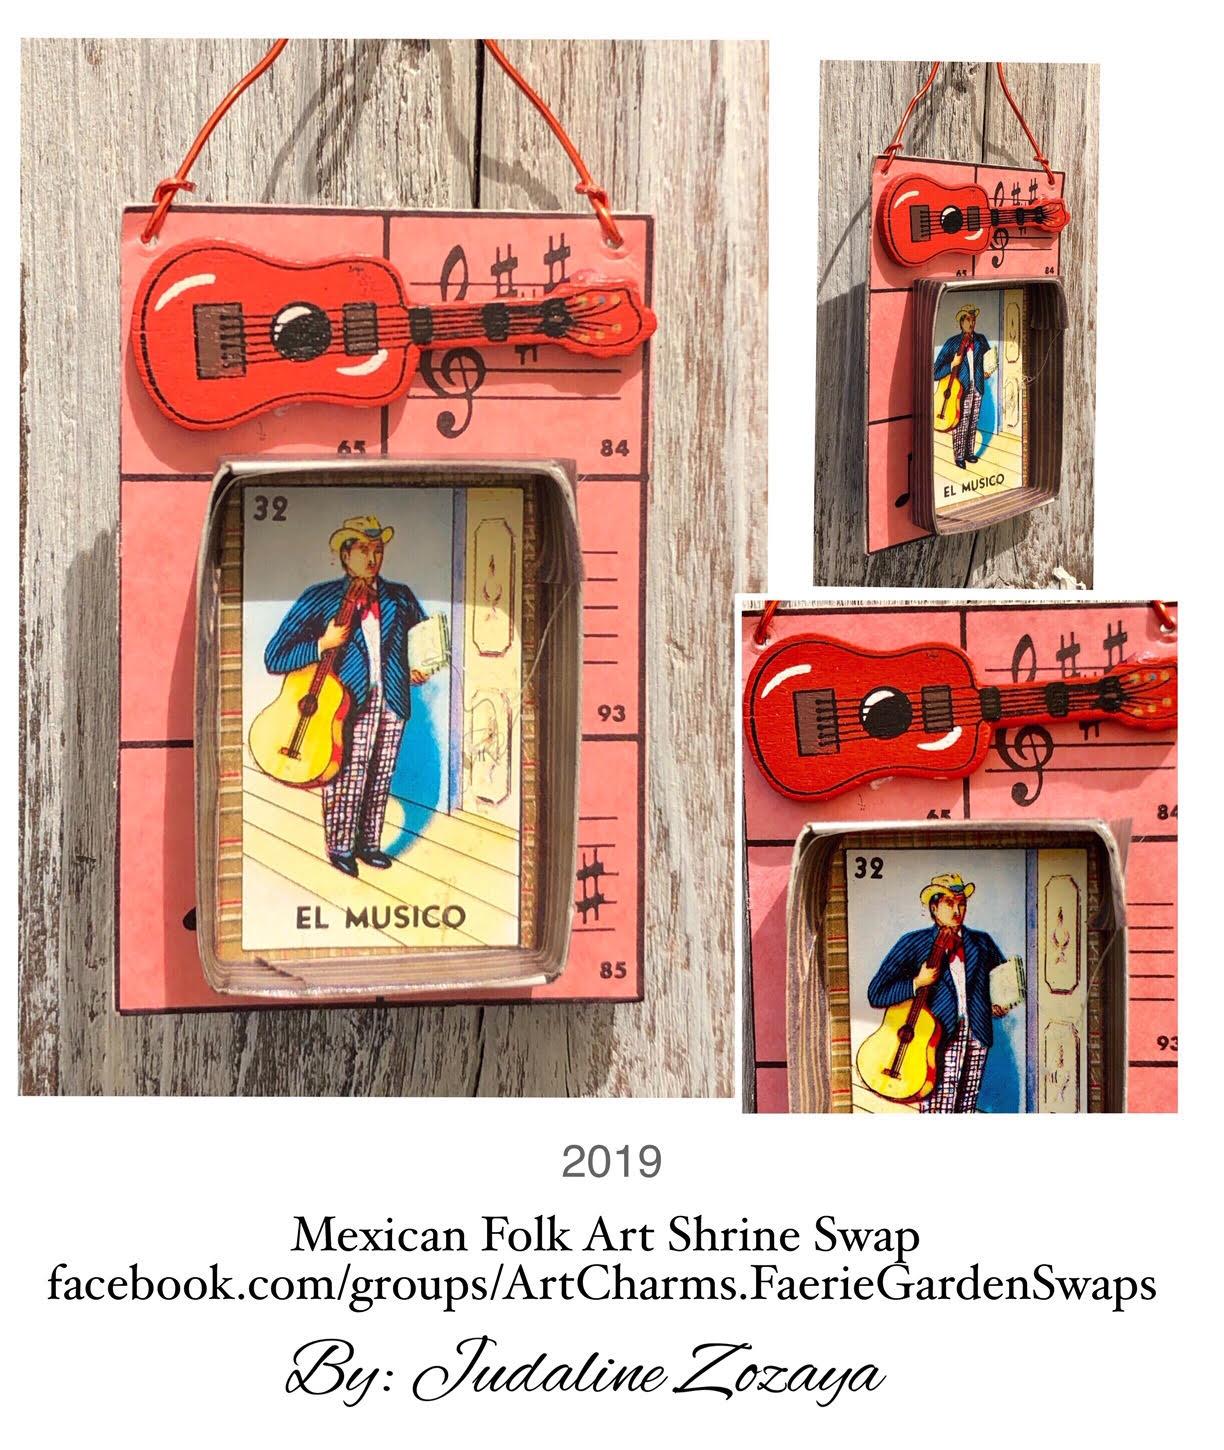
Mexican Folk Art - Miniature Shrine Swap!

 Here  are the results of our 1st Mexican Folk Art- 
Miniature Shrine Swap!


The premise was to use small matchboxes as the base and create little shrines!

8 Artists collaborated on this project, didn't they do a wonderful job?


If you would like to join the next Shrine Swap or see what other swaps are available, 
please join our group here.


9/26/19

Mexican Folk Art - Miniature Shrine Swap

 You are invited to a Mexican Folk Art- 
Miniature Shrine Swap!


The premise:
Use small 32 ct. matchboxes as the start of your shrine. 
(you can find these in packs of 10 at Walmart for less than $6)

The theme of this swap is "Mexican Folk Art"
This can be Day of the Dead, Frida, Our Lady of Guadalupe, floral, Milagros or other Mexican art!
Use any medium as long as it is durable and artfully made. 

As shown below, each shrine must not exceed 2 ½" x 3" and a depth of a  ½".

Each shrine must also include a wire or string loop somewhere at the top.
This is so it can be displayed on a wall, tree or worn - if desired. 

I have created a board on Pintrest for you to draw inspiration from.

No ATC's are required with this swap, but I ask that you personalize the back of each shrine with your name, date and any other info. 

This is a time sensitive swap. 
Sign ups begin now and close on October 1st, midnight.
All packages are due in my hands no later than Saturday October 26th, 2019. 

To join this swap, please message me by e-mail or  join our Facebook group,

Final head count for this swap will be emailed no later than October 4th. 
Return shipping is determined by participation. 

Feel free to see some of our past swaps here. 

Hope you can join in on the fun!


4/23/19

Mexican Folk Art Swap

New Art Swap!


The theme for this swap is: Mexican folk art.
(Charms, bracelets , necklace , pendants, hair clip, earrings...)
🌵 Day of the dead, sugar skulls, spirit animals, Pinata, fiesta, Milagros, Frida, punched tins and such. .
Must be 80% handmade.
Lots of bright colors.
All items must include a ATC or tag to match. - Your name and info
Sign up deadline, April 30th
(after you have rsvp'd, please message me your e-mail and mailing address)
Will post head count by May 2nd.
Time sensitive and due (no later than) May 31st.
* Just like any swap in the past, please wrap up or place your swap items and cards in a size appropriate bag. I will determine the cost of shipping once I have the final head count.

Follow our facebook group for updates!

8/10/18

Vintage Rose Purse with Rose Applique

Re-invent a vintage purse or clutch with Joy® embroidered iron-on floral appliqués!


You will need:

  • Joy® embroidered iron-on floral applique.
  • Purse
  • Strong fabric adhesive or hot iron.


See the full tutorial here. 

4/30/18

How to make a Faux Flaming Heart Tin

Hi Everyone,
     As you know, I love, love, love anything to do with Mexican Folk Art.
There is just something so classic and romantic with the embossed tin look.
Doesn't this look like the real deal? Can you believe its not?
Follow the instructions below to create your own....so easy...You'll love it!
Supplies used:
  1. Silver/Gold Glossy Foiled Paper
  2. Ruby/Gold Glossy Foiled Paper
  3. Violet/Violet Starstuck Foiled Paper
  4. Marigold/Gold Glossy Foiled Paper
  5. Copper/Gold Glossy Foiled Paper
  6. 12" x 12" Chipboard
  7. 6" x 6" 
  8. Pencil
  9. Hot glue gun with narrow tip
  10. Tacky glue
  11. Q-tips and a blunt embossing tool
  12. Embossing folder and machine
  13. Modeling paste
  14. Colored permanent markers in Yellow, light green and dark green.
  15. Scissors and craft knife
Starting with the 6x6 square, draw a design with pencil similar to mine. A border, a heart and rays of light. No need for perfection since we just need a general 'idea'  of where the heart should go. Use the hot glue to trace the border, nice and thick and straight (as possible) rays of light. 
Slather the square and hard lines of glue with your adhesive. Use your fingers to push the tacky glue into every area. Wash your hands before going onto the next step.
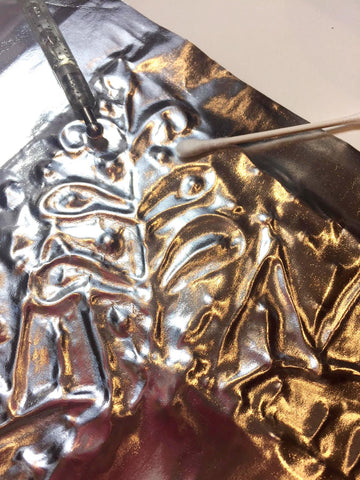
Cut a piece of the Silver foil larger than the square itself. Place foil onto the glue  and use the base of your palm to quickly press the foil down over the whole area. Glue the extra foil onto the back of the square. Use a Q-tip to gently press the foil along the lines of hardened hot glue. If you press too hard, the foil will tear. 
Color in the rays as shown with yellow pen first, then the light green. 
Finish coloring with the darker green pen.
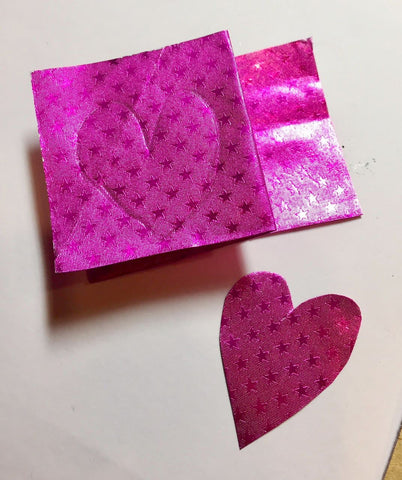
Hand cut or die cut a heart from the Ruby foil and one slightly larger from the Violet starstuck foil. Emboss the heart and fill the back of the heart with modeling paste. This will dry hard and preserve the embossed design of the heart. Glue the two hearts together. Cut flame like strips from the Marigold and Copper foil, flipping some flames to reveal the gold backside of the foiled paper. Adhere these flames to the heart duo before attaching all to the center of the rays. 
Trace the square onto the larger chipboard. Then draw your design. As you did earlier, trace the design with the hot glue gun. 
When the glue is cool to touch, use the craft knife to cut away any mistakes. Don't worry too much about all those glue trails, you won't see them under the foil.
Repeat the same process you did earlier for the smaller square. Make sure to cover the entire square/design with glue. 
Alternate between the Q-tip and embossing tool to bring out the design. Use soft pressure as not to tear the foil. 
Use the tacky glue to adhere the middle square in place and press down gently. Leave this flat to set over night before displaying on a mantle or hanging on a wall. 


So, what do you think? Let me know in comments. Thanks!
See more Rinea Foiled Paper crafts here!

3/08/18

Foiled Paper Desert Scene

Hi Michelle here to show you how you can make a tranquil desert scene with foiled papers!
Supplies used:
  1. Blush/Glossy Gold Foiled Paper
  2. Emerald/Emerald Starstruck Foiled Paper
  3. Gold/Gold Glossy Foiled Paper
  4. Fushia/Fushia Starstruck Foiled Paper
  5. Marigold/ Gold Glossy Foiled Paper
  6. Jade/Jade StarStruck Foiled Paper
  7. Copper/Gold Glossy Foiled Paper
  8. 12x12 Chipboard
  9. Tracing paper
  10. Pencil and scissors
  11. Watercolors
  12. Coarse sand paper
  13. Quick drying adhesive
Start by drawing a desert scene onto your chipboard. Make sure to a have a focal point- your cactus and a background such as the hills and mountains.
Trace the cactus onto the tracing paper and cut out.
Paint your background with the watercolors.
Fold a strip of the Fushia Starstruck into 3 squares. Use the pencil to freehand draw a simple heart. Cut through all 3 layers. Do this again, but slightly smaller for other blooms.Glue your hearts in place as shown.
Use your tracing as a template for the main cactus. Trace the entire cactus onto the Emerald Starstruck as a whole, then just the torso 2-3 times and cut out. Fold torso pieces in half length wise.
Distress the foiled paper with the sandpaper, starting in the center and out at a angle.
Glue the folded pieces to each other, then to the main shape of the cactus.
Crumple your Marigold, Blush, Gold and Copper foiled papers.
Cut them into strips, then small triangles and squares. These are your desert rocks. Glue in place around the cactus and down the hills.
For the spines, Cut a strip of gold foiled paper and fold it in half. Then cut up little strips.
Dot the cactus with glue and leave to set up a bit, then attach the spines.
Add more desert stones, scatter some and feel free to mix up the colors.
Add more Fushia hearts if you want your flowers fuller. 
Sit back and enjoy your beautiful desert scene!


See more Rinea Foiled Paper inspiration here!

11/16/17

Mexican Folk Art Holiday Decor

 This month on The Designer Crafts Connection blog, we are featuring U-Paint metals and  Colorique by Lisa Marie Jimenez. 
The theme of this hop is holidays. So I chose Our lady of Guadalupe since a huge part of my holiday decorating is Mexico folk art! I decided to make a shrine.
Enjoy!

The metal shape I used for my shrine was 4" x 9" but you can use any size.
The Colorique paints I used were Ruby Slippers, Honey Bee and Pacific Ocean. You can see all the colors here.


 Before painting, I washed the metal with hot soapy water to remove any residue. Then after drying I went over the whole thing with a little bit of rubbing alcohol.

I primed the piece with a bit of gesso.

 Next I made sure it would fit in my shrine. This particular shrine is actually a cigar box with the lid removed.


 The Colorique paints flow very nicely and can be thinned with water if desired. I chose primary colors for easy blending and mixed some with the gesso as needed.
I started off coloring in the flesh tones and yellow first. Then I set the metal piece aside to dry in between colors while I worked on the shrine.

 I painted the shrine with bright acrylic paints and constructed the rest of it using cardboard remnants.  This particular box had a convenient rim all around the outside of the box.
 I painted those cardboard pieces and glued them in place onto the rim.
 Next I randomly decorated the inside of the shrine with paint, clip art and washi tape.

I continued painting the metal piece, color by color, letting each hue dry before going onto the next detail.
When I was done, I painted the piece with a thin layer of clear sealant.
Then I added extra paint details, glitters, embellishments and flowers. 

 I glued the metal piece in place on a small piece of wood that came with the cigar box. 

 I used clear drying adhesive to add all the extras.

 "Highlights" on her robe were made with some shimmer paint.

 Lots and lots of glitter and bling!

Thank you for coming by to see my creation! Be sure to visit The Designer Crafts Connection blog to see more painted metal idea's!

LinkWithin

Related Posts Plugin for WordPress, Blogger...