Showing posts with label Kunin Felt. Show all posts

1/27/20

Valentines Day Felt Craft

Here's a lovely craft to make for the one you adore using Joy® embroidered letters!


You will need:
  • Joy® iron-on, embroidered letter sheet: 1" white
  • Die cut felt hearts
  • Wide lace
  • Sewing thread and needle
  • Steam iron
  • ironing board 
  • Pressing cloth
  • Marker - red


 1. Begin by hand stitching the lace all around the bottom heart, pleating it as you sew.


2 Following manufacturer's directions on the packaging, use an iron to fuse the letters in place on the top heart.


 3. Use simple stitches to attach the two hearts together.  Leave an opening at the top to create a "pouch". 

 4. Color the letters with permanent markers to match the letters to your lace if desired.

You can find a wide selection of Joy® embroidered iron-on letters and alphabet sheets in different sizes at your local craft stores!


10/12/17

Halloween Spell Book Covers


 Since Halloween is my favorite time of the year, I'm always looking for ways to re-purpose what I have in order to create some spooky new decor!

This is a simple enough tutorial you can make with a few supplies found around the house and at your local craft store!


What I used....
  • Joy embroidered iron-on letters in various fonts. (found at Michael's and Hobby Lobby)
  • Kunin Black wool felt (found at Walmart, JoAnns, Hobby Lobby...see more here.
  • Scissors
  • Sewing needle and black thread
  • Orange permanent marker 
  • Googly eyes or other Halloween embellishments.
  • Fabric adhesive (I used fabric Fuse e6000)
  • Books of varies sizes. Can be paper or hardbacks.
  • White and brown acrylic paint 
  • A dry brush- no water.
You can view the full tutorial here.


9/21/17

How to make Blooming Cactus's with Kunin Felt


Welcome to the Kunin®  Felt blog hop!
I, along with fellow designer friends have been asked to share with you projects you can make with Kunin® felt.

(A little bit about Kunin® felt- Made in the U.S.A. This perfect all-around craft fabric comes in a wide variety of colors. Made from Eco-fi,® a high-quality fiber made from 100% post-consumer recycled and BPA-free plastic bottles. Fade-resistant. Cuts cleanly with no fraying and can sew and glue easily.)
.

Now about my project, I love all things to do with succulents and cactus.
I especially love their vibrant blooms!  Here I have created "thorn-free" cacti you can handle easily and display all year.
Enjoy!

Supplies:
  1. Kunin®  9" x 12" Classic Felt in Pirate Green, Neon Green, Cotton Candy Pink, Red and Yellow.
  2. Burlap
  3. Embroidery hoop
  4. 3.50 MM Crochet hook
  5. Scissors
  6. Black marker
  7. Needle and thread
  8. Doll stuffing
You can buy Kunin Felt locally at Hobby Lobby, JoAnn's and Walmart.
See more locations near you and online here.


 Cut your felt length wise into 1/4" strips.

Place your burlap into your hoop and tighten until the burlap is taught. I used a 6" hoop, but you can use any size as long as the burlap is larger than the hoop.
 Draw your pattern with the marker. I generally don't label the colors but I did for you here. The lines in the greens section can help you in the beginning until you get the hang of it.
If you have ever done rug hooking, this is similar. Always start in the center of your project. Here we are starting with yellow. Push your hook through the burlap.
On the underside, hook a piece of felt and gently pull it through. Repeat until you have filled in the circle for the yellow felt.  If it's hard for you to grip the crochet hook, try wrapping the handle with a few rubber bands as I did.
After each strip of color or felt, trim off the excess carefully with your scissors.
Continue with rest of the colored felt. You can make your loops tight or long. If you mess up. just carefully pull it back through and start again.
The pattern for the sides of the cactus are shown above. When you are done, remove from the hoop and trim the burlap 1" from the project edge. Cut along the dotted lines to the center.

Turn your piece over and pinch the raw edges of the burlap together then sew shut. Do this all around.

Turn your piece inside out and stitch closed any burlap exposed areas.
Eyeball the size of the base of your cactus and cut from felt.
Fill cactus with stuffing and begin stitching base felt to the bottom, tucking in the excess burlap as you work.
Done!
Soft, vibrant, easy to handle blooming cacti!
 Display in a dish filled with rocks or crystals!
 Please visit the rest of the Kunin ® Felt projects and enter to win an assortment of both Classic felt and Premium felt valued at $75 to use to make your own projects here!


4/06/15

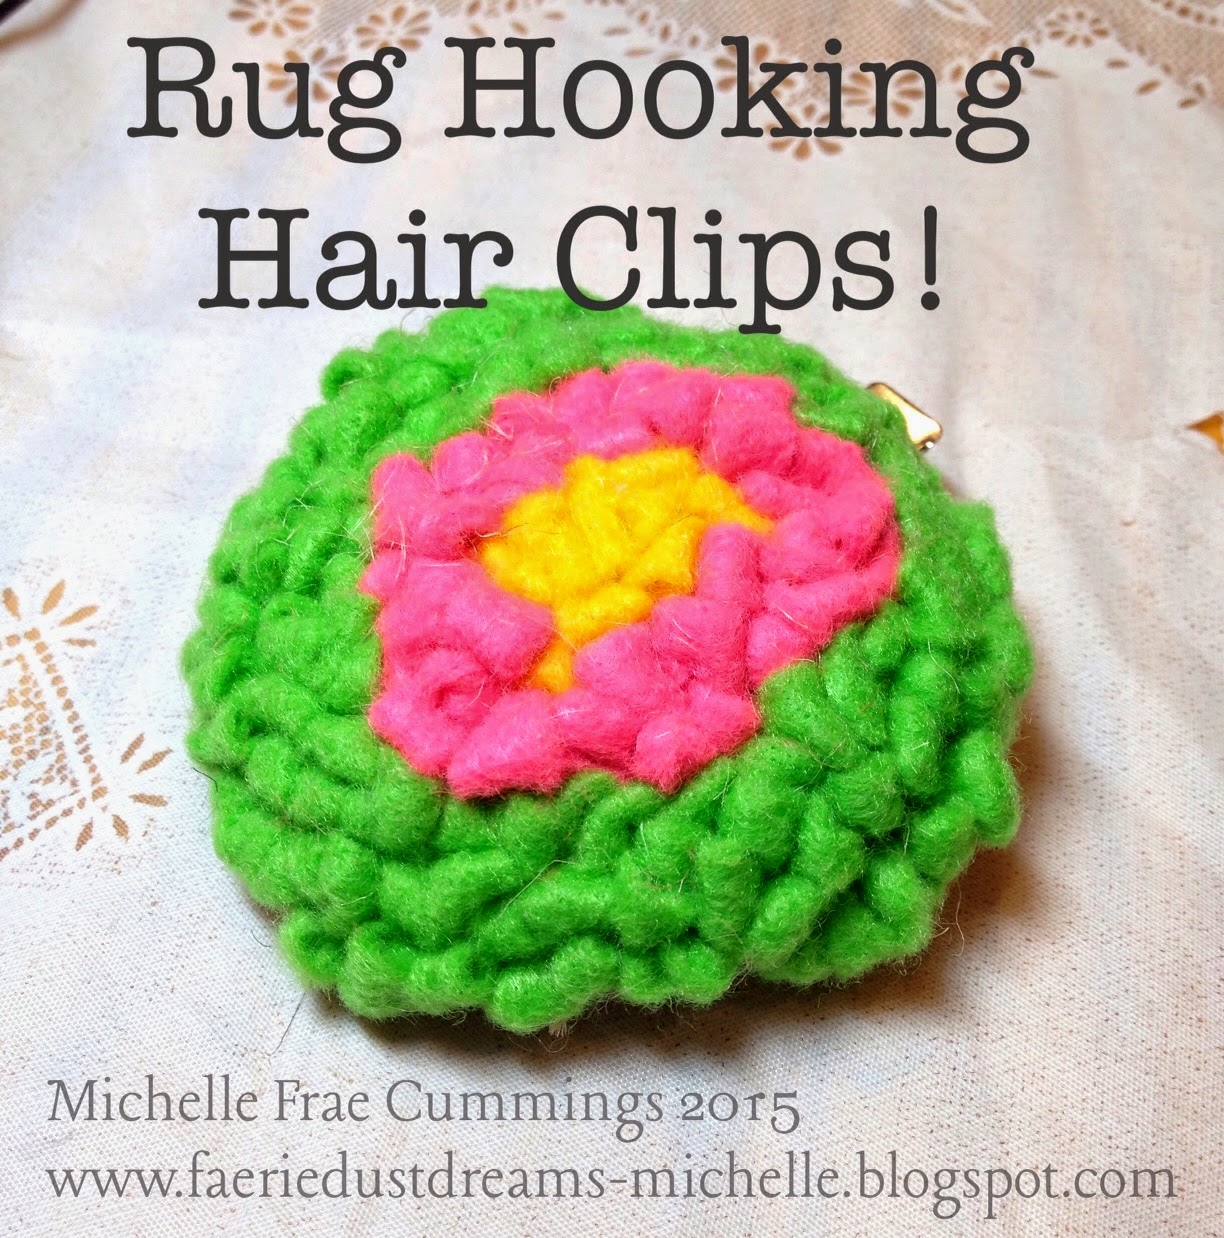
How to make Rug Hooking Hair Clips!

 No matter if spring has started for you or you are still waiting for the snow to melt, these "Rug Hooking Hair Clips" are sure to brighten any day! 
 You will need:
1. A embroidery hoop.
2. Burlap
3. A small cup to trace and a permanent marker.
 4. A crochet hook- size00/3.50MM.  Wrap lots of rubber bands around the hook to make for a no-slip-grip!
5. Brightly colored Kunin Felt cut into 1/4" strips. The longer the better.
6. Hair clips.
 7. Sharp fabric shears. These are by Fiskars.
8. Crayons.
9. Aleene's tacky glue. 
10. Additional felt sheet.
 Place your burlap in the hoop. Trace your circle. Mine measured about 2".
Push your hook through the center of the traced circle. Catch the felt with the hook and pull loop through. Continue pushing and pulling through until you are happy with your flowers center. 
 Trim off excess felt strip and start with a new color.
Repeating the same technique, over and over.
If you make a mistake, such as spacing your loops to far apart or pulling up too much of a loop- simply pull felt strip from under the hoop to remove mistakes. 

 Change colors as desired.
Stop working when you have reached desired flower size. 


  Trim burlap to be larger than your traced circle.
Flip over and trim off any long felt ends.
 With your scissors, cut sections (as shown) into the burlap, right up to the very edge of the flower.
Add a ample amount of glue to the back side of the flower.
Fold the burlap sections over into the glue, pressing firmly.
 For the last to sections, add a bit more glue.
Now place more tacky glue over the pressed down burlap.
 Cut two same size felt circles. Place one onto the glue, pressing firmly.
Add glue to the second felt.
 Place the open hair clip in between the two glued down felt circles.
Place a crayon inside the hair clip to keep the clip from accidentally being glued shut if any glue seeps through the felt.
Leave to dry before wearing your floral creation!
See more "Flower" crafts by looking for this button on my right sidebar.

2/02/15

Easy Sew Felt i-Phone/camera Pouch

 My last i-phone pouch I made was super cute but also so close to the  size of the actual phone that it  hardly left room for anything else. So in making this pouch, I designed it to have a extra pocket to store money, credit cards and what-nots. I also put this a cute puffy heart on the front for added protection and to make it easier to find/feel in my purse. 
 Materials:
Flip over outer felt and place your inner felt  inside folded as shown.
Fold over remaining felt so the cut window and sides align nicely.


 When sewing the sides, remember you are going through 4 layers of felt, use a hard surface or a thimble to help push the needle through. First use a running stitch along the sides, then a blanket stitch to finish.
Use your pinking shears to cut the corners of the top flap as shown.


 Sew your velcro in place.

 Cut your leftover felt scraps into little bits and use to stuff your heart.
I learned this idea from friend Jennifer Priest.
Super fantastic! No more waste. 

 Here you can see I have a slot for my phone and a slot for my 'extra's.

 The pink felt shows you the actual size of my phone. This pouch is also perfect for a little camera too!

 All I have left is to add a wrist strap, but I can't decide.
Ribbon, felt, cord, elastic....what would you do?

To see more crafty idea's like this one, find this logo on my sidebar.

9/07/14

Home Decor -A Pink and Black Classy Wreath!

Welcome to a special Designer Crafts special Home Decor challenge!
We are featuring three wonderful products today.  
Kunin Felt, Beacon Adhesives (Fabri-Tac and Felt Glue) and Buttons Galore & More. 

I hope you will enjoy my project and leave happily inspired!
Pink and Black Classy Wreath
 Supplies Used:
 Beacon Fabric-Tac and Felt Glue
Shocking Pink Zebra Fanci Felt
Black Classic Felt
Pink and Black buttons from Buttons Galore and More
Twig wreath
White spray paint
Gold floral wire
Needle nose pliers
Bamboo skewer
Scissors
Paper clips
3D flowers die


 Begin by spray painting just one side of your twig wreath with white spray paint, outside.
 I used a old box to contain most of the spray.
 While the wreath is drying, run the Pink Zebra felt through your cutting machine with the flower die.
Make as many flowers as desired.
 If you do not have the 3D flower die, you can cut circles from the felt, then cut them into spirals.
Place some Felt Glue onto the outer end of the spiral and use that as your starting point to twist inwards until you get to the center.
 Attach center with  Felt Glue to the bottom of the flower.
 Press firmly for about 30 seconds, then leave the flowers to set for at least 1 hour.
This glue is non toxic and drys clear.

 To make the leaves: you will need to cut leaf shapes from the Black Classic Felt.
Add some  Felt Glue as shown up and pinch close.
Secure leaves with  paper clips until the glue has set.
Then using the  Fabric-Tac in a well ventilated area, adhere leaves randomly to the wreath.

 For the buttons flowers:
Pair hot pink smaller buttons with larger black buttons.
Cut 6" of the gold wire. Fold the wire in a uneven half.
Thread through both buttons and twist to secure.

 Use your pliers to turn the shorter piece of the wire into a little spiral.
Wrap the remaining wire onto a bamboo skewer then slide off.
Make as many as you wish and adhere to the wreath with Fabric-Tac.

 Here is a easy way to make ribbon from felt!
Start cutting along the side of your felt and when you are near the top, stop and turn the square then keep cutting.
Do this carefully around and around until you have reached the center.

 Here is a continuous pile of versatile black felt ribbon!
Figure out where on your wreath you want to hang your protect.
Attach one end of the ribbon with a tight knot and a little bit of a tail.
Then gather the rest into a manageable ball and wrap around your wreath, twisting the ribbon as you work to give it some personalty.
When you get back to the top, tie onto the starting tail to complete your hanger.
Make some extra curls made from the wire and bamboo skewer.
 Attach these to the twig part of the wreath.

 Now you have a beautiful wreath to display!

Thank You coming by to see my Home Decor project, I hope I have inspired you!
But don't leave yet!

Here are 2 ways you can have a chance to win a fantastic giveaway!
Good luck!

a Rafflecopter giveaway

Designer Crafts Connection on Face Book 

Please what the remaining 13 designers have created for you!


A special thanks to our sponsors for this Home Decor Blog Hop!

Kunin
http://kuningroup.com
https://www.facebook.com/pages/Kunin-Felt-Products/259966984033282
https://twitter.com/KuninFeltFC
http://www.pinterest.com/kuningroupgeorg/

Beacon
http://www.beaconadhesives.com/chaven.html
https://www.facebook.com/beaconadhesives
https://twitter.com/BeaconAdhesives
http://www.pinterest.com/beaconadhesives/

BGM
http://buttonsgaloreandmore.net
https://www.facebook.com/buttonsgalore
https://twitter.com/ButtonsGalore
http://www.pinterest.com/buttonsgalore


LinkWithin

Related Posts Plugin for WordPress, Blogger...