Showing posts with label Mod Podge. Show all posts

3/22/19

How to use Mod Podge Ultra Spray with Sea Glass

Hello everyone! 
I'm participating in a blog hop for Plaid® using a brand new product called 
I used it to create this sea glass wall art.
Enjoy!

For this project, you will need the following:

  1. Mod Podge Ultra - Matte
  2. Assorted sizes of white sea glass, plus one blue piece for the 'eye'. 
  3. A sketch of your sea horse plus a frame with glass to fit.
  4. Parchment paper (to protect your work surface).
  5. 4 drink bottle caps
  6. Fine iridescent glitter
  7. White washi tape
  8. Twine for hanging.
  9. Wet and dry paper towels

5/18/17

Mod Podge Place Mat

 Hi Everyone!
    When I was asked if I wanted to participate in a blog hop sponsored by Plaid,  I didn't hesitate to say Yes as they have such wonderful products I use on a daily basis!
Plus Mod Podge is celebrating 50 years of amazing product!
Wow, right? Happy Birthday Mod Podge! Here's to 50 more years!

To top of the celebration, the Designer Crafts Connection page is sponsoring this fantastic prize pack!
Two lucky winners will receive everything you see above for all their creative projects.
In order to be eligible to win, we ask you to comment on their page and then enter for the giveaway. 


For the celebration,  I was given some Super Gloss medium  Mod Podge and some Decoupage brushes.

 I knew exactly what I wanted to create and set right to work!
I gathered up my supplies of:
A brush set for using with Mod Podge
Mod Podge Super Gloss
Brightly colored tissue papers
Clear vinyl (from any fabric supply store)
Pens, scissors and a shape to trace.
My project idea was to make a fun place mat to give life to our boring lazy susan.


So traced the lazy suzan onto the clear vinyl and cut out 1" from the traced line.

 I tore irregular pieces of the tissue paper and organized by color. I adhered the tissue paper to the vinyl with the Mod Podge. I started with the color yellow, then pink, green and finished with orange, especially around the place mat edges. 
 I left this alone to cure over night then flipped the mat over and cut off the black lined edges.
 
 I think its looks pretty and definitely matches my kitchen!
The nice thing about this is that you can customize it to match any season and the vinyl makes for easy cleanups from spilled food and drinks. 
Here's alternative variation I made for summer and family bar-b-ques. Before I adhered my strips of tissue paper, I placed some star confetti onto the mat.
Fun!

See more projects here!

12/03/15

Tissue Paper Ornaments

Looking for a great way to make professional looking ornaments with just a few craft items?
Visit my post here to see how I made these! :)

10/28/15

Halloween Steampunk Blog Hop


Welcome to another year of Halloween and Steampunk fun! 
All hosted by Leslie Rahye! 
This is my 4th year participating in this hop.
Here is a little re-cap- 

 October 2012, I created these Steampunk Spiders.

 October 2013, I created this Steampunk Skull Pendant.

October 2014, I put together this Steampunk Book of Spells.
 
 
This year, I have created this Spectacular Steampunk Pocket Watch pendant! 

Materials:
  • Open pocket watch. Real or fake. Can be found at antique flea markets or craft stores.
  • Chain.
  • Assorted sized watch gears. The small gears are the real deal, collected from broken watches and such, the other gears are from the craft store.
  • Halloween and Steampunk findings. Always have more than you plan to use.
  • Mini Dew Drops.
  • Mod Podge Dimensional Magic-  Dries hard and clear.
  • Inka Gold in green, orange, purple and red.
  • Wink of Stella Glitter brush.
  • Fine and chunky glitter.
 Fill your pocket watch half way with the Mod Podge. 
Then start laying down your embellishments. 
Create layers of your items. 
 Secure larger pieces onto the rim of the watch with the Mod Podge.


Fill in spaces, adding more Mod Podge as needed, add embellishments, findings and glitter.
Let set completely overnight.
In the morning, add more Mod Podge and small gears. One of the watch hands didn't work for me, so I used pliers to cut it off. After this has had a chance to set, you may now color it using the Inka Gold and a small paintbrush/water. Finish with the Glitter Brush. 

Thanks for coming by, I hope you liked my tutorial. 
My giveaway for this hop is a jumble of Halloween and Steampunk embellishments for you to play with.
 International welcome
. Leave a comment here (no later than Nov. 6,2015) for a chance to win!
For more idea's , feel free to follow me on Pintrest , FB/Blog,  FB/Charms and Garden Miniature swaps.
Now on to more Halloween Steampunk Inspiration!
Happy Halloween!

10/06/14

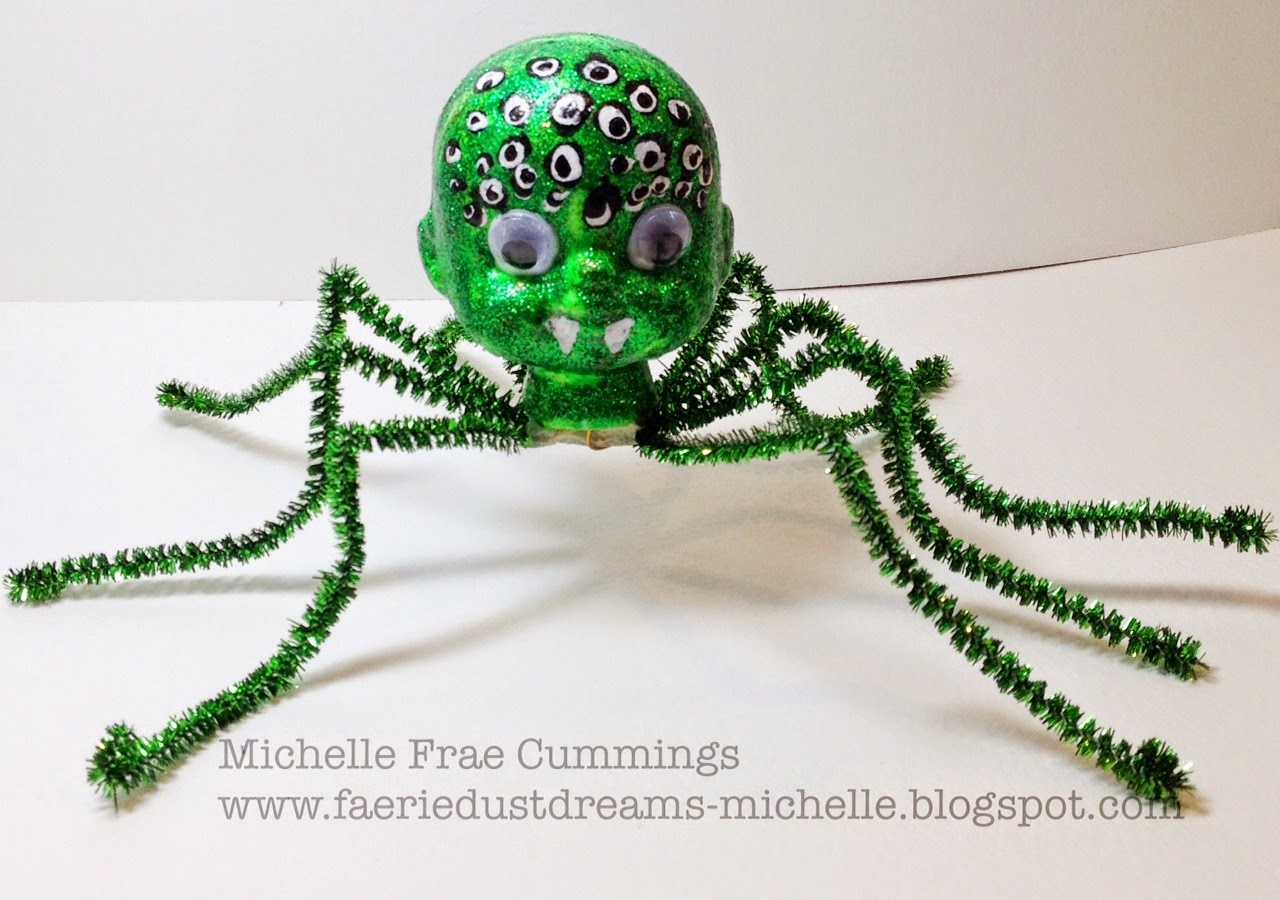
Creepy Voo-Doo Spider Dolls!

Welcome!
I hope you like Creepy things because these spider doll heads are all that!
I was inspired a little bit from Toy story 2 where the mutant toys come out from under Sid's bed- you remember the doll head? Yea, that one....
Then also a little bit of inspiration from Pirates of The Caribbean 2- when Jack Sparrow was the village king, remember his eye's?

 The materials for this craft are pretty easy to come by.
You will need:
  • 3 Smoothfoam 2 1/8" Baby Heads  Smooth off the ridges with medium grade sandpaper.
  • Neon Folk Art paints in Green, Purple and Orange. - I found these in Walmart.
  • Gloss Luster Mod Podge
  • White and Black acrylic paint
  • Metallic Chenille stems
  • Fine glitter
  • Googly eyes
  • Craft sheet, double stick take, tacky glue, (3) 3" pieces of 26 gauge wire, foam brush, a fine tipped paint brush, plastic cups, plates, tooth picks and a extra foam block.
 Pierce the bottom of the doll head with the toothpick and paint with a neon color. Set toothpick with doll head into foam block so paint can dry easily. Its takes approximately 2 coats of paint to cover the heads.
 Do this for all the colors.

Coat doll heads with Mod Podge then hold over a cup while you sprinkle glitter.
 Pour excess glitter back into container.
Place in foam block to set.
 While the doll heads with glitter are setting, work on the spider legs.
Gather all 4 chenille stems and fold in half. Then twist them a few times in the middle and add some double stick tape.

Go over each doll head with one more coat of Mod Podge to seal in the glitter.
When they are no longer sticky, carefully attach the legs.

Place some tacky glue onto bottom of the doll head and add your spider legs.
Bend the wire piece into a "U" shape and push into the doll bottom around the tape.
When the wire is half pushed in, twist, then push into the tape as shown. This helps secure the legs.

 Add your googly eyes with the tacky glue.
Paint extra eyes or designs with the black and white acrylic paint.
Don't forget to add the fangs!
Bend the legs as shown.

 This is my Jack Sparrow take off.
Don't the eyes totally creep you out?


 I was going for a Voo-Doo spider doll on this one.... can't you hear the African drums beating?


 Spiders have 8 eyes, so I thought this was pretty cool.
Plus I love purple!

 I can't wait to see these under a black light!
What do you think?
Feel free to check out more Smoothfoam idea's here.
Then while you are at it, check out more  Halloween creations with the Designer Crafts Connection!

3/31/14

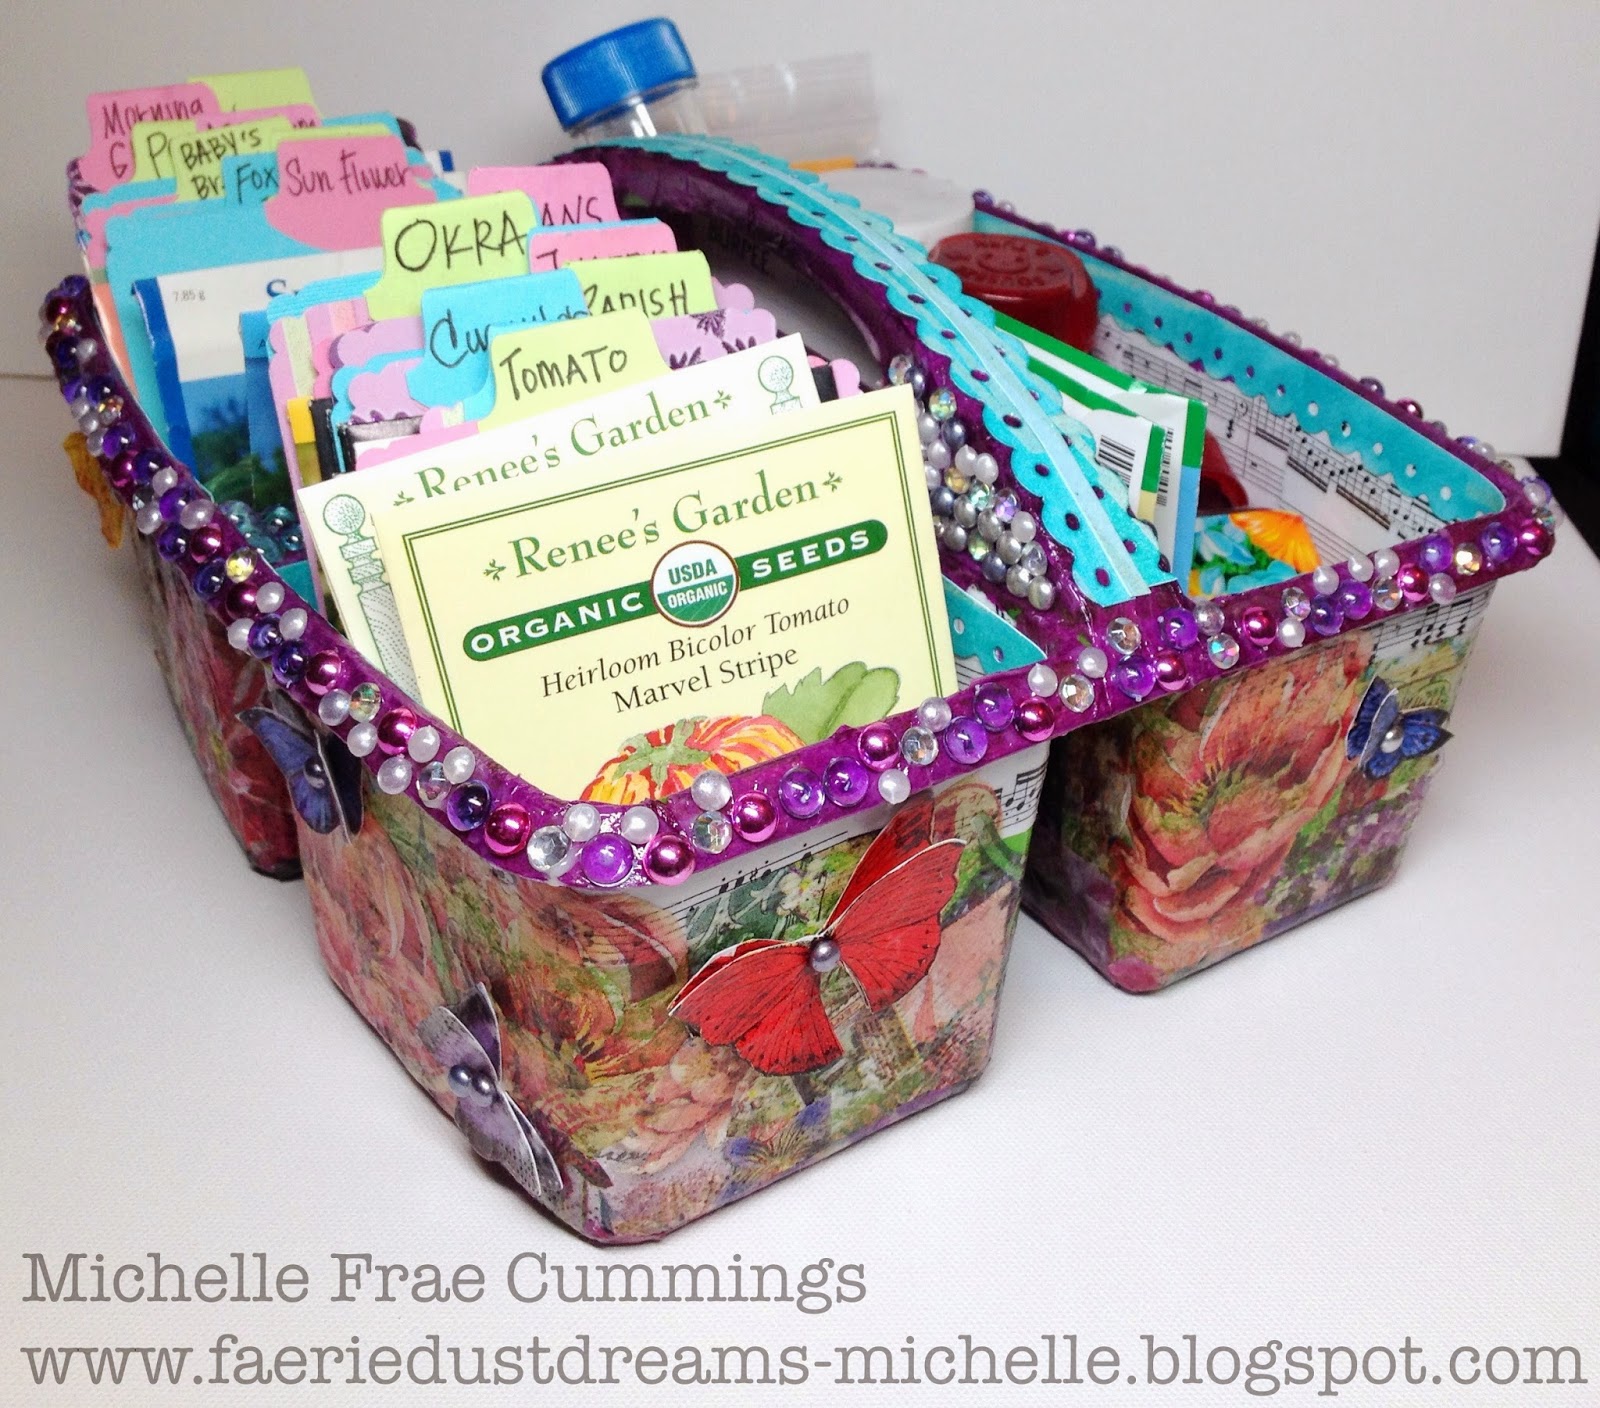
A Butterfly Decorated Seed Caddy


This  project was inspired by my love of gardening and that I needed a practical yet attractive holder for all my seeds!


I started with this small plastic art caddy that my son had out grown.
I first wiped it clean with a wet then dry cloth.

 I used a few paper plates, a foam brush and Gloss luster Mod Podge.

I sorted through my collection of printed paper napkins. I get the majority of my napkins at a discount store called Tuesday Morning.  The rest in specialty shops when the design catches my eye.

 I tore up copies of vintage music sheet paper and cut out parts of the napkin that I knew I would use.


I applied the torn music sheet paper to the inside of the caddy with the Mod Podge and foam brush.
 I also added some of the music sheet paper to the out side of the caddy, just under the lip.
Next I applied the napkin cut outs with Mod Podge to the entire outside of the caddy.
I filled in exposed areas with assorted purple tissue.
 I roughly trimmed out 2 of each butterfly images and applied them to sturdy white cardstock with Mod Podge. When dry, I carefully trimmed them out.
I used Tombo glue to adhere the first of each butterfly securely to the outside of the caddy. Then I placed a bit of glue to the center of each butterfly...let that set up a bit and placed the center butterfly onto the first, folding up the wings a little.
 For the inside border, I used a scalloped border punch on some aquamarine cardstock.
Then I inked them with teal ink before gluing them in place.  Lastly I filled in space on the caddy with an assortment of rhinestones other embellishments.
 I measured my seed packets, and created some divider cards with some pretty papers and a tab punch.

Here are my seed packets.

 I reused old prescription bottles and spice containers for my bulk seeds. I combined all my miscellaneous flower seeds so I'd be surprised as they bloom! Some of seeds were harvested myself and some were given to me.


 I adorned the butterfly's with the dew drops.
I just LOVE butterfly's!


 Thank you for coming by!
 I hope you have enjoyed my creation and are inspired to make something like this for yourself or even  friends. :)
Click here for more idea's and inspiration.


LinkWithin

Related Posts Plugin for WordPress, Blogger...