Welcome!
I hope you like Creepy things because these spider doll heads are all that!
I was inspired a little bit from Toy story 2 where the mutant toys come out from under Sid's bed- you remember the doll head? Yea, that one....
Then also a little bit of inspiration from Pirates of The Caribbean 2- when Jack Sparrow was the village king, remember his eye's?
The materials for this craft are pretty easy to come by.
You will need:
- 3 Smoothfoam 2 1/8" Baby Heads Smooth off the ridges with medium grade sandpaper.
- Neon Folk Art paints in Green, Purple and Orange. - I found these in Walmart.
- Gloss Luster Mod Podge
- White and Black acrylic paint
- Metallic Chenille stems
- Fine glitter
- Googly eyes
- Craft sheet, double stick take, tacky glue, (3) 3" pieces of 26 gauge wire, foam brush, a fine tipped paint brush, plastic cups, plates, tooth picks and a extra foam block.
Pierce the bottom of the doll head with the toothpick and paint with a neon color. Set toothpick with doll head into foam block so paint can dry easily. Its takes approximately 2 coats of paint to cover the heads.
Do this for all the colors.
Coat doll heads with Mod Podge then hold over a cup while you sprinkle glitter.
Pour excess glitter back into container.
Place in foam block to set.
While the doll heads with glitter are setting, work on the spider legs.
Gather all 4 chenille stems and fold in half. Then twist them a few times in the middle and add some double stick tape.
Go over each doll head with one more coat of Mod Podge to seal in the glitter.
When they are no longer sticky, carefully attach the legs.
Place some tacky glue onto bottom of the doll head and add your spider legs.
Bend the wire piece into a "U" shape and push into the doll bottom around the tape.
When the wire is half pushed in, twist, then push into the tape as shown. This helps secure the legs.
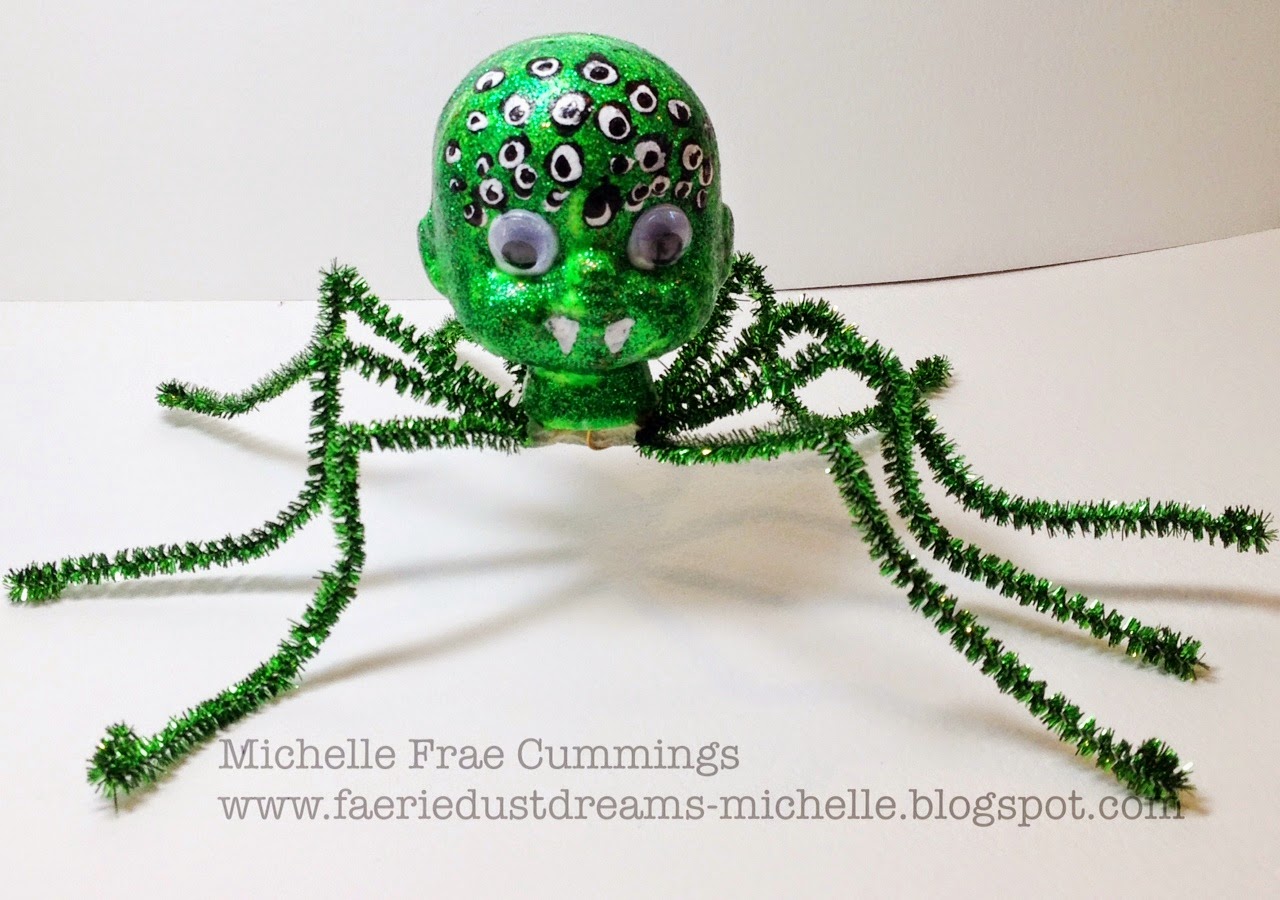
Add your googly eyes with the tacky glue.
Paint extra eyes or designs with the black and white acrylic paint.
Don't forget to add the fangs!
Bend the legs as shown.
This is my Jack Sparrow take off.
Don't the eyes totally creep you out?
I was going for a Voo-Doo spider doll on this one.... can't you hear the African drums beating?
Spiders have 8 eyes, so I thought this was pretty cool.
Plus I
love purple!
I can't wait to see these under a black light!
What do you think?
Feel free to check out more
Smoothfoam idea's here.
Then while you are at it, check out more Halloween creations with the Designer Crafts Connection!