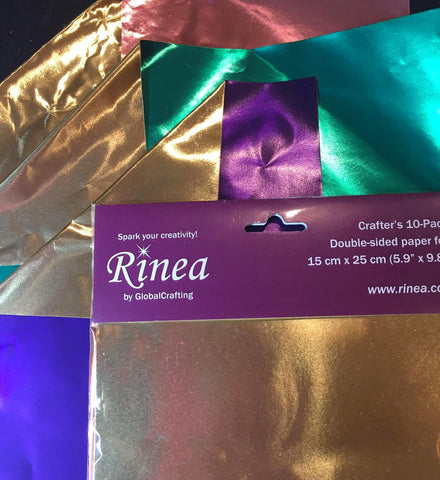
Showing posts with label Rinea Foils. Show all posts

5/25/18

Giant Foil Flowers


Hello!  Here is a easy way to make giant flowers from Rinea Foiled Paper- perfect for any occasion!

See the full tutorial here!
Supplies Used :


11/11/17

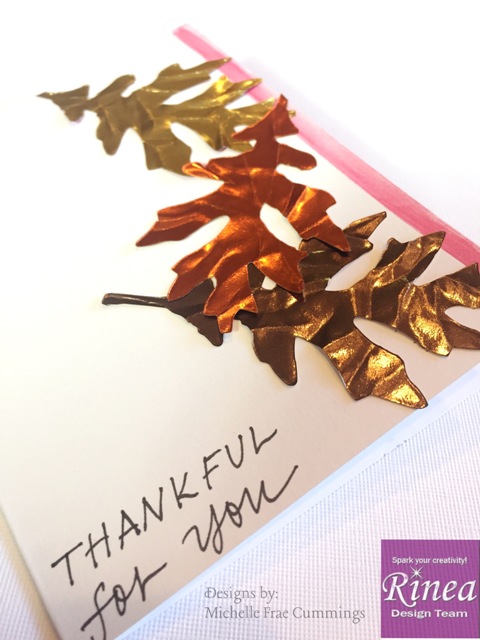
Crunchy Fall Leaves Card

Here's a new card I made for fall...classically easy too!

Supplies used:
You can see the full tutorial here!

9/23/17

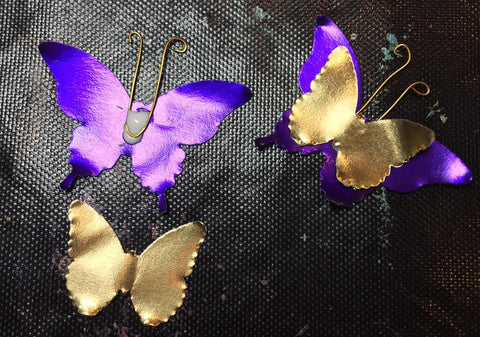
Rinea Foil Butterfly Card


For this project, I used the following:
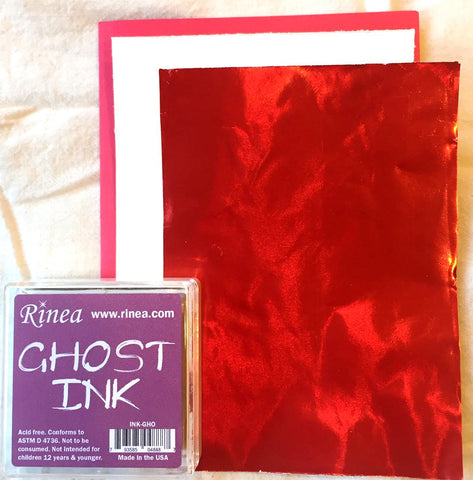
Ruby/Gold Foiled paper
Ghost Ink

4"x 5" watercolor paper
4 1/4" x 5 1/4" red card blank
Dandelion burst background stamp by Sin City Stamps
Butterfly punch
70% rubbing alcohol and paper towel.
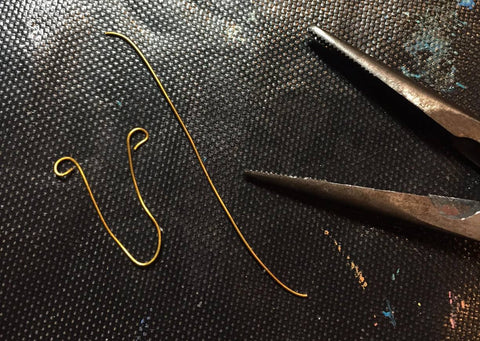
Heat gun, scissors, pliers, gold wire, gold acrylic paint, water colors, adhesive, rhinestones, foam tape and washi tape.


See how I made this card here!

8/22/17

Flaming Day of the Dead Shrine Card

I really love all things to do with Mexican folk art and Rinea Paper Foil!
The combination is just so perfect!
For this ATC, I used the following:
Ruby/Gold Glossy Foiled Paper
Petaloo Flowers
Day of the Dead Sugar Skulls stamp by Sin City Stamps
Tacky glue, foam tape, white cardstock,  scissors, colored markers, rhinestones.
  1. Stamp your skull onto a piece of white cardstock and color in with the markers and cut out.
  2. Trim 2 pieces of foil and one piece of cardstock to be 2 ½" x 3 ½" .
  3. Adhere one foil piece onto the cardstock, gold side up.
  4. Cut and attach flower pieces as shown to the gold foil.
  5. Adhere the skull to the red foil. Cut flame shapes around the skull, removing in between pieces with your fingers or tweezers.
  6. Adhere the flaming skull to the ATC with 2 layers of foam tape.
Please visit the Rinea blog for more inspiration!

8/07/17

How to make a Faux Blooming Cactus with Foil!


When I saw how beautiful and rich the Emerald/Gold Glossy Foiled Paper was, I just 'knew' I needed to make a cactus of some sort.

Supplies:


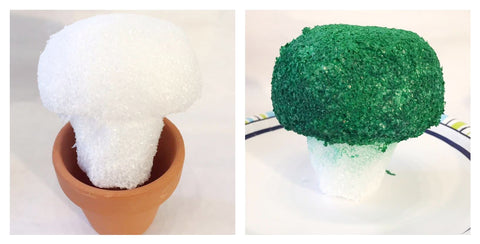
1. Carefully carve your cube into a mushroom like shape with a knife over a trash can. It will get messy!
2. Roll the top part of the carved piece onto a hard surface. This will 'round' out the edges and make them smoother.
3. Place you carved piece on a paper plate and spritz until it is evenly coated. Place this outside in a sunny spot to dry.

4. While your piece is drying, you can start to texturize the foil. To do this, place your foil green side down onto a foam mat or the underside of a mouse pad. For the 'tool', I cut a small rectangle from clear plastic. Can you see it in the top left photo? I made quick indentations going one way, then rotated the foil and made more indentations, criss-crossing until I had 'spine-like' designs.

5. Next I cut about (15)  1" x 4" strips of the foil with a few to spare.
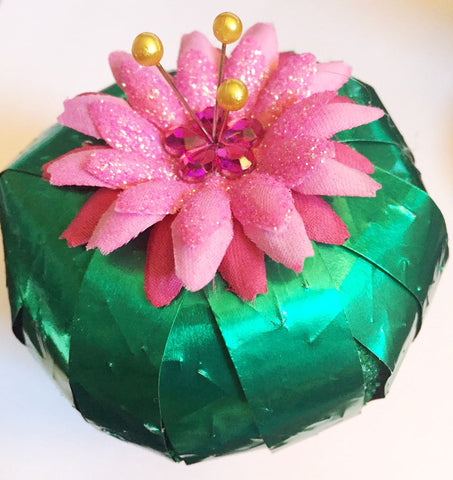
6. As shown in the photo above, I pinned them in place, leaving the center open. Then I flipped it over and pinned the rest of the strips at the base of the cactus. I added more strips as needed to fill any gaps.

7.  I assembled the flowers, securing them at the top of the cactus with the decorative pins.

I love the color contrast, just like a real blooming cactus but with out any prickly fuss!

Please visit  Rinea Inspires for more foil idea's!

7/07/17

Rinea Paper Foil Butterfly Cube

I really love how Rinea Paper Foil adds elegance to just about everything including this butterfly cube!

Supplies:

Trim your Blush foil to fit four sides of the cube. Crumple the foil, then open up and smooth out. Adhere this with your adhesive to the sides of the cube.
Repeat this step with the Emerald foil for top and bottom of the cube.

Cut 1½" of wire and fold in half. Then curl the end of the wire with jewelry pliers to create antennas.

Fold the Violet foil in half 4 times and punch out with 2 sizes of butterfly punches.
Add adhesive to the center of the larger butterfly, add the wire antenna, then secure the smaller butterfly on top.Adhere these butterflies to the sides of the cube and add the word stickers at the bottom.

Cut some wire to be 3" long and crimp with your fingers. Attach the dimensional butterflies at the top. Use the paper piecer to make holes in the foil, them push your butterfly topped wires in place. Add decorative trim is desired.


See more idea's on the Rinea Blog!

4/20/17

Creating with Rinea Paper Foil!

Hi Everyone!
I'm so excited to join in on another Rinea Foil blog hop as I really love their line and can't wait to show you what I made!

If you have never heard of Rinea Foil, you've been missing out!
Rinea® paper-foil is a specialty craft paper imported from Germany. 
It is made up of a thin sheet of paper sandwiched between two layers of thin aluminum foil - the paper gives it sturdiness and stiffness while the foil gives it the shininess and the malleability to maintain the shape however you bend or fold it.
 It is more than just origami paper due to the specific thickness and the quality of the foil used, making it ideal for many interesting crafting ideas. 
The paper comes in a variety of colors with shiny, matte, and embossed surfaces giving you endless options to spark your creativity!


So once you start playing with Rinea Foil you'll find that the possibilities of what you can create are endless! I actually had 4 projects in the works but narrowed it down to these two with a special giveaway at the end!

Project  #1 is this lovely embossed earring holder.
Supplies used:
  1. Rinea Glossy Silver Foil.
  2. A wooden frame from the dollar store.
  3. Tacky glue.
  4. Strong clear adhesive.
  5. The dull end of a narrow paint brush and 1 cotton swap.
  6. Scissors, a pencil, a stapler 
  7. 26 gauge craft wire.
Remove the inner plastic and wrapping of your frame.
Trace frame onto foil with at least a 1" border inside and out. Save the scraps for later.


Sketch your design onto the front of the frame.
Trace sketch with a continuous line of glue.
Let glue dry until clear and hard. This can take up to 8 hours or just overnight.
Working in sections, apply the clear glue to your frame and lay down the pre-cut foil.
Smooth the foil into the grooves with your fingers- not the sticky ones!
Apply glue to the remaining foil and fold over onto the sides and back of frame.
With careful pressure, use the cotton swab and paintbrush end to guide the foil around and into the grooves of the raised design.
To create the loops for the earrings, Just twist some wire around the paintbrush handle a few times.
Repeat once or twice.

Lay your looped wire across the back of your frame and secure the ends tightly with the stapler.
 Feel free wind the excess wire through the staple if desired.
After you have stapled down all your wires, coat them with glue and cover with the foil scraps.
Add some wire at the top if you wish to hang your frame.
Ta da! Done!
Add your favorite earrings and enjoy!
I love how it looks like old embossed tin! Don't you?

So here's project #2. A colorful foil and crystal prism!
I "Love" crystal rainbows dancing in my kitchen and home.
Bobbing and twirling like little bits of magic.
Best part? The demo here is my giveaway!
Supplies Used:
  1. Rinea Foils- Star Struck
  2. 1" and 2" circle punch.
  3. Fishing line.
  4. Crystals and beads.
  5. A glue stick and scissors.


Punch  (3)  2" circles  from 2 different colored star foil. = 6 circles.
 To achieve the 2 foil punched rings....
Fold a 3"x 6" foil in half.
Punch the 1" circle dead center.
Align the 2" circle as shown and punch.

Fold the six 2" circle in half.
Smear some glue onto one of the halves and place a second half on top, lining up the edges.
Repeat until all six are glued/stacked.
Don't glue the closing flap yet.
Always measure more fishing line than you think you need. So about 36" is a good start.
Thread one bead onto the fishing line. Bring ends together.
Now you can start threading your crystals and other beads.
Place the un-threaded fishing line into the open crease as shown.
Generously apply the glue stick to both of the circle flaps.
Pinch together and hold for about 10 seconds.
Add a few more beads then more crystals, pushing them up further on the line.
Apply the glue stick to both foil rings.
Place one ring just under the crystals, glue side up, then place the other ring  firmly on top, making sure the fishing line hangs securely right down the center.
Wipe away any excess glue and open up the foil circle.
Hang in a bright window to catch sunlight and fill your home with cheery rainbows!
Make sure to leave a comment for your chance to win this window decoration!  International welcome!


Here are some other variations of this projects. So pretty!

Thanks for coming by! I hope I have inspired you to try Rinea Foil!
Please visit the Designer Crafts Connection blog  for more creative ideas.

11/17/16

Rinea Foil Greeting Cards


Hi everyone!
Recently I was gifted with some specialty foils from Germany called Rinea foils. 
Let me just start off by telling you that these foils are amazing! They are thin, but not so thin that they tear easily. They have more of a paper quality that can be cut with decorative and regular scissors, or die cut. The foils can also be embossed by hand or with a machine.

My inspiration for these cards came from my love of Iris folding. Only with these foils, there is no need to "fold" as foil is so perfect as is!

 
Supplies used:
  1. Rinea Foils
  2. A printed Iris folding pattern (free online). 
  3. Prepared blank cards plus extra cardstock for inside of card.
  4. Scissors
  5. Clear tape, double sided tape and some removable tape (painters tape).
  6. Adhesive
  7. A pencil and glitter gel pens
As you can see, the foils are gorgeous. Some are readily embossed....

While some are ready for 'you' to emboss or leave plain.

The foils are also double sided. Some with the same color, some with a bright gold.

Instructions:

1.  Print out your pattern to be smaller than the front of your card.
2.  Center the pattern and trace the outline with a pencil, pressing into the card.
3.  Reinforce the trace with a pencil and carefully cut the circle out. You can now use the circle or whatever shape you decide on, to trace for more than one card.

4.  Before you can begin working with the foils, you need to have your tape ready. Attach pieces of the clear tape to something where you can get to them easily. I used a oversized clipboard. I had 18 spaces on my pattern to cover so I  made sure to have double that in tape ready plus some extra pieces.

5.  Place the pattern over the top of your card so the design peeks through the hole. Hold it in place with one piece of removable tape- this will act as a 'hinge' to check your progress.

6.  Your pattern spaces are numbered. You'll want a different color of foil per number.
7. Open your card so the pattern is showing through the outside of the card.
You can now start adding your foils.

  • Cut strips of foil so that it is a little longer than the opening.
  • Line up a strip of foil with the inside edge of the area labeled with a "1"
  • Tape both ends of the strip of foil face down to the card as shown- the backside of the purple foil is gold.
  • Repeat with your next color foil for #2.
  • Occasionally close your card to check your progress, lifting the pattern back on its 'tape' hinge. 
  • Continue on with the 3rd foil for #3.
  • Before you add your center foil, use any leftover tape strips to secure loose edges of the other foils. 
  • Add the center piece with full strips of tape. 
  • Place long strips of the double sided tape over the foil and at the edges of the card. Affix your extra cardstock in place to hide your work.
  • Close your card and remove the pattern. Add any additional foil shapes with adhesive and accent the card with your gel pens.
Here are some variations.....


After I completed the bottom card, I used a dull pencil to draw some designs into the foil.
Thanks for coming by! I hope you liked my cards as much as I enjoyed making them!
Be sure to visit The Designer Crafts Connection blog to see more foil creations.
Then enter for a chance to win an amazing prize pack of 20 sheets of Rinea foil to play with!
Good luck!


LinkWithin

Related Posts Plugin for WordPress, Blogger...