Hi Everyone, Welcome to the "Sin City Stamps" Halloween Blog Hop!
Sin City Stamps is having a fabulous giveaway but in order for you to have a chance to win, you will need to Start at The Sin City Stamps Blog, leave a comment on all participating blogs (7 total), and like their Face Book page. Good Luck!
Here I am showing you how to make this Vintage inspired Halloween treat cone
10/11/13
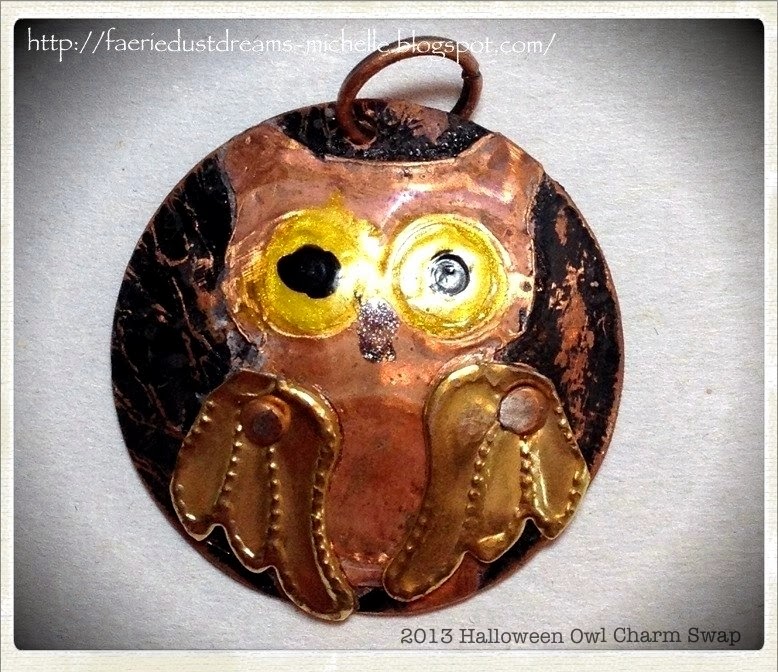
Halloween "Owl" Charm Swap - reveal!
| Michelle Frae Cummings |
"Halloween Owls"! Enjoy!
| Ashani Samuel |
| Buffi Gentry |
| Carol Hoffmann |
| Deb Patrick |
| Kathleen Leanna |
| Lyneen Jesse |
| Maria Soto |
| Marilyn Weyman Kegg |
| Molly Jo Walsh |
| P.J. Waldrop |
| Sarah Carlson |
| Sue Cox |
| Susan Brown |
| Shelia Goldsberry |
If you are interested in joining future charm swaps, leave me your email in comments and feel free to join our FB page. :)
10/07/13
Kitschy Charm Swap Reveal!
Last May, I hosted a Kitschy Charm swap.
Kitschy refers to the "low-art" artifacts of everyday life such as items from the 50's, 60's and the 70's.
8 creative Artist, made and swapped what they feel to be 'Kitschy' along with matching ATC cards.
Enjoy!
| Here are my charms and ATC |
| Above Pin and ATC by Ann Butler. |
| Shrink Plastic Dangle and ATC by Veronica Noechel |
| Ring and ATC by Stephanie Meadows |
| Owl charm and ATC by Joan Alcantar |
| Ring and ATC by Ashani Samuel |
| Groovy Mushroom and ATC by Kathleen Leanna |
| Vintage Fruit and ATC by Vicky Breslin |
Want to join in on the next swap? Go here for more details!
Bleach Painted Halloween Shoes
Hi Everyone!
This months theme is Halloween. So I thought I'd make a pair of fun "spooky" Halloween shoes!
The technique is the same as some bleach painted shoes I made this last July.
Items that you will need:
Then with your white cloth pencil, you can add your design to the shoe. The nice thing about the cloth pencil is that it disappears later with water.
Once you have your shoes sketched out, you can begin with the bleach. Simply dip your paint brush into the bleach and carefully paint along the lines of the pencil on the shoe.
You will see results immediately.
Add 1-3 coats of bleach to each design. The bleach becomes a lighter orange as the design drys, but if you need to speed up that process, you can go over what you are working with the heat gun. I did this for larger designs. These designs were ones like the jack-o-lanterns, ghosts, or bats.
When you are done painting, you can correct designs or add detail with your black sharpies. Make sure the shoes are very dry or you will need to use several pens to bring out the darkness of the sharpies.
Don't forget to add some fun detail to the inside of the shoes!
Now the shoe below, that is closer to you, is the result of when I first experimented in this project last July. I tried a Bleach Gel pen first, which did not work at all, and (for some strange reason) never fully washed out- so the finished design with the straight bleach is a a little less precise -design wise- than the other shoe.
I think they both look great and the markers helped alot.
Below are the shoes I made last July.
On the left , they are newly finished. The right, well worn and after a few washes.
So while you may love this reddish color, be prepared for them to fade more over time, but still look Amazing!
Thanks for coming by, let me know what you think in 'comments' and have creative day!
This months theme is Halloween. So I thought I'd make a pair of fun "spooky" Halloween shoes!
The technique is the same as some bleach painted shoes I made this last July.
- Inexpensive black canvas shoes. These are from K-mart. $10.
- 100% straight bleach in a small container.
- Small fine tip paint brushes, the more real they are, the better for the project.
- A white cloth pencil.
- A heat tool, sketch pencil, paper, and black Sharpies.
- A well ventilated area.
Then with your white cloth pencil, you can add your design to the shoe. The nice thing about the cloth pencil is that it disappears later with water.
Once you have your shoes sketched out, you can begin with the bleach. Simply dip your paint brush into the bleach and carefully paint along the lines of the pencil on the shoe.
You will see results immediately.
Add 1-3 coats of bleach to each design. The bleach becomes a lighter orange as the design drys, but if you need to speed up that process, you can go over what you are working with the heat gun. I did this for larger designs. These designs were ones like the jack-o-lanterns, ghosts, or bats.
When you are done painting, you can correct designs or add detail with your black sharpies. Make sure the shoes are very dry or you will need to use several pens to bring out the darkness of the sharpies.
Don't forget to add some fun detail to the inside of the shoes!
Now the shoe below, that is closer to you, is the result of when I first experimented in this project last July. I tried a Bleach Gel pen first, which did not work at all, and (for some strange reason) never fully washed out- so the finished design with the straight bleach is a a little less precise -design wise- than the other shoe.
I think they both look great and the markers helped alot.
Below are the shoes I made last July.
On the left , they are newly finished. The right, well worn and after a few washes.
So while you may love this reddish color, be prepared for them to fade more over time, but still look Amazing!
Thanks for coming by, let me know what you think in 'comments' and have creative day!
10/02/13
Subscribe to:
Posts (Atom)