9/27/22

Curly Ribbon Autumn Wreath

Add some fun to a new wreath or update a old favorite with a blend of Autumn curly colored grosgrain ribbons from Gwen Studios! 


8/31/22

Ribbon Decorated Halloween Pumpkins

 As most of you know, Halloween is my absolute favorite time of the year! I love the thrills, the chills, the dressing up and of course the decorating! Here I have created the easiest way to embellish pumpkins. In this tutorial, I used foam pumpkins but you can also use real ones if you want a more realistic affect.


8/09/22

Back 2 School Ribbon Crafts!

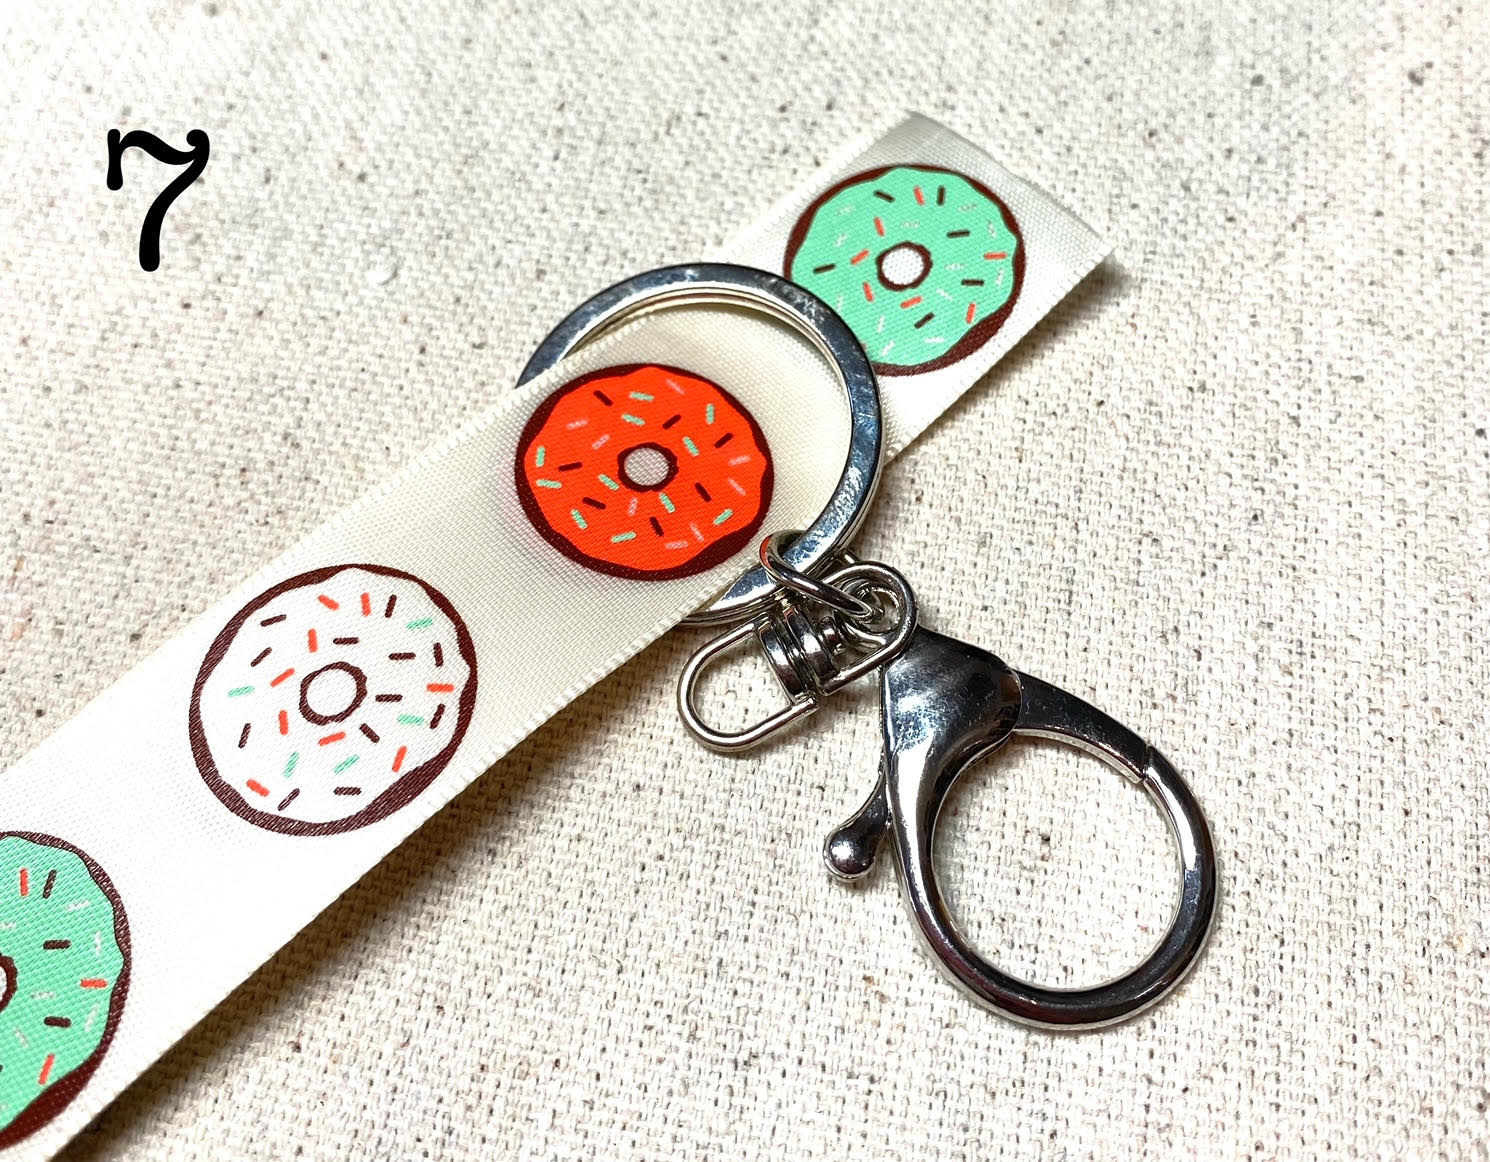
 Lanyards and wristlets are the perfect hands free accessory for students, teachers and school staff. Customizing them with Gwen Studios ribbons helps to make them extra special and extra fun!



* As a design team member for Gwen Studios,
I am provided with product to work with each month.


To make the ribbon lanyard, you will need the following:

1. Cut 2 ribbons at 38" each.
2. Cut your heat n bond at 37" and if its not the same size as your ribbon, trim to fit.
The heat n bond comes with (shiny) adhesive side and a paper backing.
3. Place the heat n bond adhesive side down onto the back side of one of the ribbons, leaving 1" uncovered at the end.
4. Carefully run the iron over the ribbon. This will be HOT, so make sure you are using a heat proof surface. 
5. After you have ironed the whole length of the ribbon, carefully peel off the heat n bond paper backing. 
6. Lay the 2nd ribbon as shown and iron again to fuse the two together. 
7. Once cool, thread the ribbon through the key ring.
8. You should have a 1" space at the end of your ribbons. 
Fold this back and iron a piece of the heat n bond - face down as shown in #9. 

10. Peel off the backing and trim off any stray threads.  Then sandwich the other end of the lanyard between the open end and iron to fuse shut, making sure to iron the other side as well. 
Leave to cool before adding charms and other accessories. 

*   *   *

To make the matching ribbon wristlet, consider using a coordinating piece of grosgrain ribbon as I did here with some orange. 

1. Cut 2 ribbons and 1 length of heat n bond at 12" each and fuse together.
 Fold slightly in half, leaving a 1" space at one end. Mark this space with a pen.
2. Cut a length of heat n bond and place as shown. Secure with the hot iron and remove the backing.
3. Bring up the end of the ribbon to just below the line. 
4. Carefully iron on just the 'left' side, fusing that small area in place. 
5. Slide the key fob ring in place. 
6. Fold the remaining end down and iron both sides to be sure it will not come undone.
Add some heat in bond to a small bit of ribbon and use to cover the exposed area.

That's it! So fun, right? 
Mix and match with your favorite Gwen Studios Ribbons and Trims!

Find your favorite Gwen Studios Ribbons at your local Walmart and online at Walmart.com!


Follow this link for more creative ribbon idea's! 


6/30/22

Curly Ribbon Hair Clips

Now that its Summer, I couldn't wait to make up these fun hair clips using new Curly Ribbon from Gwen Studios! 


* As a design team member for Gwen Studios,
I am provided with product to work with each month.


To get started, you will need the following:


  • Gwen Studios Curly Ribbon
  • Snap hair clips
  • Scissors
  • Hot glue
Find your favorite Gwen Studios Curly Ribbons at your local Walmart and online at Walmart.com!
 Per hair clip,  you'll need 3 strands, 24" each of the  gold curly ribbon and 2 strands, 24" each of the holographic curly ribbon. 

1. Find the center mark of the 3 strands of the curly gold ribbon and place in the hair clip as shown. 

2. Tightly tie in a double knot.

3.  Carefully pull down the knotted ribbon a bit on the hair clip and slide the 2 strands of the holographic ribbon under the knot. 

4. Tie firmly in place. Slide the knotted ribbon back up to the top of the hair clip.
Secure ribbon in place with a bead of hot glue.

5.  Use your scissors to curl all your ribbons. 
Hide the center knot by tying 1 silver ribbon and 1 gold ribbon. Fluff with fingers when done.

So cute! Check out some of my other variations below.
I can't wait to wear the patriotic ones on July 4th!


See more Curly Ribbon craft idea's here! 


5/30/22

Make a Seaside Garland with Gwen Studios!

 If there is one thing I love, its all things to do with the sea!
I live near enough that I can spend a few hours or the whole day if needed. 
Making beach crafts is one of my favorite things to do 
and this Seaside Garland is a breeze to make!


* As a design team member for Gwen Studios,
I am provided with product to work with each month.


To get started, you will need the following:


1. Prep the selected shells and starfish by first cleaning them with a damp cloth, then applying a coat of clear sealer. Set these aside to dry while you wrap the twine around the cord.

2. Next, cut 8" lengths of the assorted ribbon. 
Fold them in half and hot glue to the back or inside of the shells.
 

3. Loop and glue some ribbon as shown below, to the back of a couple of shells and the starfish.
Slide these loops onto the wrapped cord and attach the bows using the included twist-ties. 


 4. Stagger your shell placement on the garland, filling in spaces with tied ribbon.


All ready for summer!


Head on over here  to see more creative idea's to make with this ribbon!


LinkWithin

Related Posts Plugin for WordPress, Blogger...