Showing posts with label Couture Creations. Show all posts

6/18/16

Embossed Gift Bag with Couture Creations!


Hello Couture Fans!


I am Michelle Frae Cummings and I'm super excited to be a Guest Designer for Couture Creations this month.

Today I am sharing a embossed gift bag to fill with goodies then give to my son's 4th grade teacher on the last day of School this year.

 To start, emboss a plain brown lunch sack using Vine Frame from The Harmony Collection.

Here you can see that the embossed design, raised or not, is now all around the bag.
 So elegant.
Using a white pigment ink, lightly dab at the raised design on the front of your bag. As you work, you can add more ink till you have the desired shade. Don't worry if a little bit of ink gets on the bag itself, this will only add to its charm.


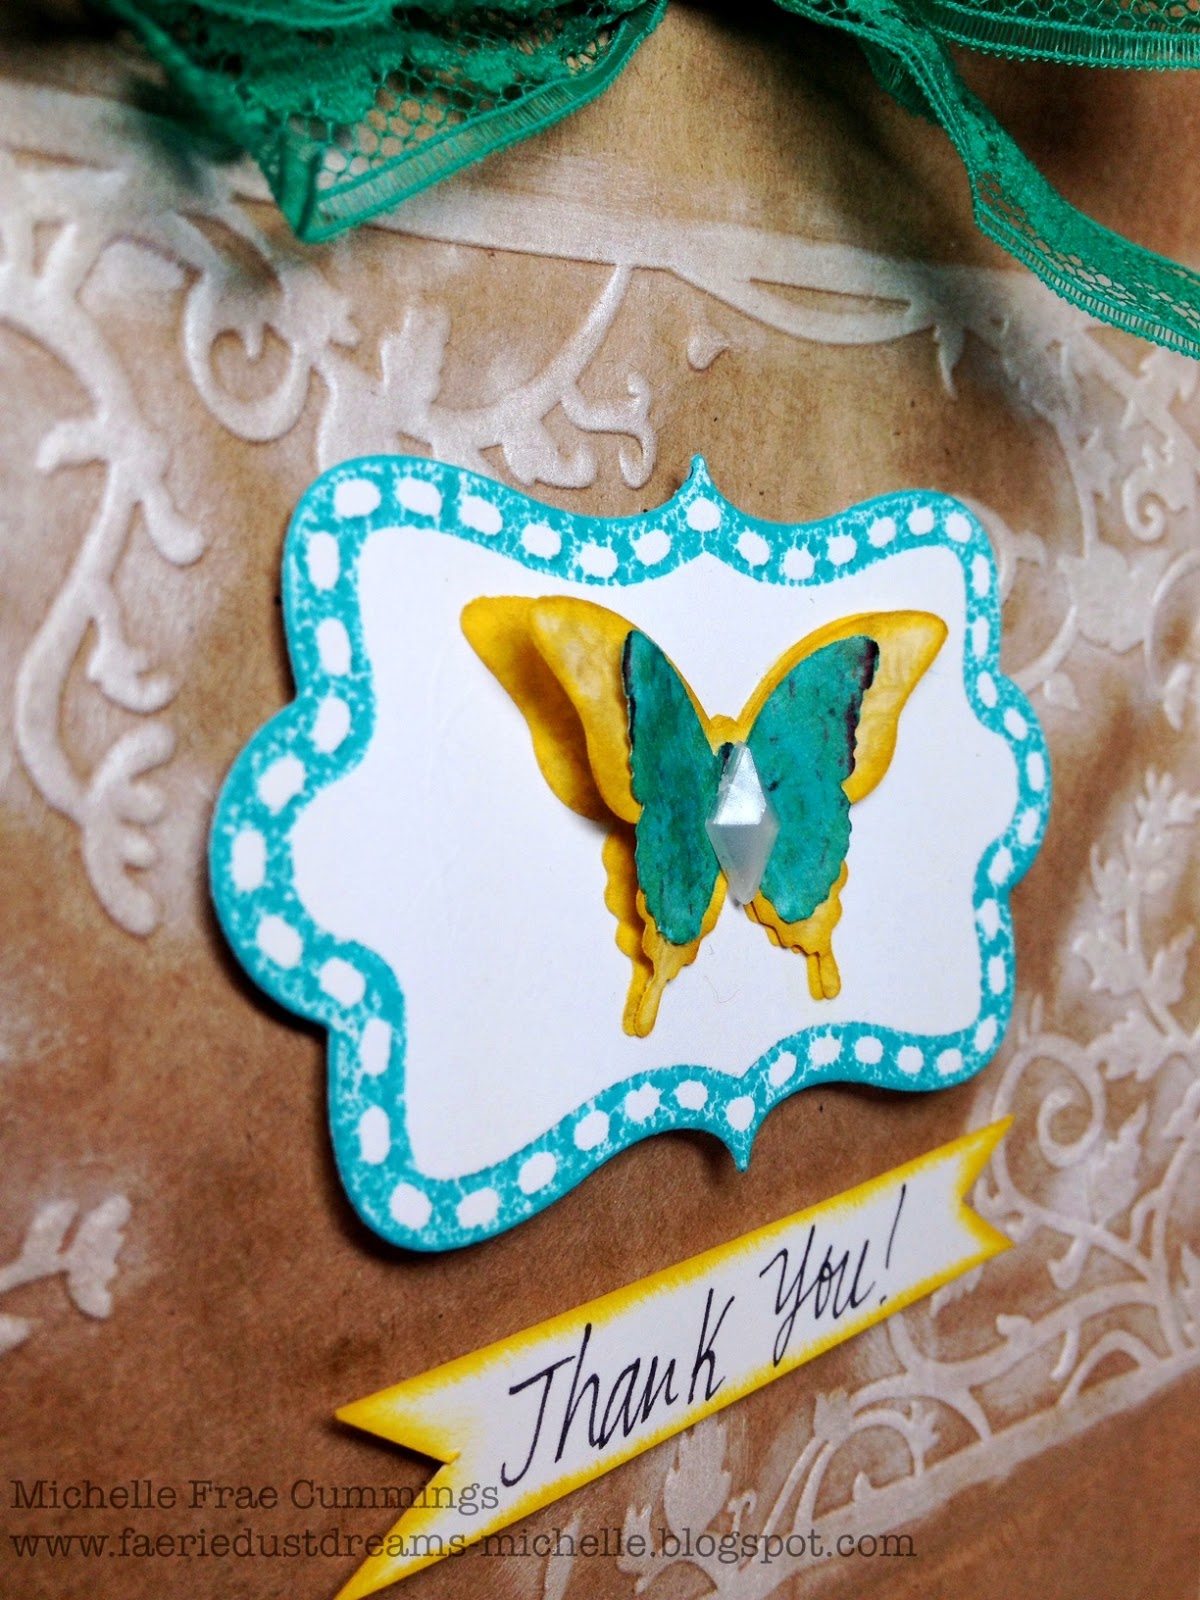
For the tag, dab teal ink directly onto a Decorative Plaque from The Secret Treasures Collection.
Then quickly (before the inks dries) flip over onto some clean white cardstock and run through your die cutting machine. The result will be a a embossed and stamped Decorative Plaque!

Place the Decorative Plaque onto your sack with foam tape. Add some colorful butterfly's to the center of the Decorative Plaque and finish with a hand written sentiment. 


Fill with some happy surprises and secure the top with some vintage trim.


Thank you for visiting.
 I hope I've inspired you to create a few Embossed Gifts Bags for your friends or family!


6/27/14

Happy Birthday Card with Couture Creations!

Hello Couture Fans!
Michelle here again, sharing another creation as June's Guest Designer.
I am always in need of Birthday cards and never seem to have enough. 
But now with these versatile Couture Creations dies, the possibilities are endless and I will always have the perfect card!
 The background paper I chose for this card was very thin, so the first time I embossed it with Fretboard from The World Fair Collection, I noticed the paper cracked.
 So for the second piece, I placed the background paper on a piece of manilla envelope into the embossing folder before running through my die cutting machine. 
As you can see in the results below, this worked beautifully.

 Before adhering the embossed background paper onto my card base, I gently tore the edges with my fingers, then lightly sanded the embossed design for a vintage rustic look.

  Here is how I made the Birthday banner using bakers twine and washi tape.
Super cute and oh so easy!
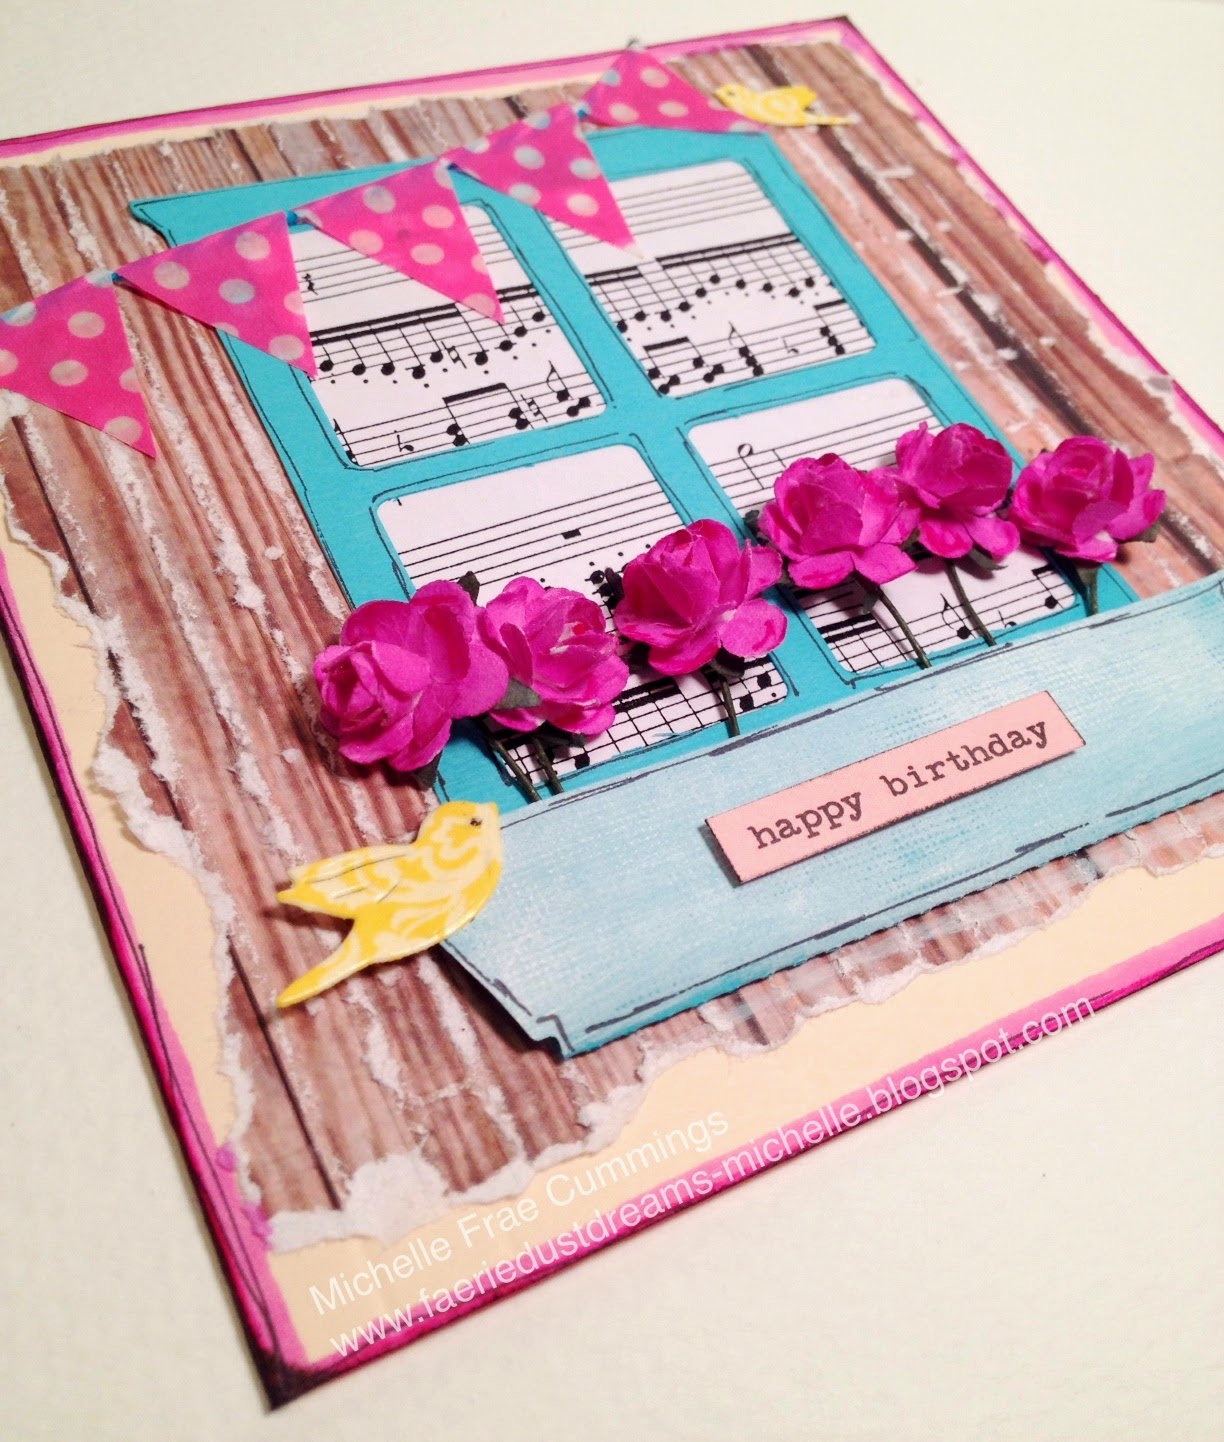
 I placed piece of turquoise cardstock in my die cutting machine with the Look in My Window Decorative Die. I then trimmed of the shutters before placing some vintage music sheet paper behind the window pane.
 To place the flowers in the window box securely, I glued the flowers down but also used some thin washi tape to hold the stems in place. Next, I placed bits of foam tape (as shown) and folded the window box up onto the tape.
I lightly inked the window box with white chalk ink, then added some character to the box and window with a fine black pen.

 The birds were a delight to make and so easy!
Simply place a bit of wide decorative yellow washi tape on a scrap of yellow cardstock.
Place the Bird Song Decorative Die on to the washi and run through your machine.
Accent the birds eyes with your black pen and glue into place.

 Add your sentiment to the window box, glue in place the banner then ink the cards edges if desired.


I am very much loving this card and I hope to have inspired you you create one of your own.


C0723031 Fretboard- World Fair


Michelle Frae Cummings


6/20/14

Embossed Gift Bag

Today I have the honor of being a guest designer for Couture Creations!
This is a sneak of my tutorial-
You can see the entire post here!

2/22/14

Butterfly Card


I like to create beyond normal paper and glue. I love working with my hands, getting paint under my nails and imagining the impossible.
This is my creation.
Enjoy :)


I started with a 3x3 label die. I use a Big Shot which is compatible with any manufactured die and embossing folders, but sometimes I have to improvise.
To make the die-cut, I used the multipurpose platform with all the flaps closed, die- cutting side up, paper on top and 2 acrylic plates.

Then to emboss the shape, I left the piece in the die. Placed it on the platform with all the tabs closed, a Sizzix impression pad, and (3) 8x11 cardstocks folded in half. - Trust me...this works like a charm!


 I stamped my sentiment onto the die cut and inked the edges for a distressed look.

Then I began work on the card. I wanted something stiff, so I used watercolor paper trimmed to 5½ x 3½.  This I covered with 2 strips of foil tape, then trimmed off the excess.
I ran this through the embossing folder, Work Shop by Couture Creations.

 I drizzled a few patina inks on the embossed card and blended with a makeup sponge. When this was dry, I gently used a sanding block to remove some of the color from the raised design and around the card.
 

Whenever I create something new that involves an assortment of mediums,  I always make a practice piece...just in case I mess up.
Below on the practice piece I played around with where I could add some red accents.
 What I ended up doing was adding red to the edges with my fingers, followed by some gold to soften it up.
 Now most of my projects start with a base plan and end with something way better than I envisioned. My mind is in constant creating motion. :)

Butterfly's are a favorite of mine and always seem to "flutter" into most of my creations.
I keep a color variety of punched butterfly's in little bags, these are punched from paper scraps and are always ready for last minute inspiration. 
 I ran one of the butterfly's through the Work Shop embossing folder.
Next I added just a touch of gold to the plain butterfly then more color to the other butterfly, highlighting the embossed design.
 A butterfly cannot be a butterfly with out it's faerie antenna! To get the perfect length every time, cut a piece of wire to be double the center width of your  butterfly. Fold in half, pinch at the bottom and loop the ends with jewelry pliers. Glue in place as shown with quick setting adhesive.
 Place another dot of glue onto the wire then add the top butterfly, folding up it's wings. Let set completely. Glue your foil card onto a 6 ¼ x 4½ card stock.  Line the edges of the stamped die with some gold and add to the card with foam tape.
Accent the butterfly with some patina, red color and rhinestones if desired.

Supplies used:
Work Shop Embossing Folder by Couture Creations
Labels by Spellbinders
Boundless Flight cling stamp by Tim Holtz
Black stamping ink
Jade, Moss and Verdigris Patina ink by Ranger
Gold and Lavared Inka Gold
Tombo glue
Foam tape
Foil Tape (plumbing section of any hardware store)
Sanding block
Colored floral wire
Rhinestones
Butterfly punchies
Paper trimmer, scissors, jewelry pliers,big shot and accessories.

2/13/14

Couture Creations 2014 Design Team Audition

 One of my favorite ways to put a personal touch on any paper craft or mixed media project is to emboss it. I love using my embossing folders with materials that might normally surprise you at first and delight you in the end. This post is a Design Team Audition for Couture Creations.
I am head over heels in love with their embossing folders and dies.
So here I am showing you  5 of my favorite (embossed or die cut) projects to date.

The above butterfly hair clips were made by covering butterfly die cuts with foil tape.
I then ran them through assorted embossing folders.
I painted them with alcohol inks and accented them with wire, beads and hair clips..
 This SteamPunk Christmas card was created using a Couture Creations embossing folder, washi tape for the trunk, then  accenting with a gold leafing pen and dew drops.

 Here's a fun and whimsical project I made for the garden!
 I die cut flowers from soda cans then ran them through various embossing folders.
Next I painted them with bright nail polish colors before adding a button and wire for support in my garden pots!

 Here is a simple yet elegant card for any occasion. I used a combination of a butterfly die, Celtic thin die and a border punch to help the card come to life.


 Oh the things you can die cut and emboss!
This is shrink plastic cut from steampunk gears die then embossed before heating.
After they "shrunk", I accented them with a gold leafing pen.
Now they are ready for jewelry or anything!

Thanks for coming by.
 I hope you have enjoyed my creations.
Wish me luck! :)

LinkWithin

Related Posts Plugin for WordPress, Blogger...