Hi there! This months theme for The Designer Crafts Connection is "Wishes".
At first I was completely 'stumped' as what to create for you. I figured everyone would go with Birthday Wishes or Faerie Wishes...and I wanted to try something different.
I hope you like this!
Materials used:
Glossy photo paper
Zig glue pen.
Assorted distress inks and daubers.
Water mister, 1 dry paint brush with stiff bristles and 1 soft bristle paint brush.
Paper towels, a craft mat, tape and baby wipes.
Stencils (Mariposas and Butterfly Meadow) from The Crafters Workshop
Super fine glitter, gold leaf pen and a stamped sentiment.
Step 1.- Place your photo card shiny side up and begin by applying the distress ink colors with a dauber or make up sponge.
Step 2. - Add other colors, try not to make it 'muddy' but still cover up as much white as possible.
Step 3. - Lightly spray your inked card with water.
Step 4. - With the stiff bristles of the paint brush, 'jab' the colors. Does that make sense? You don't want to use strokes, but more as a crunch down method with the stiff dry bristles. If your card starts to dry up before you have had a chance to finish, mist with some more water or the blending process won't work.
Step 5. When you are pleased with the color blending, turn your card over onto the paper towels and gently pat to rid of the excess moisture.
* The ink will be very sticky to touch, almost too sticky, so set the card aside to air for about 10 minutes.*
Step 6. When the card is not as sticky as it was before, place your stencil onto the card and secure to the paper towels with tape.
Step 7. Using your daubers and multiple distress inks, dab (not rub) into the cutouts of the stencil until you have achieved the desired color combination.
Step 8. With the stencil still taped firmly in place, wipe the plastic gently with a baby wipe to remove excess ink.
Step 9. - Fill in the stencil design with the glue pen. Don't worry if you get any on your stencil. It's comes off easily with a wipe later.
Step 10. - Use the other soft dry paintbrush to apply the fine glitter to the designs, making sure to get the glitter into the smallest of crevices.
Take a minute or two to clean your brushes, then carefully remove the tape and remove the stencil.
From here you can add more inked designs, tint the edges with a gold leaf pen, and a stamped sentiment. I was even able to add some gold leaf spatters onto the card using a rubber suction bulb like syringe. The blast of air onto the pen gave the card just enough of a 'air brushed' look.
When finished, leave the card alone for 30 minutes to one hour to fully cure and have no more stickiness.
Thanks for comings by, I hope you liked this tutorial and are inspired to try it for your self.
If you do...I'd love to see your creation, maybe even share it here on my blog. :)
Please look for this button on my side bar to visit more amazing creations or select from the link list below.
5/05/13
5/02/13
Getting ready to sell my handmade stuff this weekend....Can you come?
This is what I have been up to this past week, hence my lack of postings....
I've been sewing liking crazing owls and craft aprons and other fabric made stuff.
All for the event this weekend. I'll will crafting with my friends but also have my boutique table setup near a few other vendors....
Leftovers will be added to my shop in part of a re-opening!
Hope to see you!
I've been sewing liking crazing owls and craft aprons and other fabric made stuff.
All for the event this weekend. I'll will crafting with my friends but also have my boutique table setup near a few other vendors....
A rep from Origami Owl
- adorable jewelry. - http://www.origamiowl.com/
Paper Craft Princess
- she will have scrapbooking supplies, hand made pendants, purses and
accessories - http://papercraftprincess.blogspot.com/
I hope you can come!
I'll be able to accept cash, check and credit card.
Come spend at least $10 and be entered in a drawing to win a
family of 3 hugable plush owls custom made just for you!
Open to the public from 11am-2pm Saturday and Sunday
Park
Royale Mobile
Home Park
300 N. Rampart
OrangeLeftovers will be added to my shop in part of a re-opening!
Hope to see you!
4/26/13
4/19/13
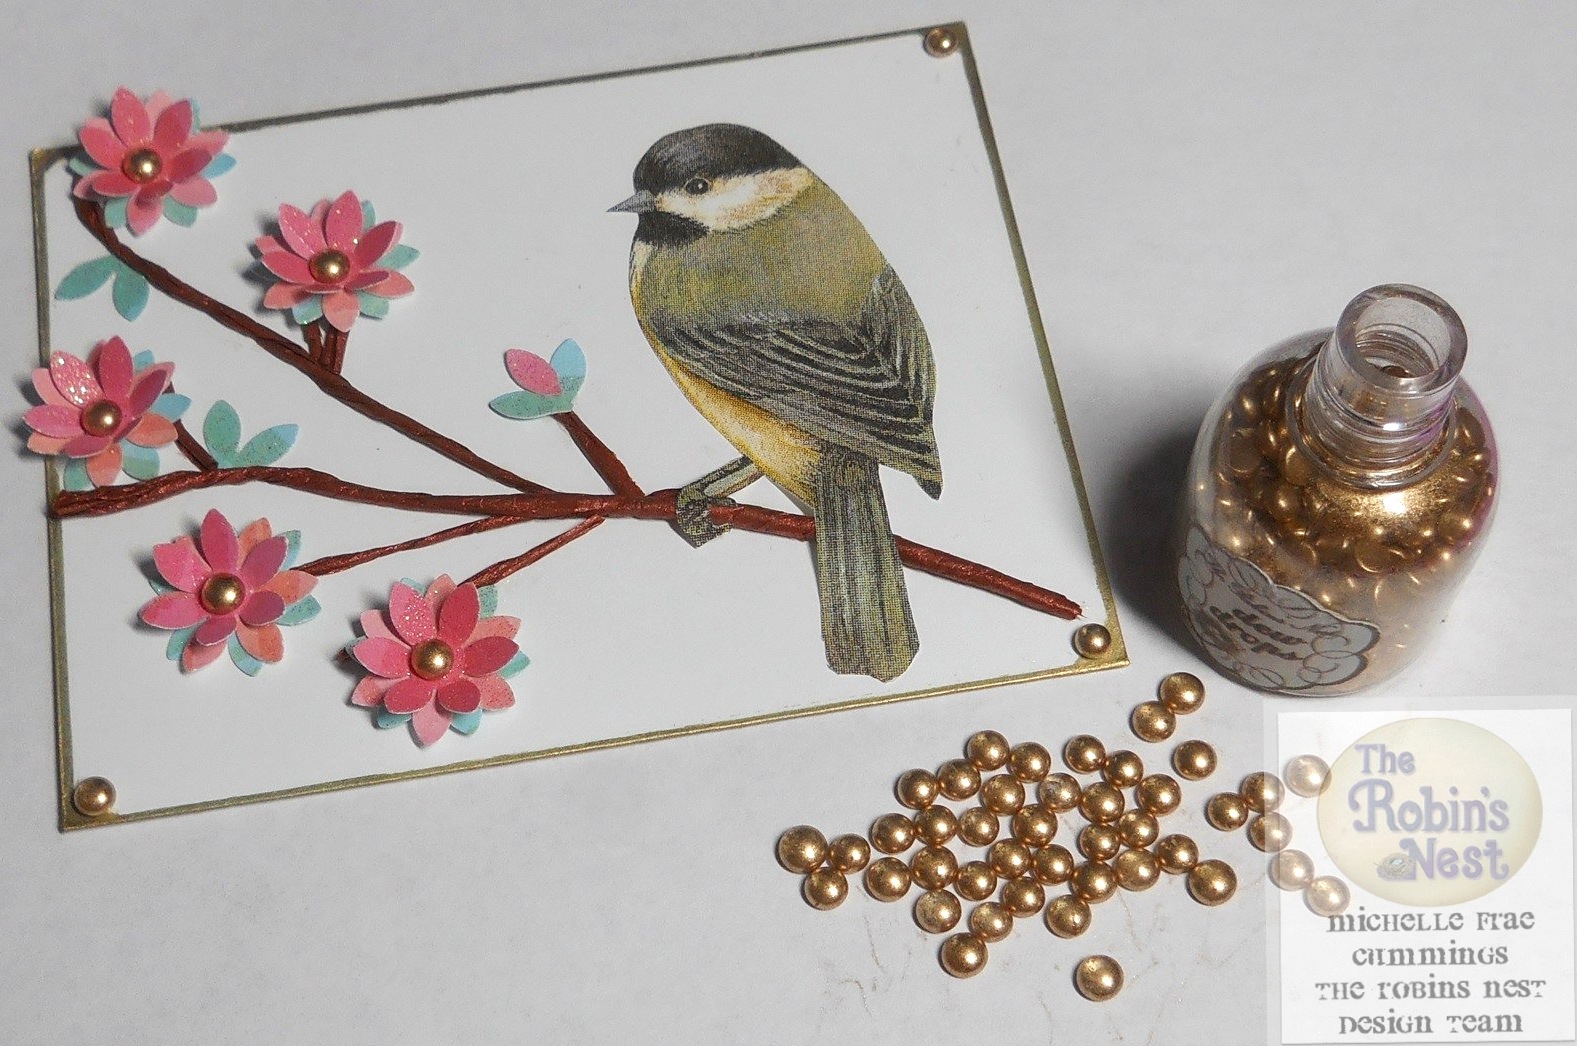
Spring Blooms while the Bird Sings.
Sometimes the best inspiration for card making can be found while walking around outside!
I love how the neighborhood trees are already showing the most delicate pink flowers and the birds are happily singing!
I created this card using the following Robins Nest supplies:
Pink Sorbet Glitter
Aquamarine Sorbet Glitter
Mini Gold Dew Drops
Coppery tissue paper
A decorative bird paper napkin, a gold leafing pen, precision scissors,
a mini flower punch and tombo glue.
Cut strips of tissue paper and then start to roll it up length wise.
It helps if you can moisten the paper as you roll.
Twist the ends and crumple some for a realistic branch-like appearance.
Once you have made the branches you need to fit your card, use some extra tissue to wrap the cluster of branches. (As shown above)
Glue your wrapped branches to your card. Add more rolled tissue bits for little branches.
Carefully trim your bird from the paper napkin and glue onto the card.
Punch your flowers from the pink and aquamarine paper.
Trim some of the aquamarine flowers to become little leaves.
Layer the flowers as shown. Form the top flower by bending the petals upwards.
Add some of the Mini Gold Dew Drops to the center of each flower and to the corners of the card after gilding the cards edges with the gold leaf pen.
Thanks for coming by and Happy Spring!
Subscribe to:
Posts (Atom)