8/01/16

Sharpie Dyed Back 2 School Pencil Pouch


When it comes to Back-2-School shopping around here, we like to find items that are eye catching and cheap to make! I like to join in on the fun and decorate pouches for my own art supplies too!
To make this back 2 school pouch, you will need the following:

1.  A clean canvas pouch. I got this at a Japanese store near me called Daiso. But you can also find these at dollar stores too!

 2... Assorted sharpie permanent markers in a variety of colors and tips. I found that the fluorescent colors were the most eye catching in the final outcome.

 4. 91% Isoprophyl (Rubbing) alcohol - found in the pharmacy section of Walmart or any other convenience store.
5. Travel sized spray bottle.

 6. Plastic bin.
7. Wire rack or baking sheet.

 *Begin by drawing a basic repetitive pattern on both sides of the pouch.
Make sure you are in a well ventilated room or have a fan blowing on you as the pens do stink.

 * Scribble with the colors.

 * Go crazy and add lots of color, have fun with this!

 *Fill in any empty spots with the brighter colors.

 * Once you have colored both sides, go outside and place the pouch on top of the rack in the bin.
* Starting in one section spray with the rubbing alcohol.
* You will see results instantly.
* When you have fully saturated and blended both sides, leave the pouch outside to air out and 'set' in the heat of the sun.
* If you have no sun, you can toss pouch in the dryer or iron to set the dye. Place pouch in a old pillow case to protect dryer and use a sheet of parchment paper when ironing to protect the iron.

Fill with your favorite School or Crafting supplies and have fun!
See more Back-2-School ideas here!

7/21/16

Make Everyday a Crafting Party!


 The wonderful thing about Deflectos 3-tier dessert display is that it can be used for any and every occasion! From craft gatherings to Celebrations!

 The Deflecto 3-tiet dessert display easy to assemble, easy to clean and easy to store!
The holes allow you to display cake and lollipop!

 The 2 sizes of the slots allow you to adjust the height of your tiers.
 You can place the tiers any way you want.
  Here I've displayed some colorful vintage goodies for a craft party!


  Deflecto products are available through local art, craft and educational stores, in addition to online retailers such as Amazon.
 Cookies anyone?
Please visit the Designers Craft Connection blog to see more ideas and have a chance to win a 3-tier dessert stand for your next party!

*This is a sponsored post. Deflecto has provided product in exchange for my creative ideas, views and opinions.

6/18/16

Embossed Gift Bag with Couture Creations!


Hello Couture Fans!


I am Michelle Frae Cummings and I'm super excited to be a Guest Designer for Couture Creations this month.

Today I am sharing a embossed gift bag to fill with goodies then give to my son's 4th grade teacher on the last day of School this year.

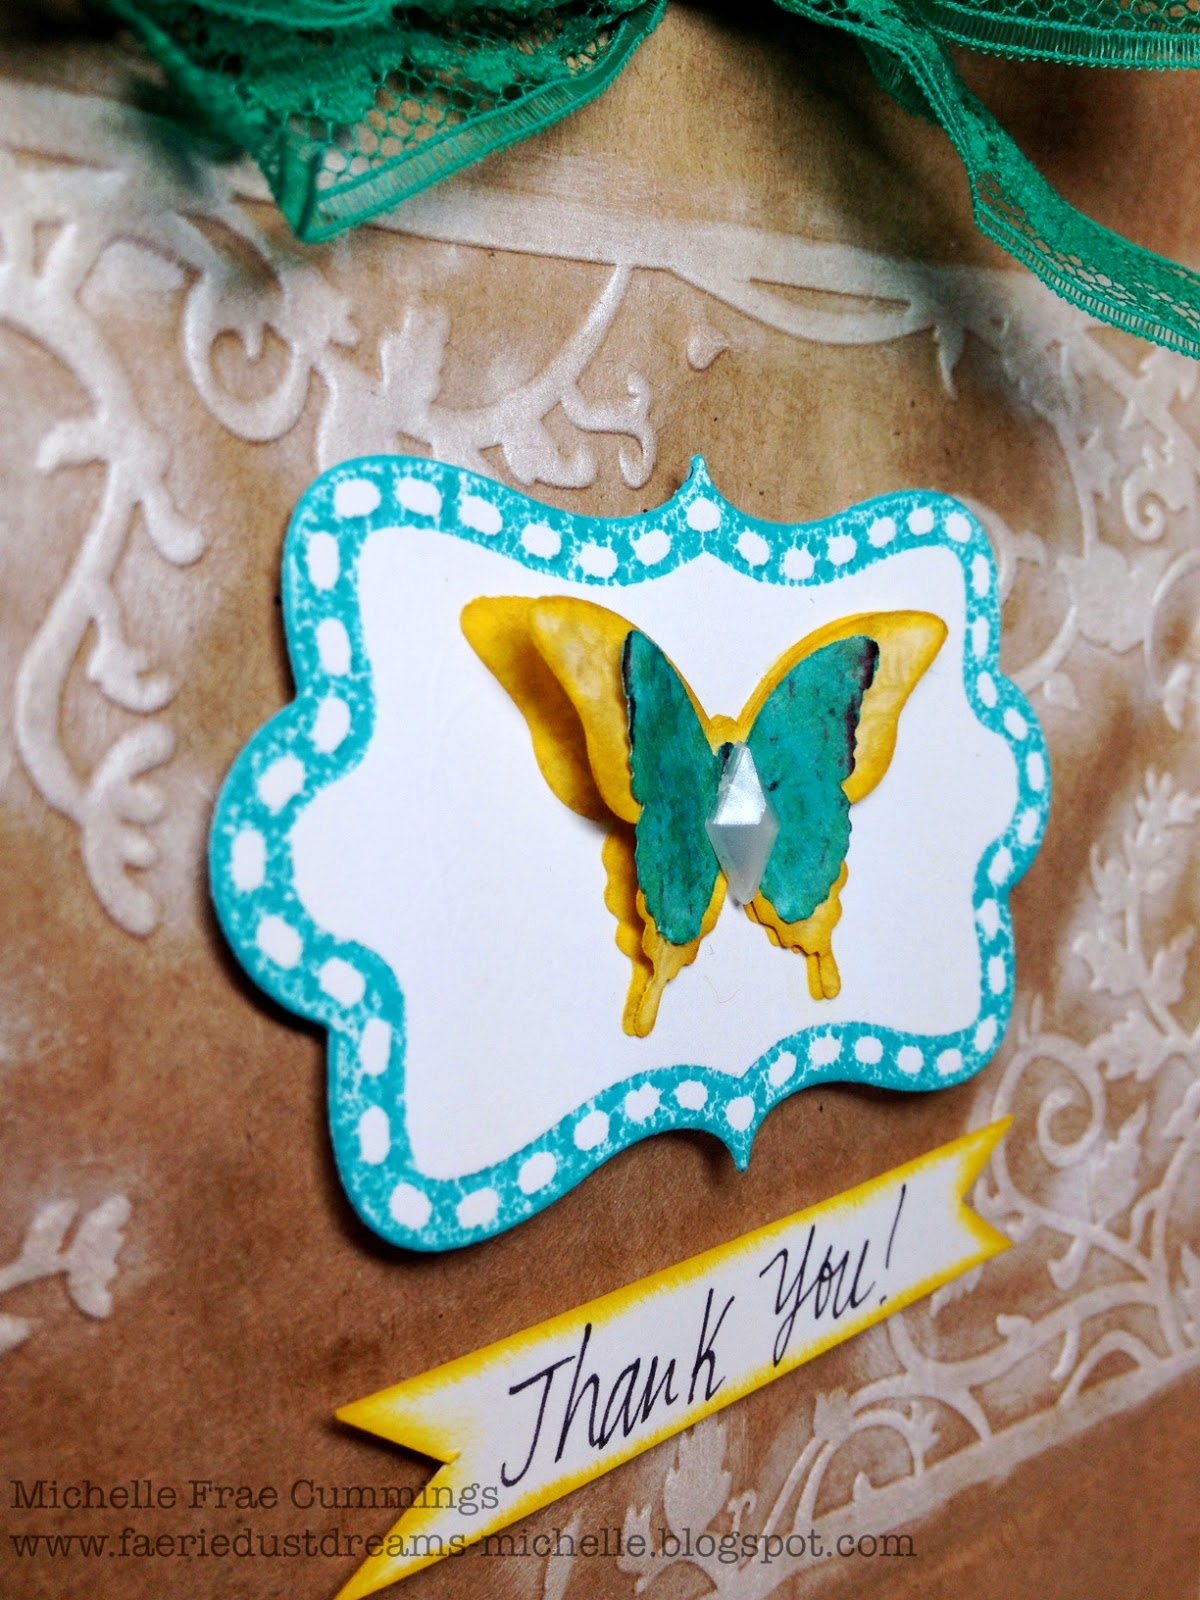
 To start, emboss a plain brown lunch sack using Vine Frame from The Harmony Collection.

Here you can see that the embossed design, raised or not, is now all around the bag.
 So elegant.
Using a white pigment ink, lightly dab at the raised design on the front of your bag. As you work, you can add more ink till you have the desired shade. Don't worry if a little bit of ink gets on the bag itself, this will only add to its charm.


For the tag, dab teal ink directly onto a Decorative Plaque from The Secret Treasures Collection.
Then quickly (before the inks dries) flip over onto some clean white cardstock and run through your die cutting machine. The result will be a a embossed and stamped Decorative Plaque!

Place the Decorative Plaque onto your sack with foam tape. Add some colorful butterfly's to the center of the Decorative Plaque and finish with a hand written sentiment. 


Fill with some happy surprises and secure the top with some vintage trim.


Thank you for visiting.
 I hope I've inspired you to create a few Embossed Gifts Bags for your friends or family!


6/11/16

Favorite Patriotic Summer Crafts!

Here are some of my favorite Patriotic Summer themed crafts I have created. Enjoy!

Beaded Firework Hair-clip


Sharpie Painted Shoes


Mosaic Flower Pot


 Freedom Resin Art


 Patriotic Cottage Mini-Book


Thanks for coming by! 
Be sure to follow my Face Book page for giveaways and more craft inspirations!

LinkWithin

Related Posts Plugin for WordPress, Blogger...